
**Please read news and update titled “Flex Grid Tie In Settings Required for Online Scheduling” first.
Now your clients can reserve their spot for events or appointments online through your integrated Adilas
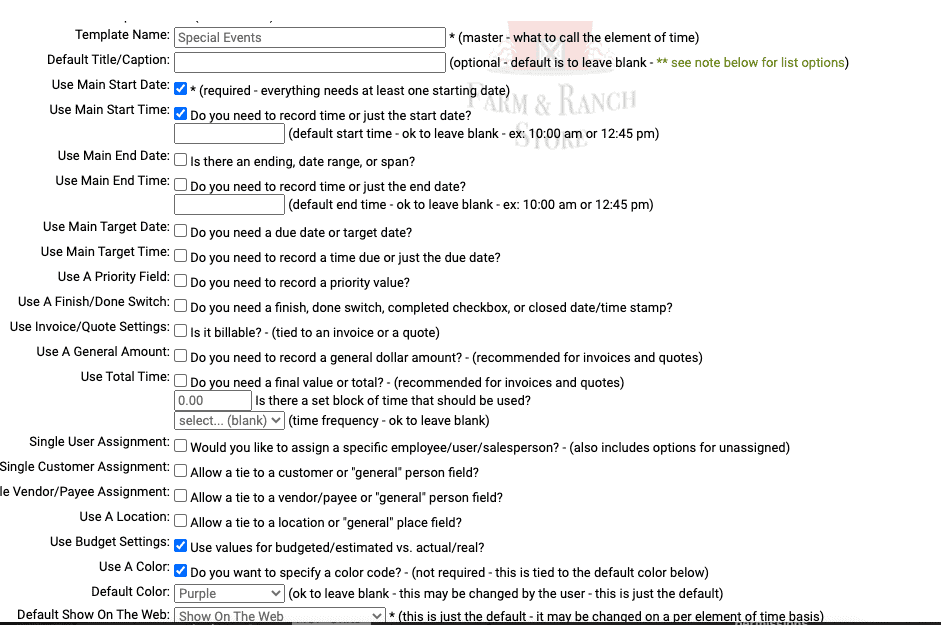
e-commerce. To start, you will need to create a master time template for Elements of Time. Please consult the previous news and update titled “Track Project Time in Elements of Time” if you need help setting up the template. Below you will see an example of a template that was set up for the special events this company offers its clients online. Your template might include more data points, but these would be the minimum needed.
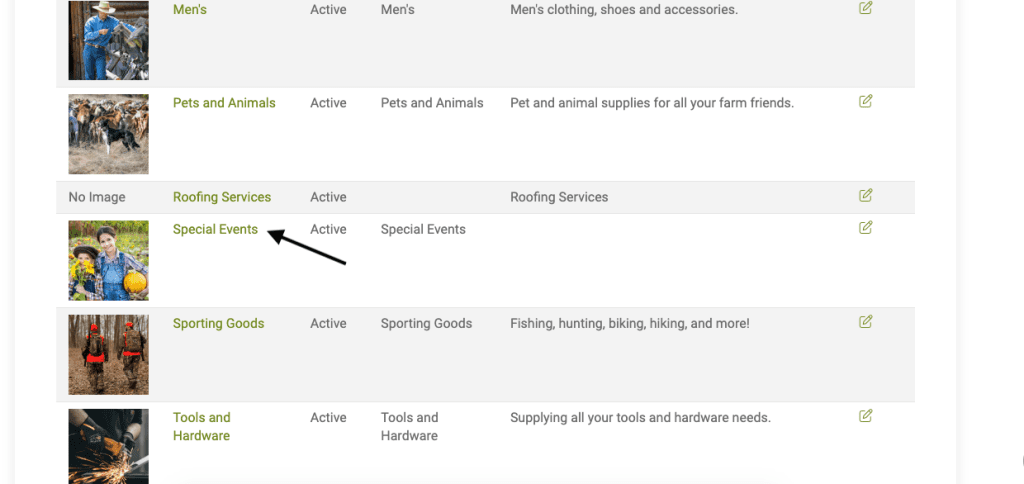
You will also need to create a category for your events. This company used the category “Special Events,” but it can be whatever you want, as you will see in this update.
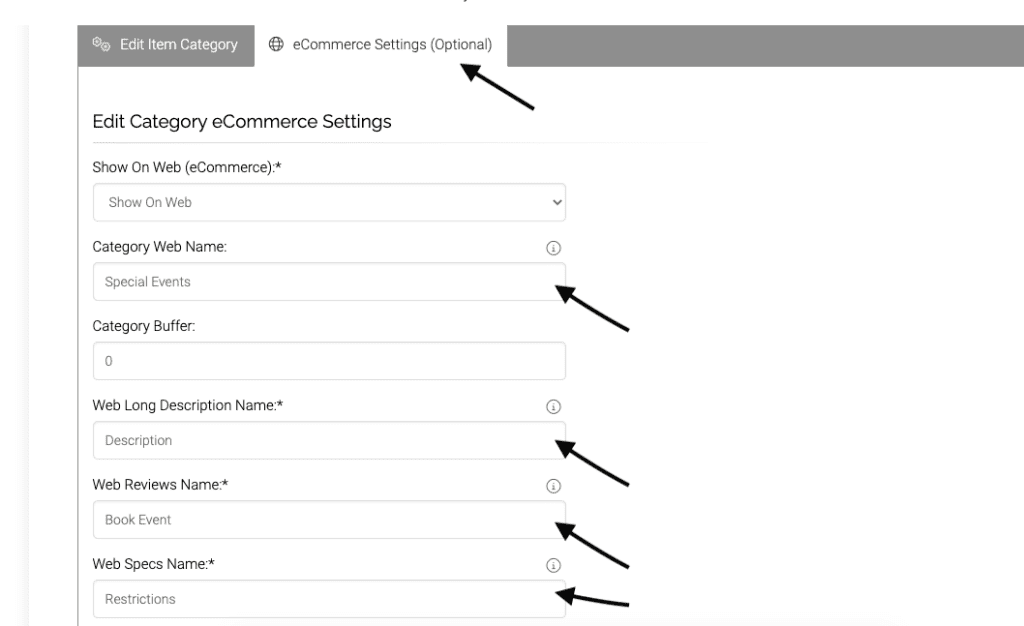
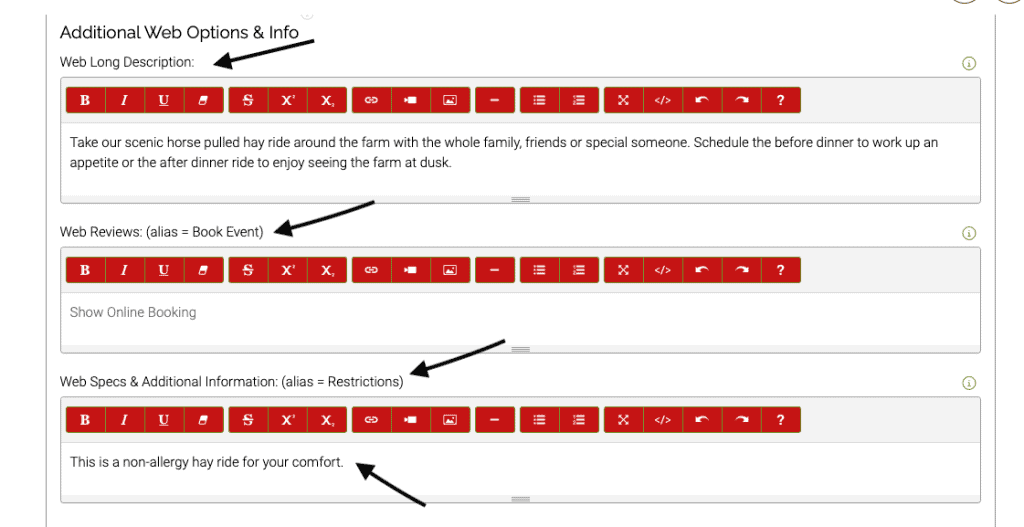
After creating the category, click on the tab for eCommerce settings. There are defaults that can be renamed to best fit your sales needs. As you can see below, ‘Web Long Description’ has been renamed ‘Description’ and Web Specs Name’ has been renamed ‘Restrictions.’
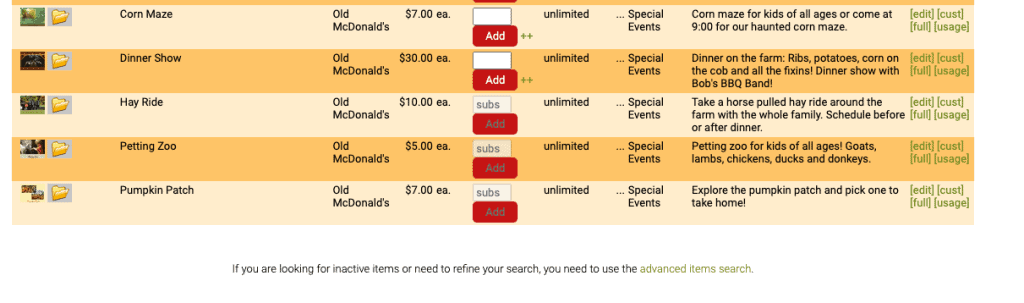
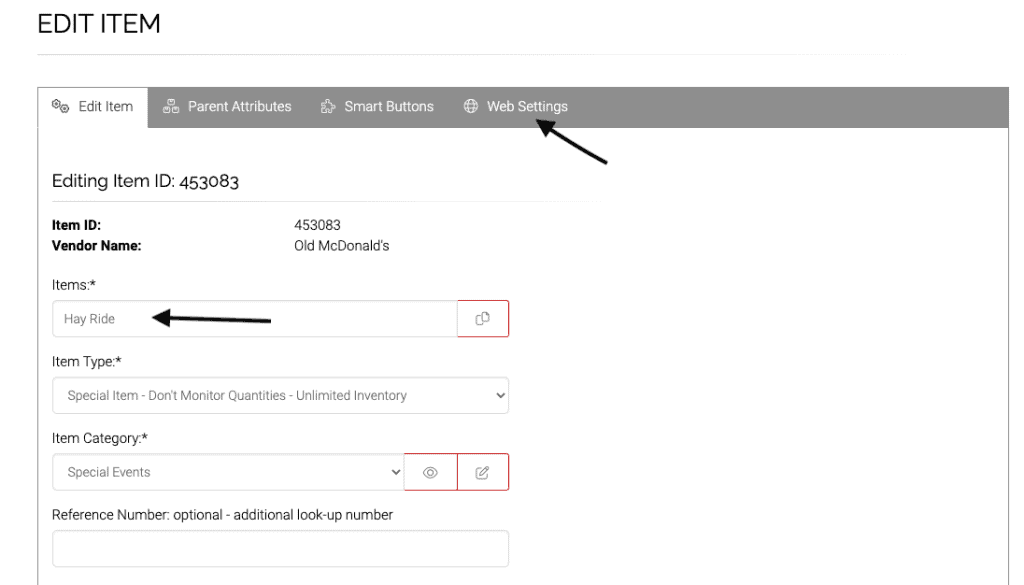
Finally, you will need items that represent the events themselves. In this example, there is a Dinner Show, Hay Ride and Pumpkin Patch, which are all under the category of Special Events.
When creating the items, it is important to click on the web settings link to add in the verbiage you would like to see online.
For the Hay Ride item, you can see below that the Web Long Description (Description) describes the event and the Web Specs aka Restrictions has verbiage related to the event that is shown when booking online.

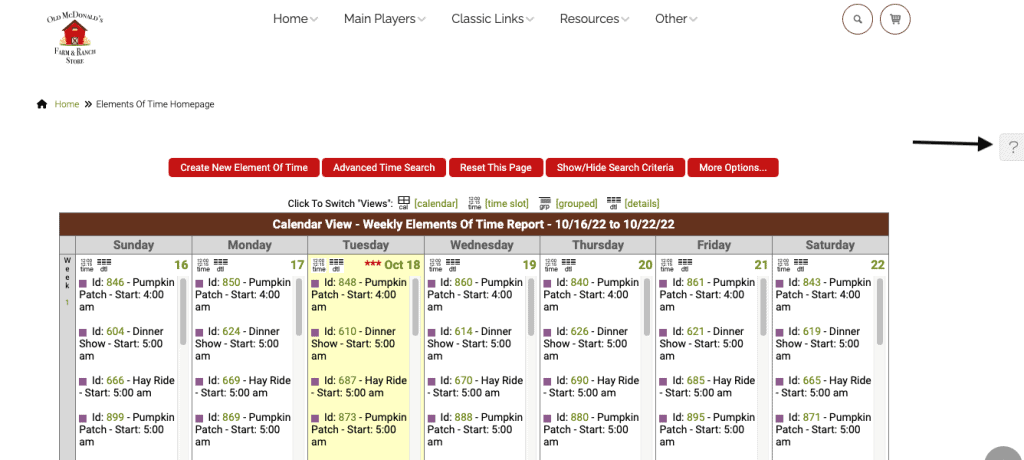
Now it is time to set the settings. From the Classic homepage, click on Time & Requests, then Elements of Time Homepage.

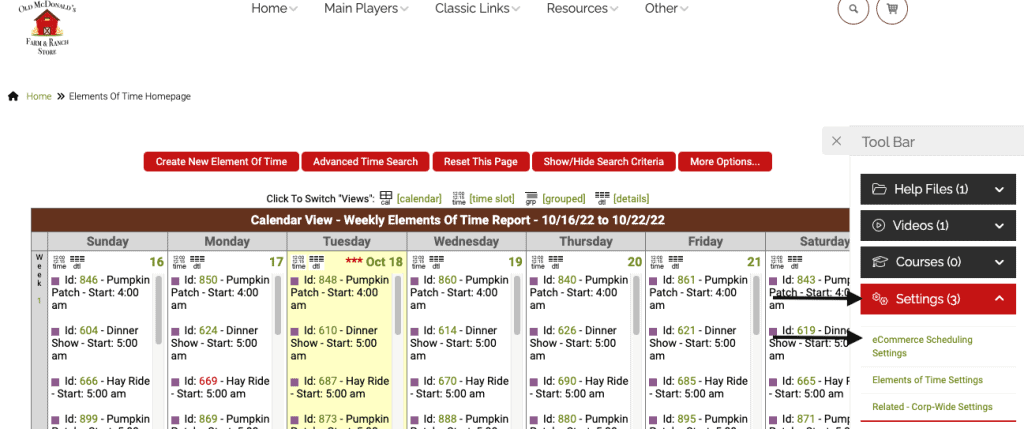
Click on the question mark on the right side of the page to access the settings.
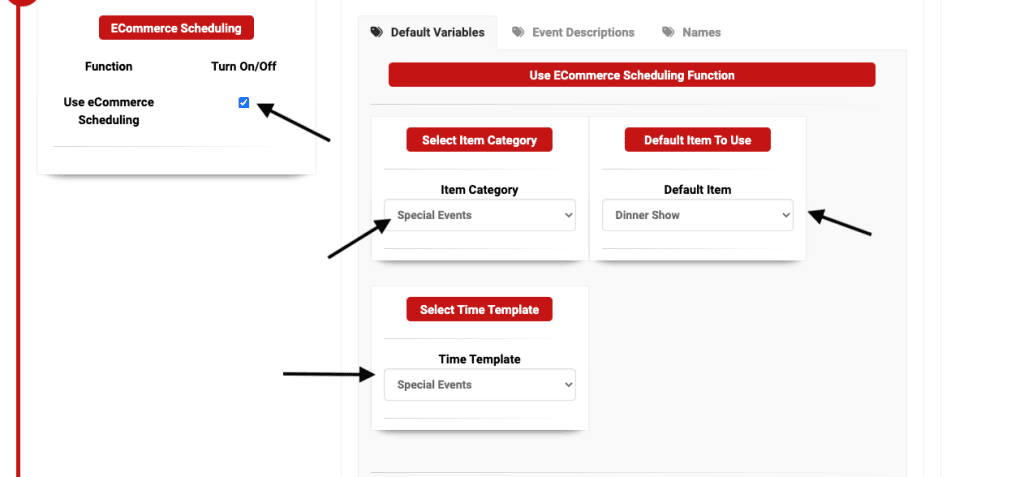
Click on Settings drop down link and select eCommerce Scheduling Settings.
Turn on the eCommerce scheduling. You will land on the Default Variables tab. Choose your category, items and select your time template.
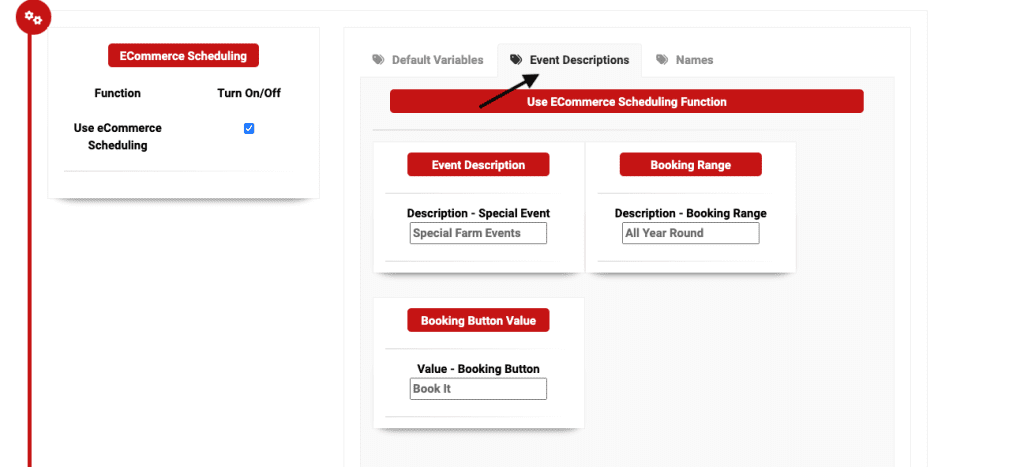
Move to the Event Descriptions tab and fill in the fields as you want them to appear on e-commerce.
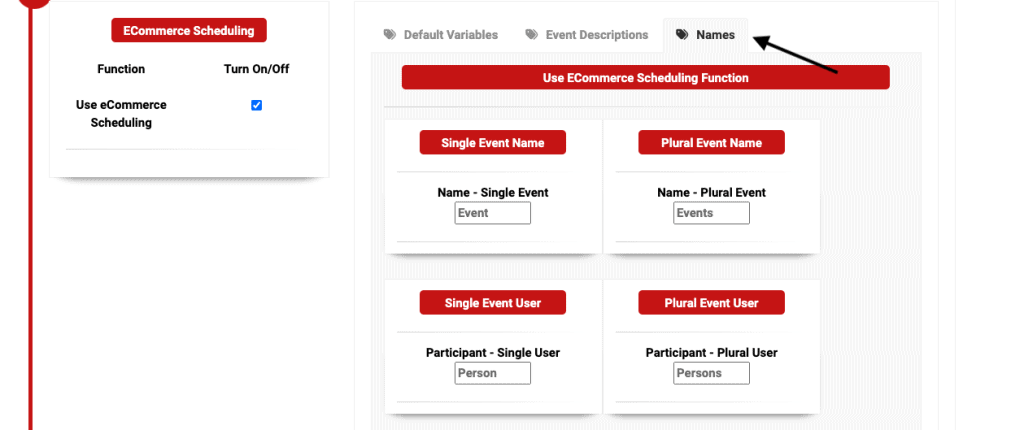
Move on to the Names tab. These fields are also dynamic and can be tailored to your scheduling needs. Click submit once you have set your settings.
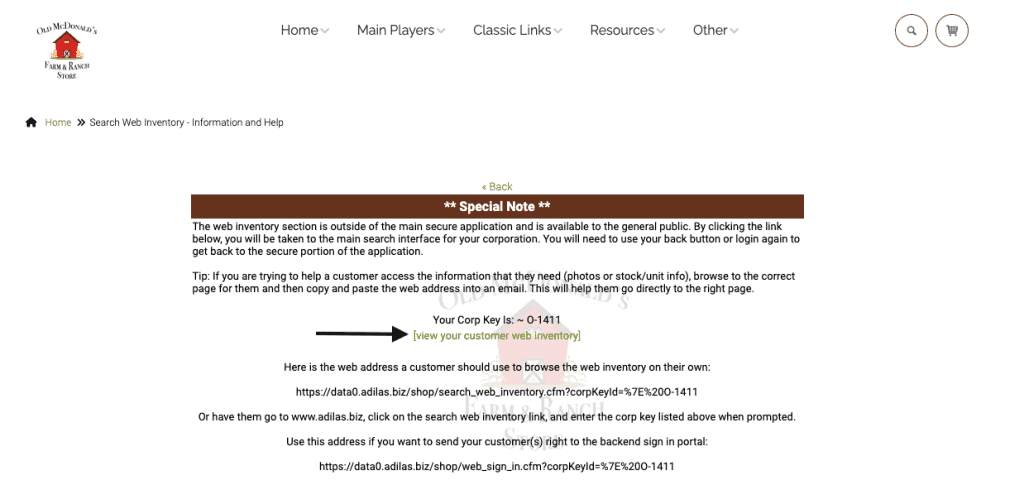
Now we will go to your Adilas e-commerce and see how our settings look, and if we want to change anything. From Classic homepage, click View Web Inventory.

Duplicate the current tab you are working on by right clicking on it so that you have one tab open in adilas, and one tab in e-commerce. This makes it easier to review your settings. Once you have a second tab, click on the link for “view your customer web inventory.”
Now you will see your special events setup. All of these fields with arrows were determined in the
e-commerce scheduling settings and can be changed according to your scheduling needs.
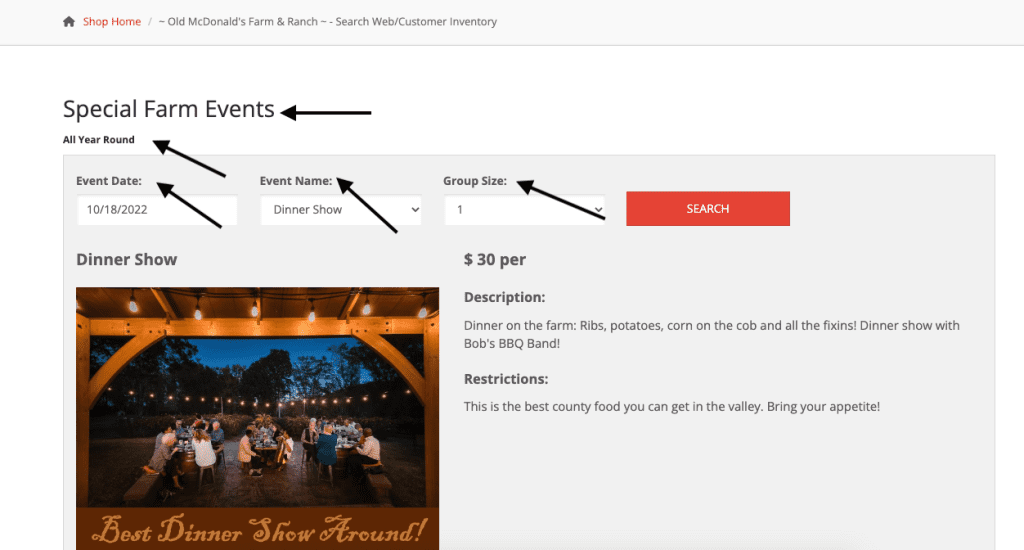
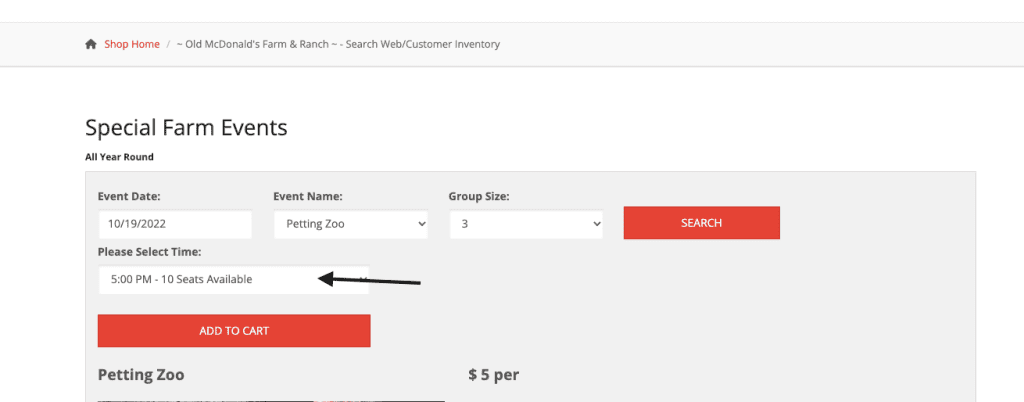
The event above was set as the default “event” or “item.” Below you will see another event was selected and searched for.
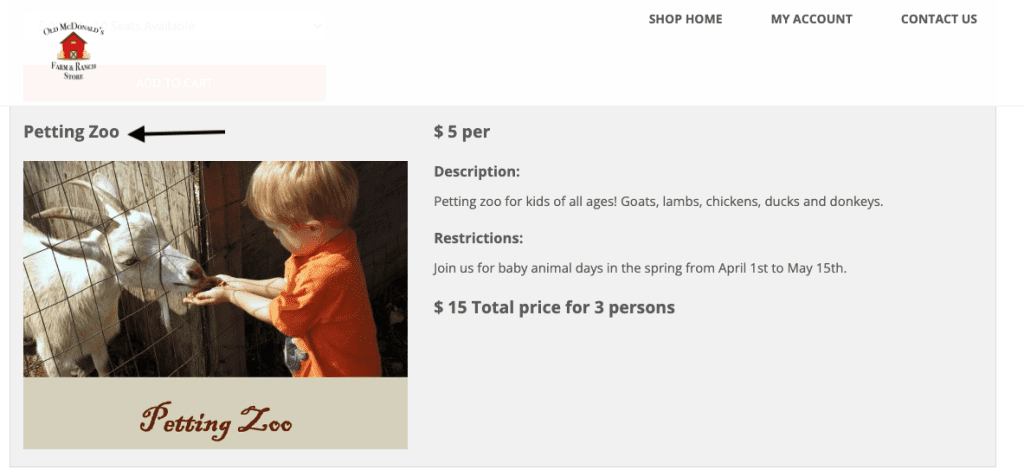
Then it was added to the shopping cart to reserve.
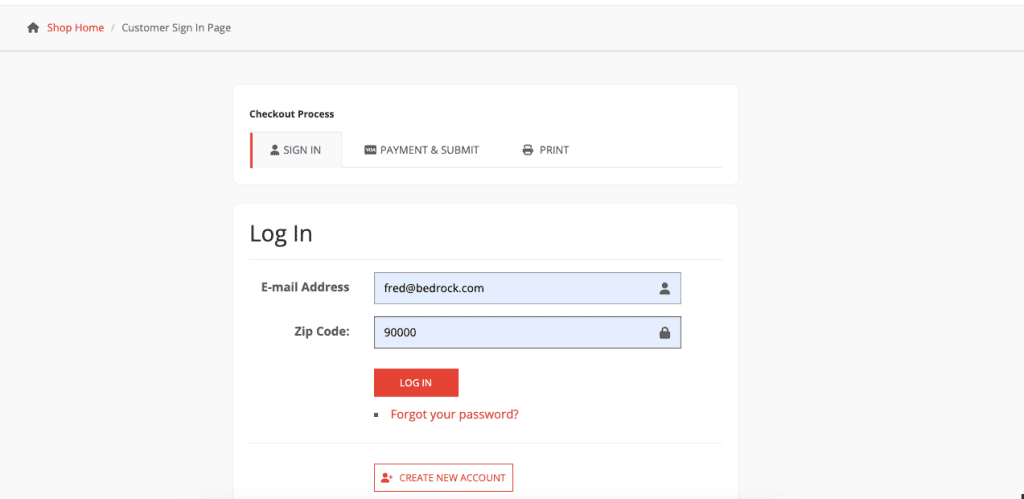
Now you can check out to solidify your reservation. If you haven’t already, you will need to log in. Each company can choose their log in credential criteria. In this example, they are using email address and zip code. You may also create a new account if you don’t have one.
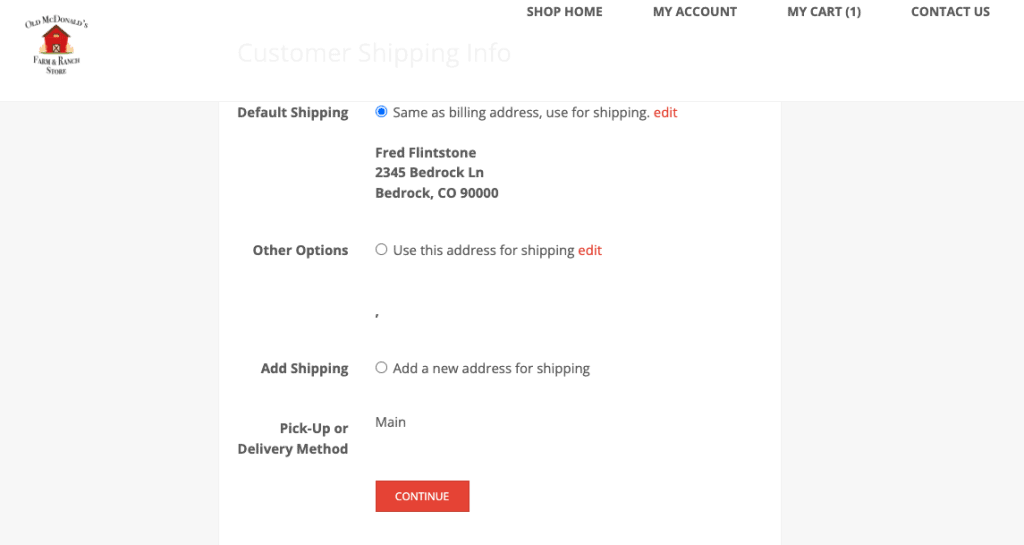
There is a review page to make sure your shipping information is correct, should you use shipping.
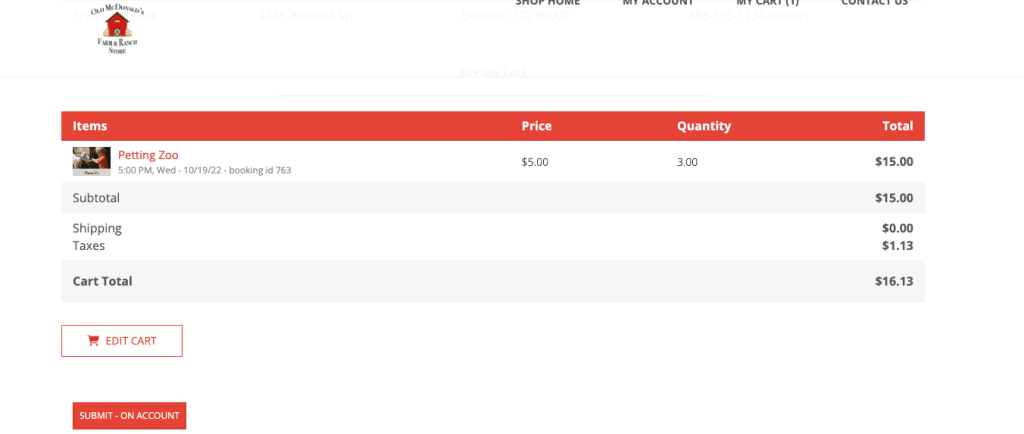
One last review of the item(s) in your cart and you can submit the order. This is also based on your particular settings. Some companies will want to take a payment through e-commerce, while others will want their customers to pay upon pickup.
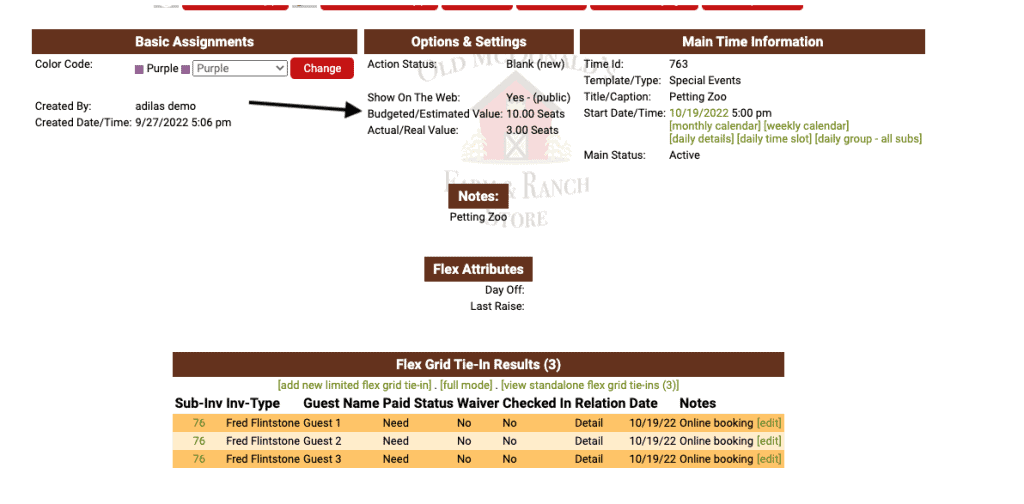
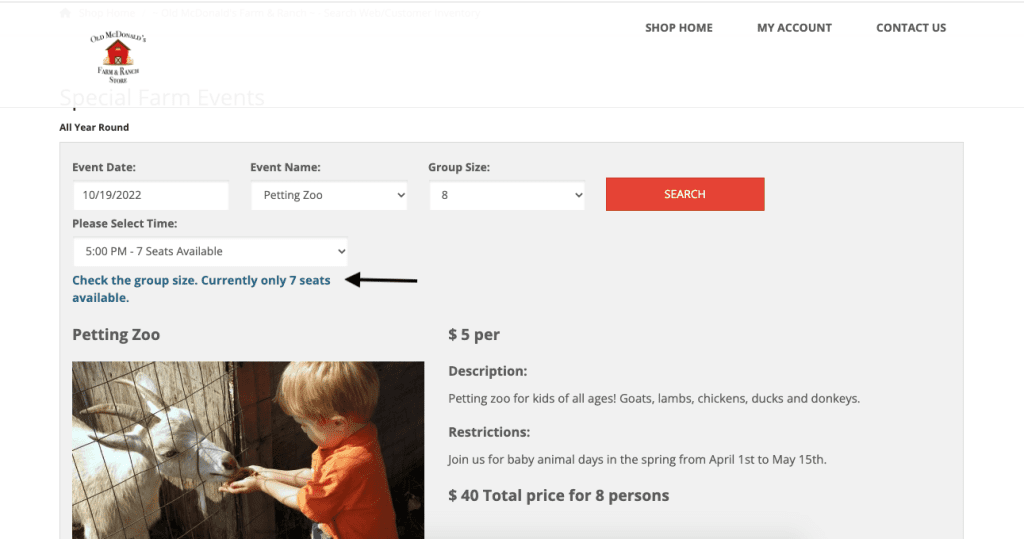
Now your order has been submitted. If you were to look in adilas at the Element of Time for this event, you would see that there are now three spaces reserved. Please note the value at the top for Budgeted/Estimated Value. This is needed to determine how many spots are available. In this instance, there are ten total.
Now, back in e-commerce, attempting to book eight spots for this event, you will notice that a warning comes up and alerts that there aren’t enough spots.
As always, please feel free to reach out to technical support at 720-740-3076, or email support@adilas.biz if you have any questions, concerns, or suggestions.