
This update includes all of the original information plus new rules and permissions that have been added since the fall.
Thanks to all the hard work of Eric Tauer and Brandon Moore, the first phase of the loyalty points program is now in effect. It is easy to setup and use, and will be a great addition to the functionality adilas has to offer.
To set the rules for this special account, you must have the admin permission id=86 for editing balance sheet items. Once you have this permission, from the classic homepage, go to system management, choose manage corp info & permissions. Please note the id=86 is the permission number on the right hand side of the permissions page, and not in numerical order. If you do a ctrl F and search for that number you will easily find it on the page.
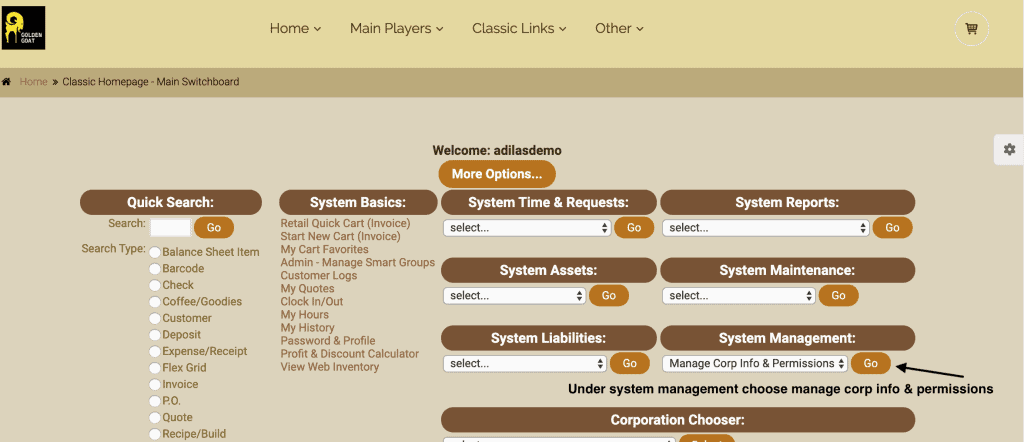
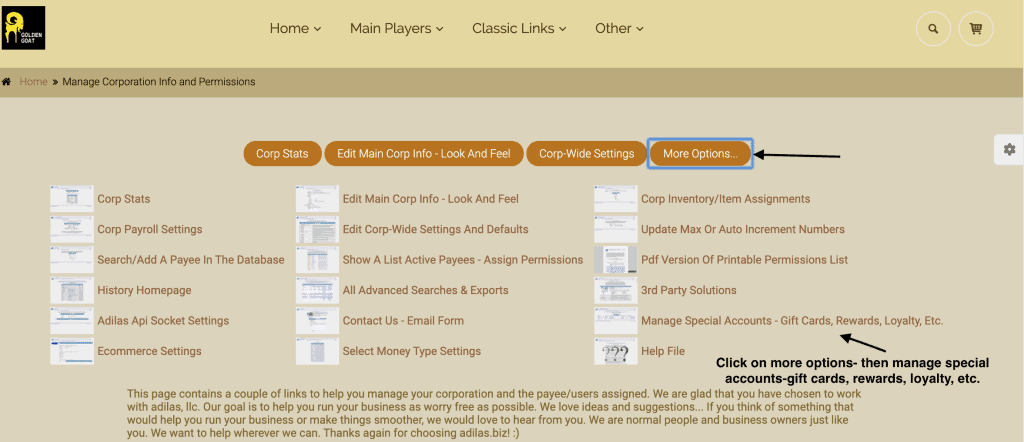
Click on more options and choose the link “manage special accounts-gift cards, rewards, loyalty, etc.” (In the next phase of special accounts development there will be more payment types available, such as gifts card, in store credits.)
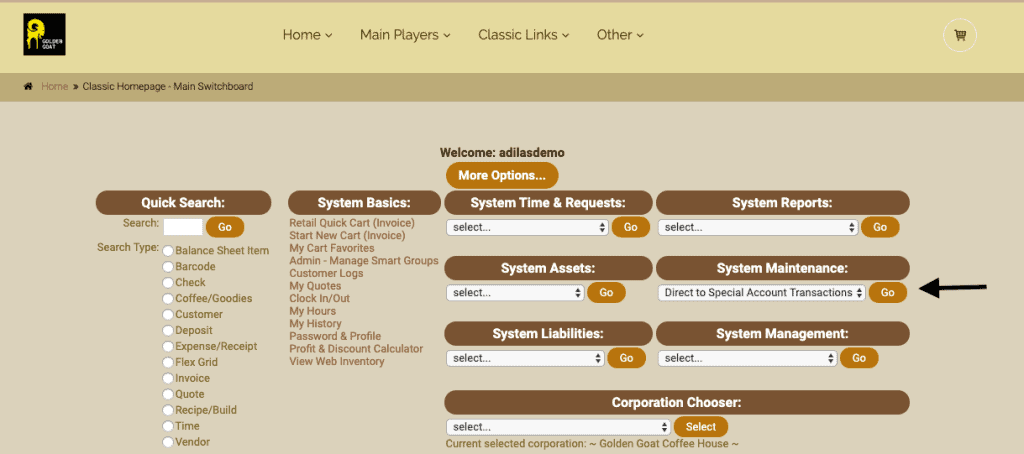
If you don’t want to give a user this permission and access to the balance sheet, there is a new permission called ‘direct access to corp special transactions. This is permission id=172. Once you assign this permission, you can find this link on the classic homepage, system maintenance, direct to special account transactions. Please note the id=172 is the permission number on the right hand side of the permissions page, and not in numerical order. If you do a ctrl F and search for that number you will easily find it on the page.
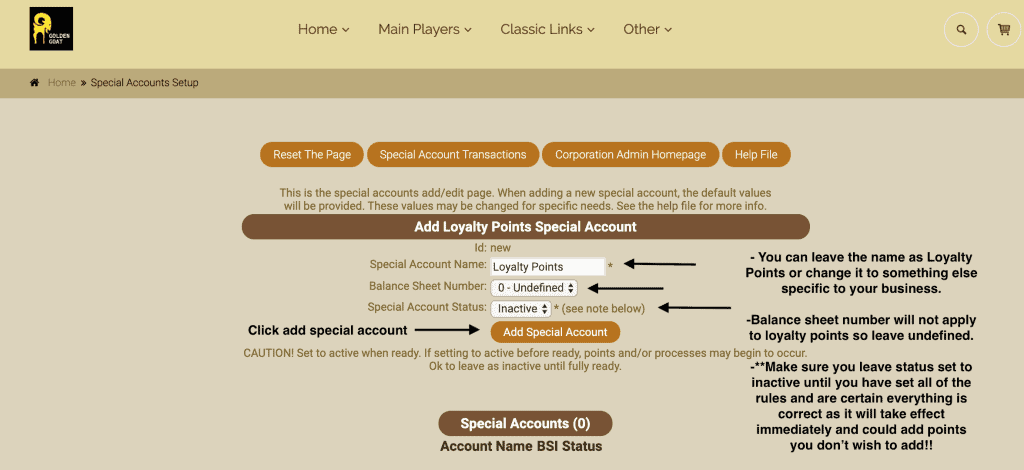
Choose Loyalty Points from the drop down list. Currently it is the only choice, but in the future there will be more options.

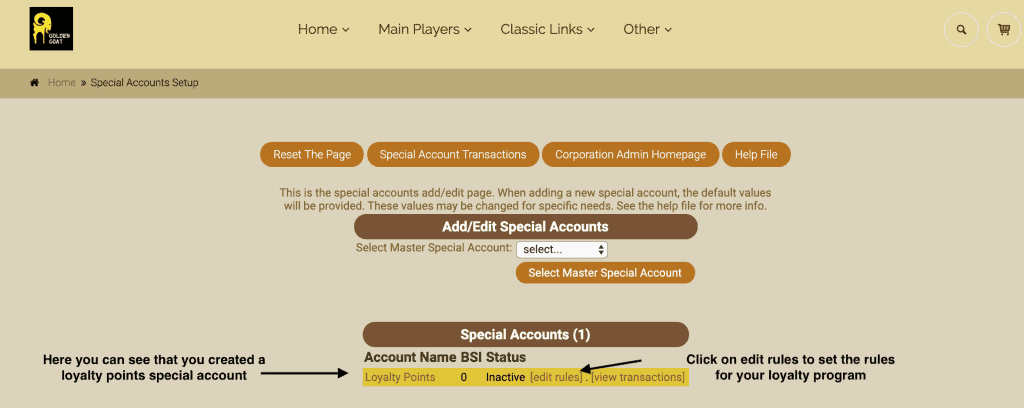
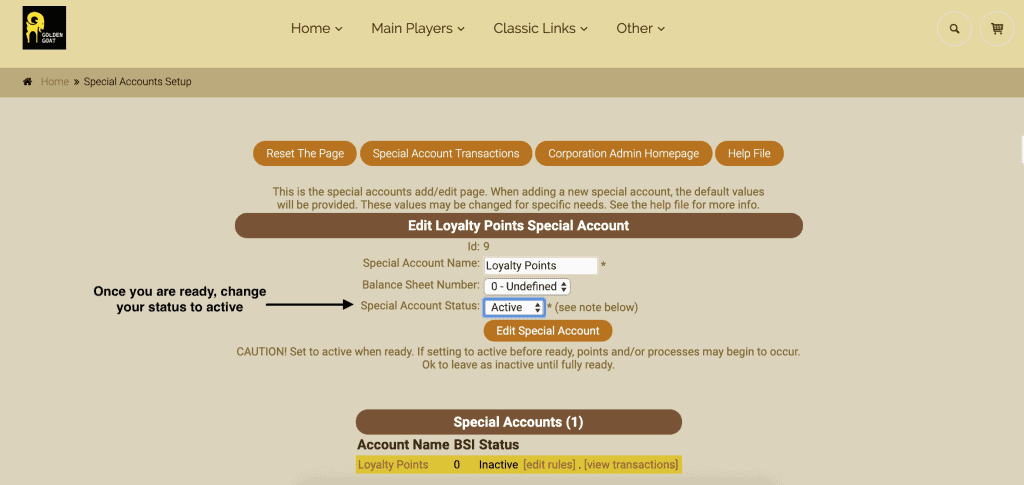
You can choose to change the name of the loyalty points to something unique to your business or leave it the same. The balance sheet will not be in use for this special account, so leave it as is. The status is very important!! You should leave the status inactive until all settings have been edited and you are confident that the rules and dates are set correctly. Then click add special account link.
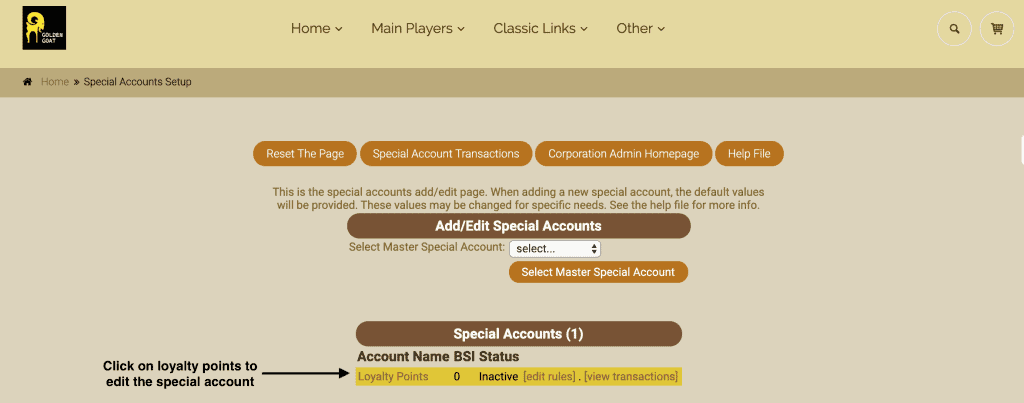
Now you can see your loyalty points program in the list of special accounts below. Click on edit rules to set the rules for this loyalty program.
You will see a list of eight rules that have default settings that you may use or change.
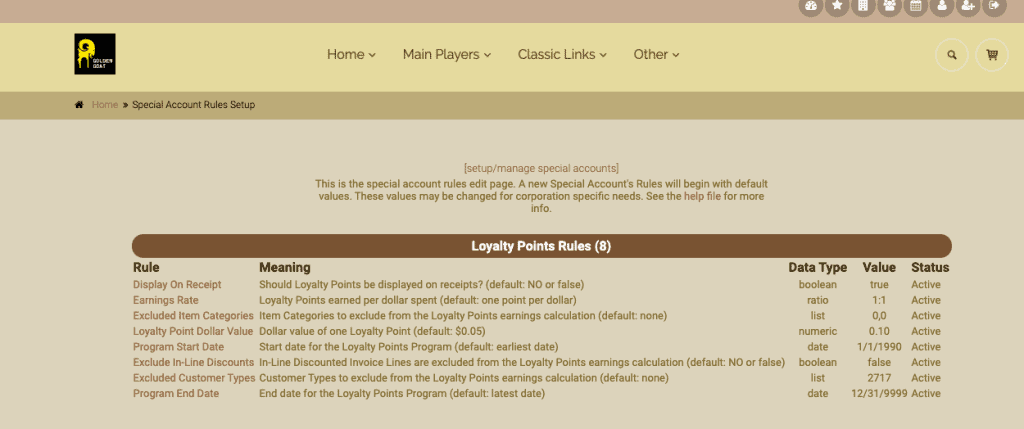
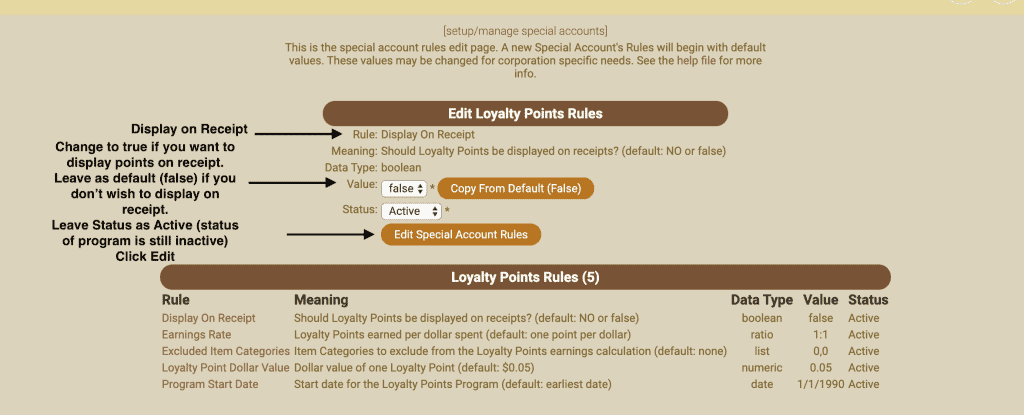
The first rule controls if the loyalty points will print on the customer receipt. Default is set to false or no. Change the rule to true if you would like the points to appear on the printed receipt.
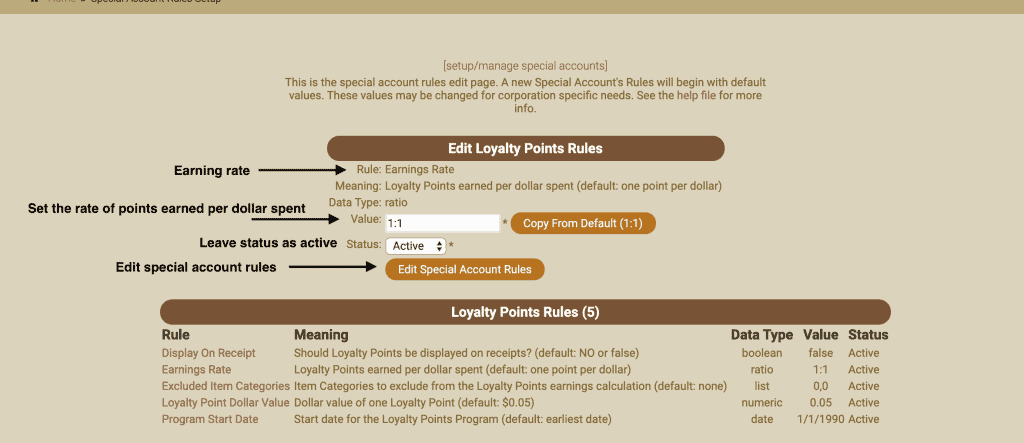
The second rule determines the earning rate for loyalty points: how many points are earned per dollar spent.
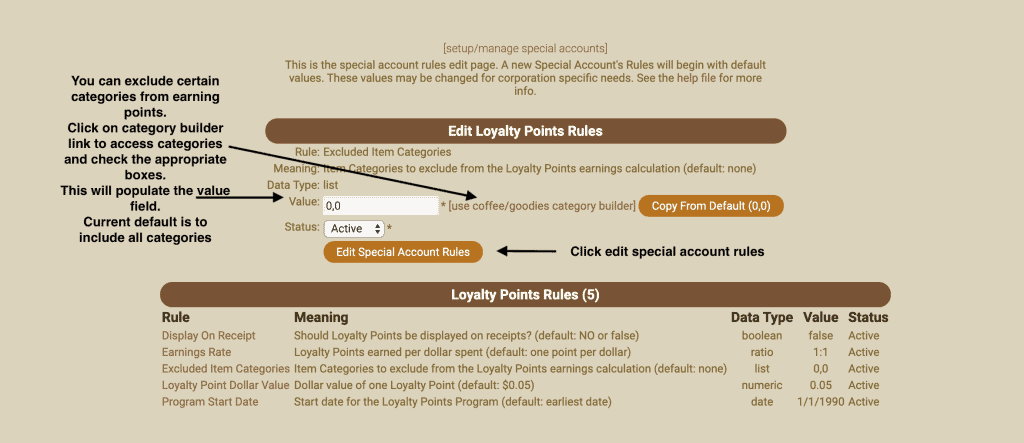
The third rule deals with categories and if you will exclude any categories from earning loyalty points. If you want to exclude any categories you must click on the category builder link and check the box(es) next to the category or categories that you wish you exclude. This will populate the category ids in the value field. Currently the default is set to 0, or no exclusions.
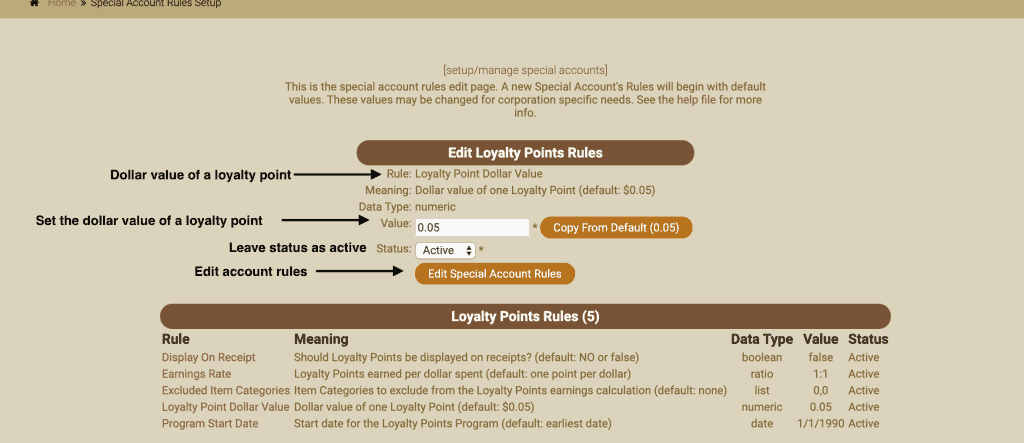
The fourth rule determines the dollar value you wish to assign to a loyalty point.
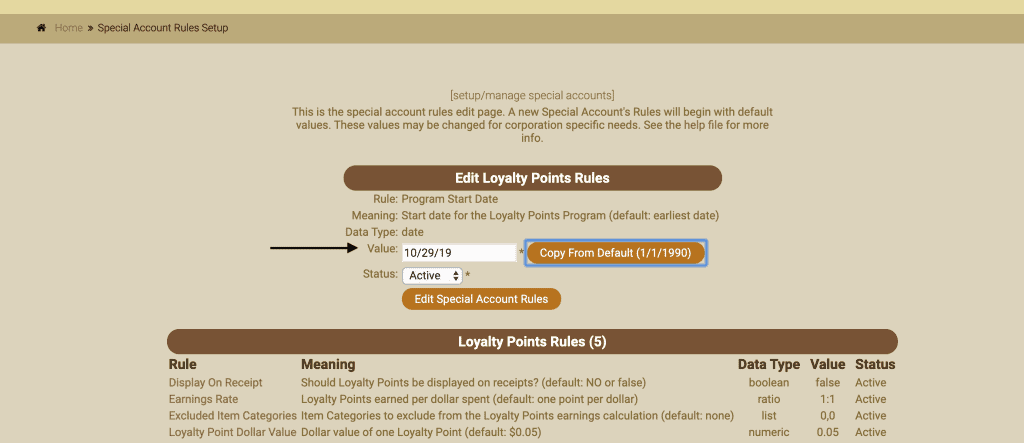
The fifth rule is super important!! It is the start date for the loyalty program. Once the account is active, points will be assigned (even retroactively) based on the date you put in that field. It is very important to change that date and make sure you are satisfied with that date prior to flipping the loyalty account to active. It is highly recommended to keep the entire loyalty program set to inactive until you are satisfied with all of the rules**While each rule has a status, it isn’t necessary to flip the rule status to inactive, just the loyalty points account as a whole.
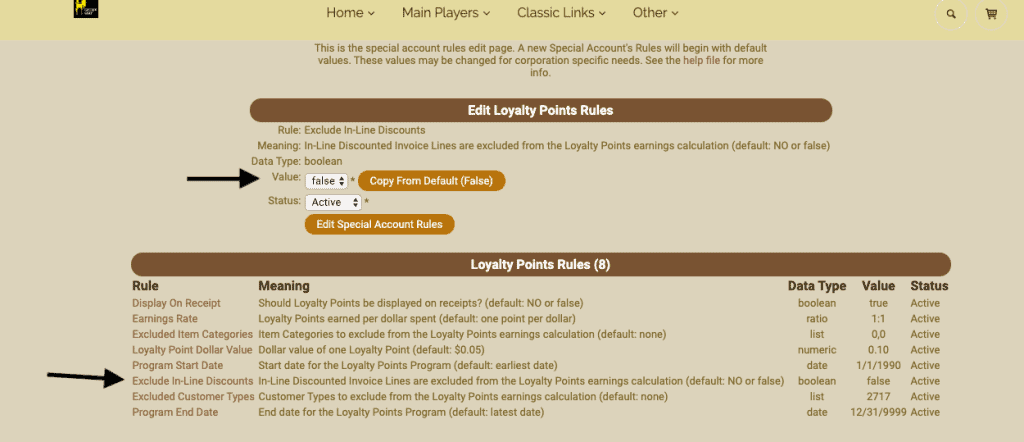
The sixth rule deals with excluding in-line discounts. If you DON’T want items that receive discounts to be counted toward loyalty points, then you would choose true. Otherwise, the default is false, which means that all of the items you give discounts to will be eligible for accruing loyalty points.
The seventh rule deals with excluding customer types. If you don’t want to exclude anyone, click the button ‘copy from default- (0,0). All customer types will be included.

In this example, a customer type has been selected to exclude from the loyalty point program. This was done by clicking on ‘use customer type builder’ link to the right of the field.
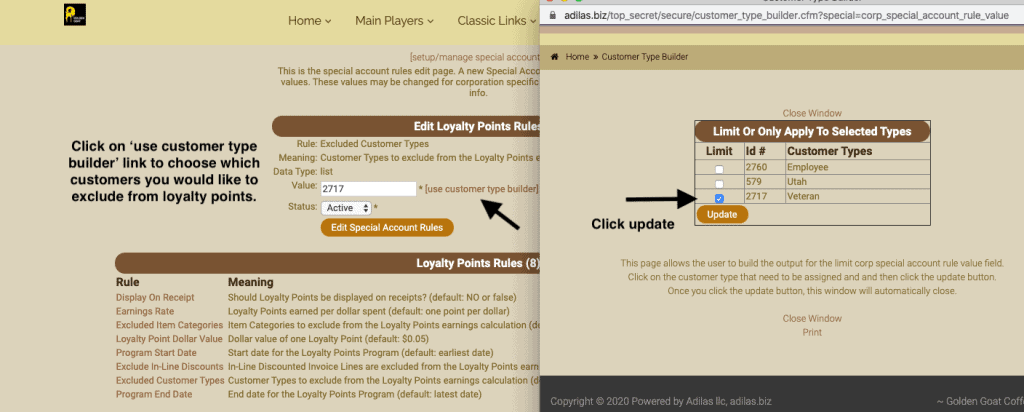
As you can see, 2717 Veteran was chosen from the list. Click update to send any new settings through.
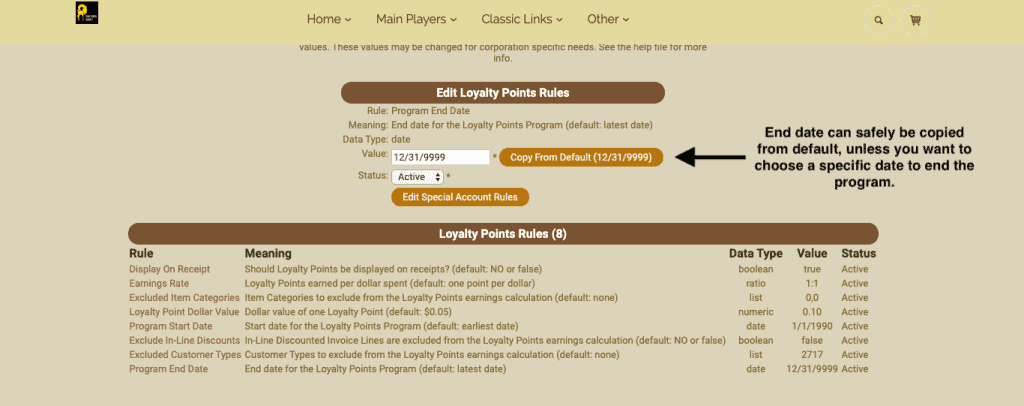
The eighth setting is the program end date. While not as crucial as the start date, it will affect how long your loyalty program runs. If you don’t have an end date in mind, you can ‘copy from default’, which will set it far into the future. This is recommended unless you have another date in mind.
Once you have set your rules, click on the link at the top to “setup/manage special accounts.” Click on the link for loyalty points to edit the account.
Change the status to active on the account.
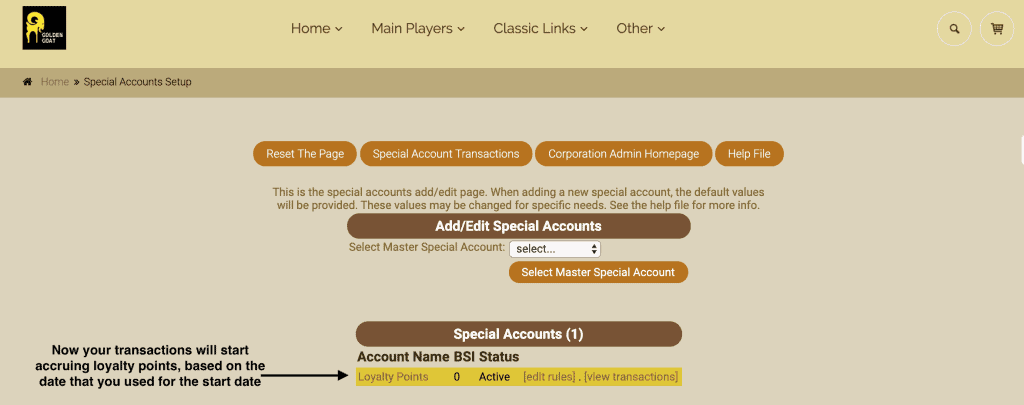
Now you will see your loyalty program is active and accruing points based on the date that was assigned as a start date.
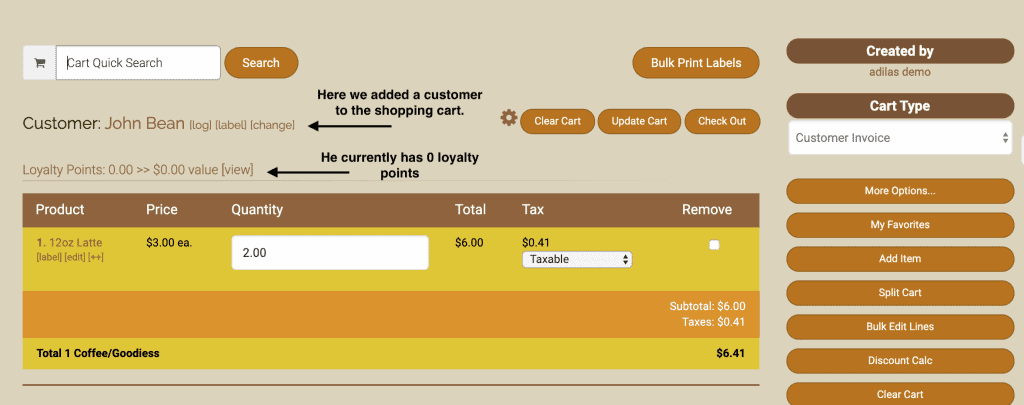
To see the loyalty program in action, assign a customer to the shopping cart. You will see that he has zero loyalty points, since the program just started yesterday, and he is coming in for the first time since it was activated.
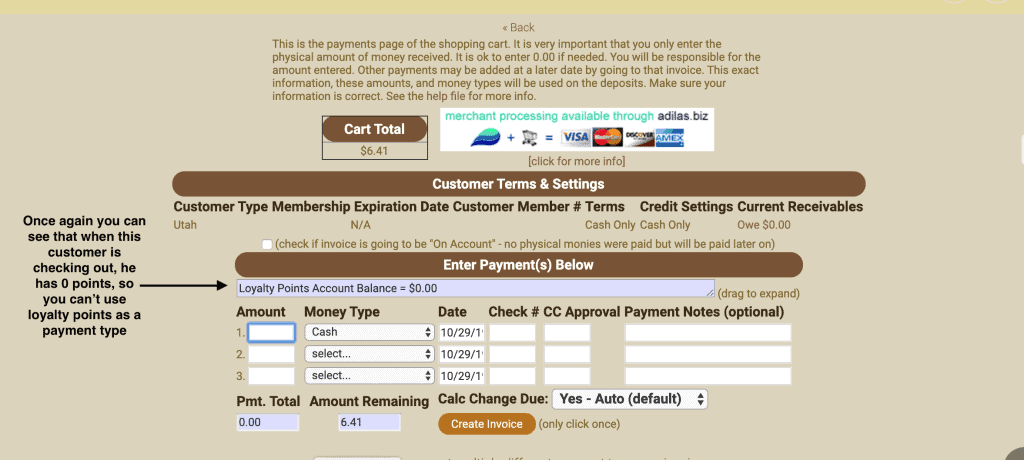
When we checkout, you will also see that there are zero loyalty points available to use as a payment.
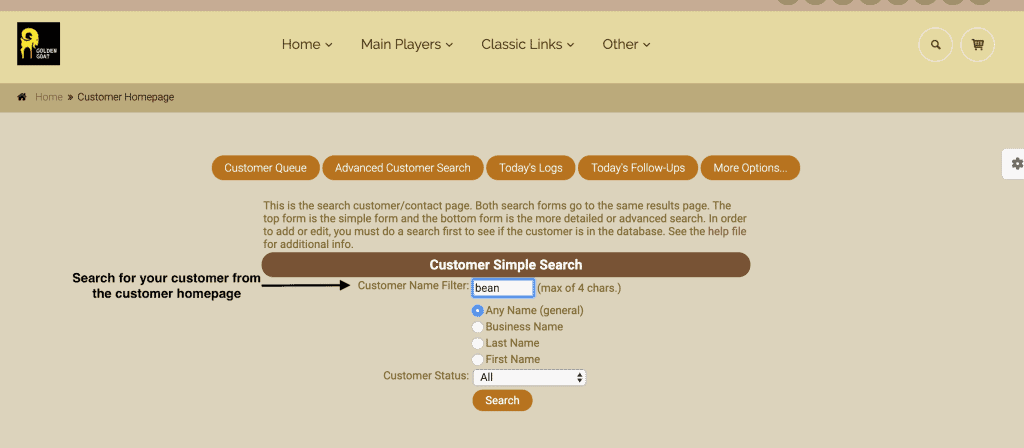
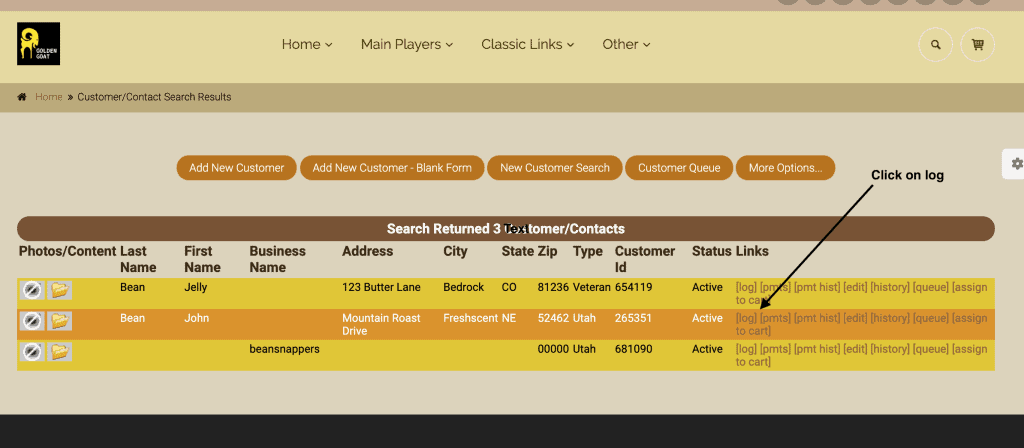
You can look up how many loyalty points a customer has by accessing their log. To access a customer log, search the customer from the customer homepage.
Click on log to the right of the customer’s name.
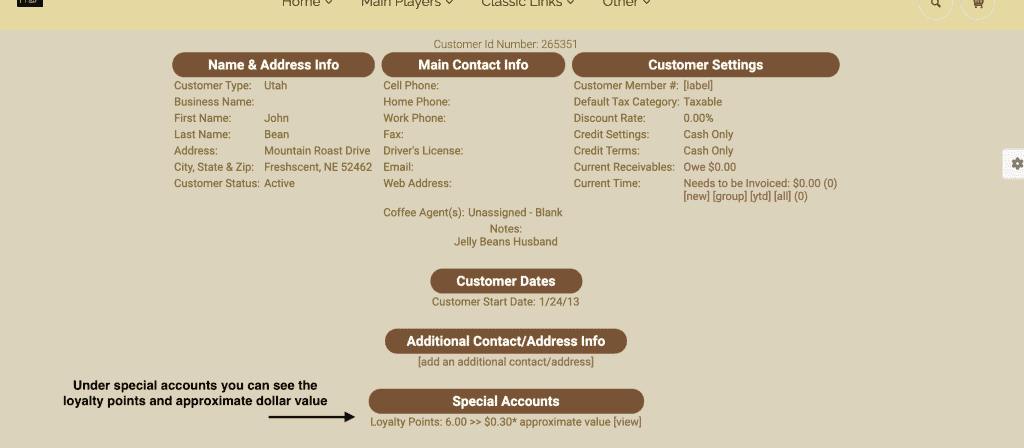
Under special accounts, you will see any loyalty points the customer has accrued.
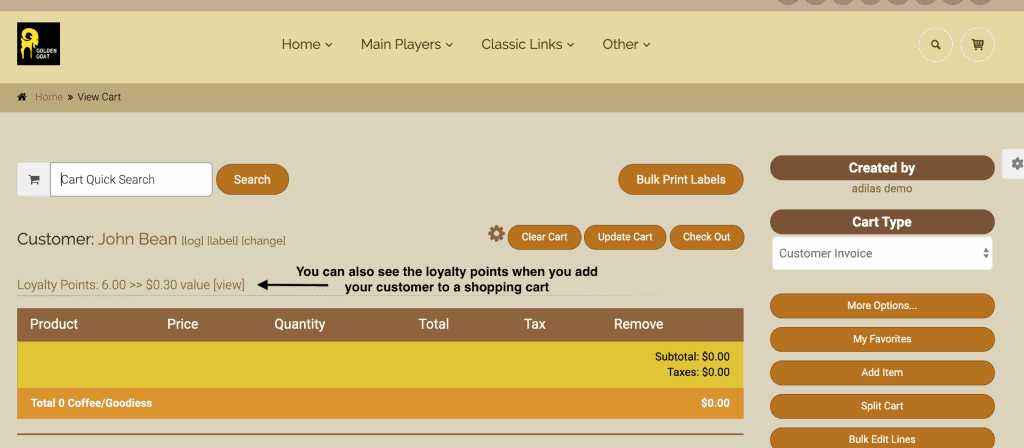
You can also see the customer’s loyalty points when you add them to a shopping cart.
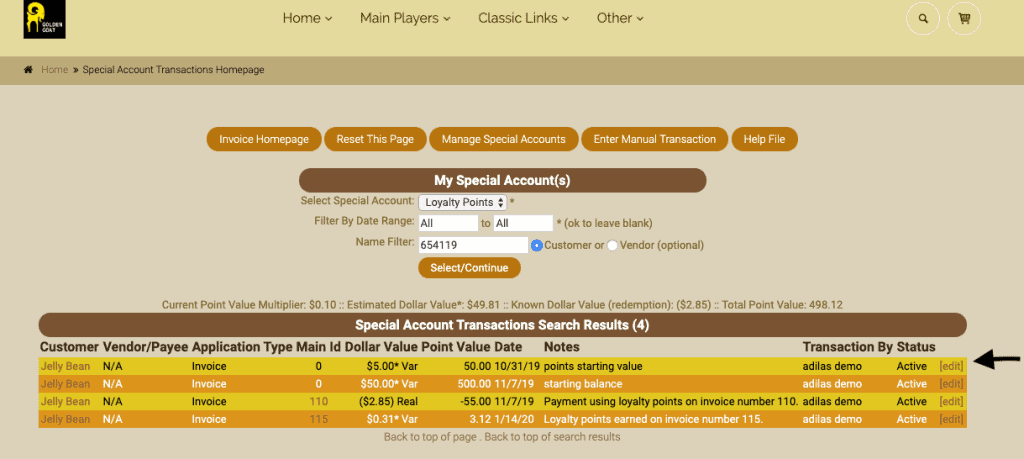
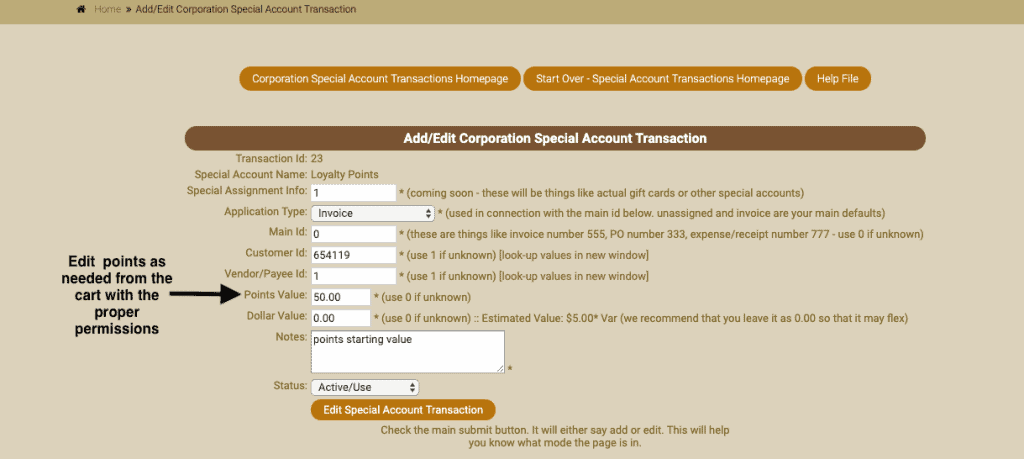
When you click on view, you will also be able to access all of the customers loyalty point transactions. If you have permission id=172 you will be able to edit these points from here as well. If not, the transactions will be locked.
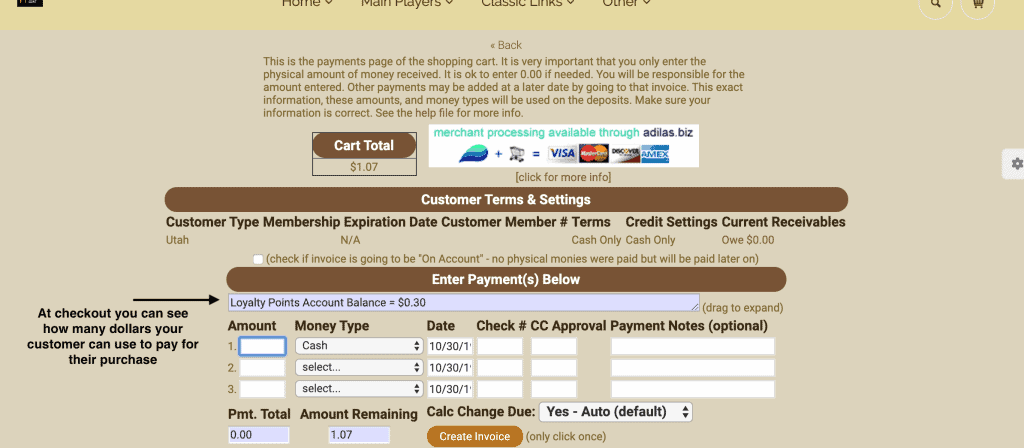
Upon checkout, the line above the payment fields shows how many dollars the customer can use toward their purchase.
In order to use loyalty points as a payment, you must select it from the money type drop down list. This list can be modified/shortened so there are fewer choices and the list is shorter. (Please search the news and updates for money type settings for help with accessing that list.)
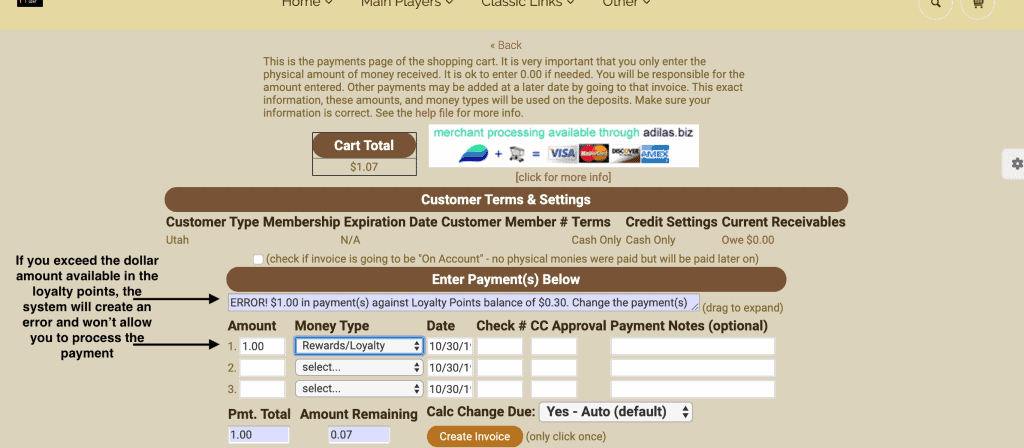
If you add a greater dollar amount to the field than you have in loyalty points and choose rewards/loyalty points as your payment type, you will see an error in the purple field above, stating what you actually have available, and to choose another payment type.
Once you adjust your dollars to match or fall below your dollar balance, you may add another payment type to satisfy the sale (if you don’t have enough loyalty points) and then you will be able to check out.

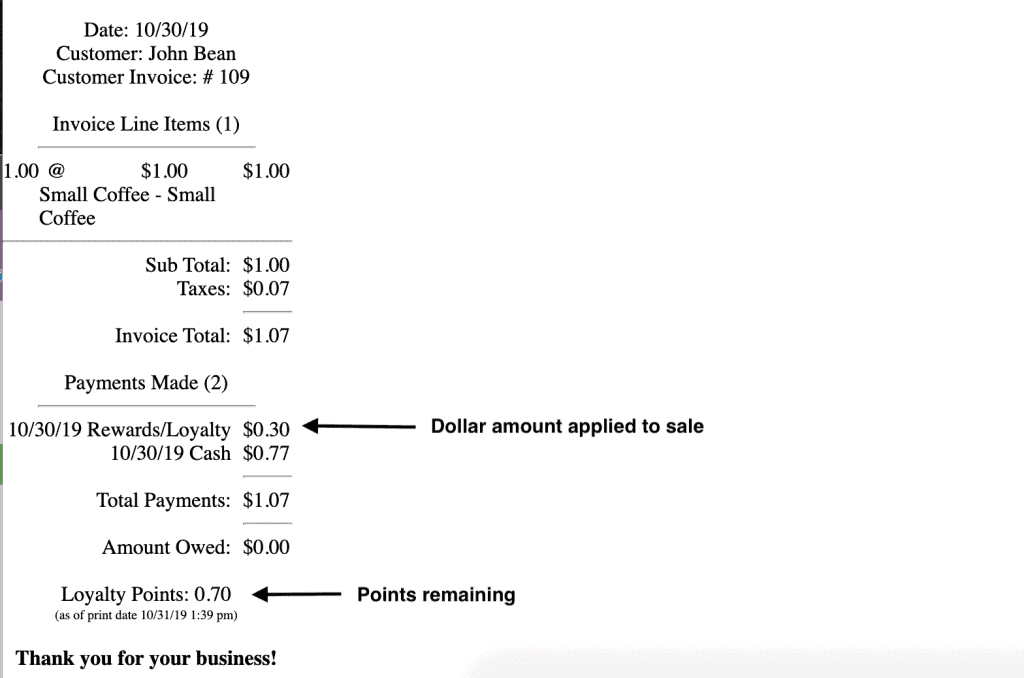
When you print your receipt, you will see how many loyalty points you spent in dollars, as well as how many points you have left.
Make sure to check back in news and updates for more helpful hints for using your loyalty points program, as well as more features that will be added in the future.
As always, please feel free to reach out to your consultant, Technical Support at 719-966-7102, or email support@adilas.biz if you have any questions, concerns, or suggestions.