
Time templates control what the time elements are called. They also control what they allow as far as subs, add-on’s, default settings, and functions of time. When you create a new element of time, it will always be assigned to a template, which will determine exactly how it functions.
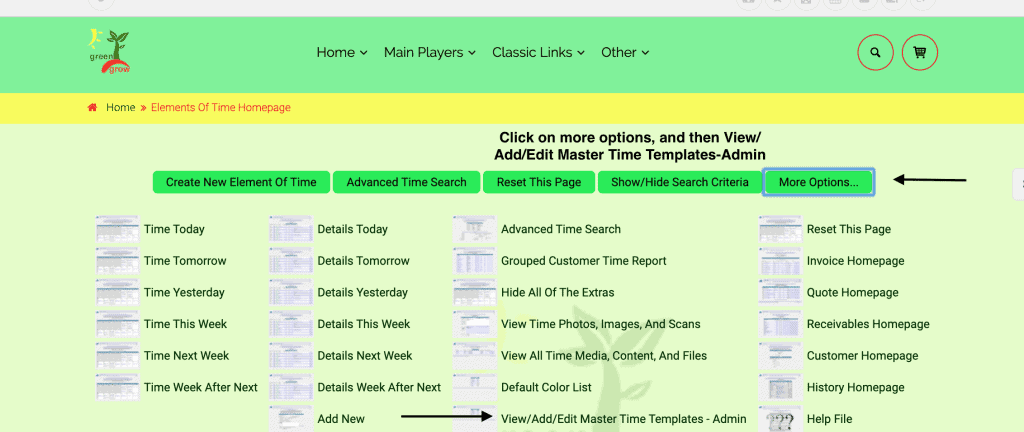
To create a new master time template go to the elements of time homepage. Click on more options and then the View/Add/Edit Master Time Templates link.
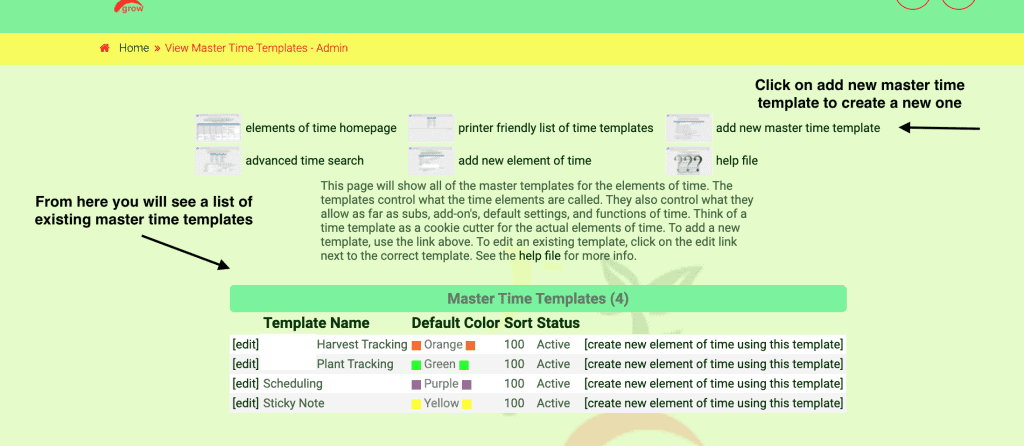
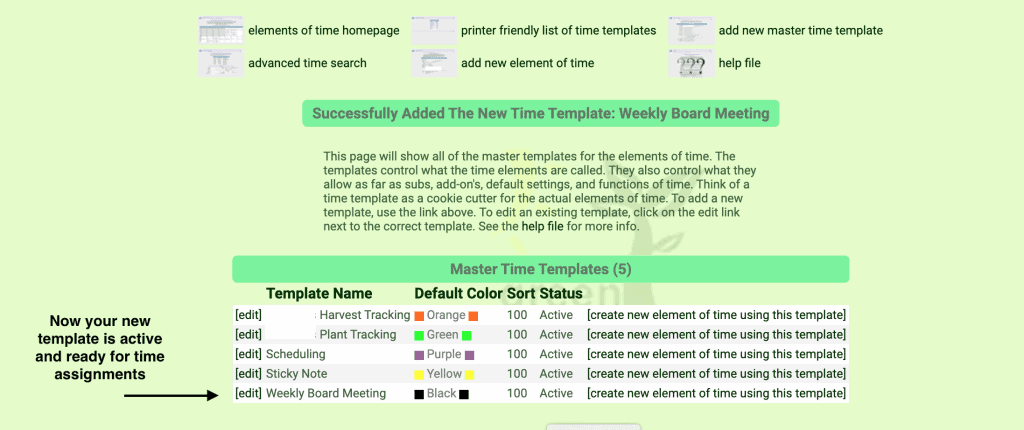
From here you will see a list of existing Master Time Templates. If none have been created, there will be a default template that can be used to create one of your own. Or you can click on “add new master time template.”
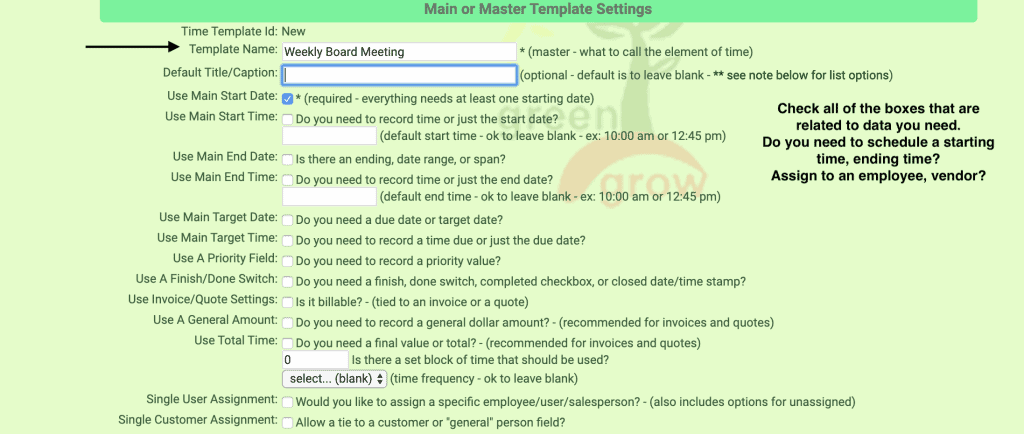
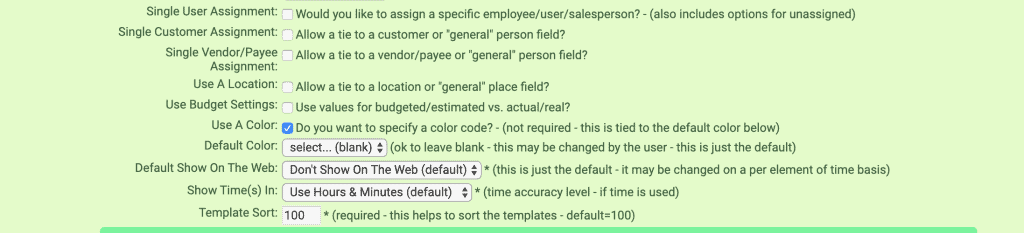
There are many choices to choose from for setting up your template. Read through and determine what data you need to track: time, date, assignments to employees, and more. Once you have made all of your selections (two pages are shown here and there are several more not shown) add the new master template. If you find that there are more features that are needed you can go back and go to view/add/edit templates and check more boxes. Similarly, if you find you have selected too many boxes, you can deselect them.
Now that you have created your template you can assign elements of time to it (click on add new element of time, assign to template, and then fill in the boxes as needed). For help with how to create reoccurring elements of time, please see update called How to Use Reoccurring Elements of Time.
As always, please feel free to reach out to your consultant, Technical Support at 719-966-7102, or email support@adilas.biz if you have any questions, concerns, or suggestions.