E-commerce – Parent Attributes/Tags
For the sake of describing this tool, we will use the name of Tag. Please know that this naming convention is up to you.
Parent Attributes or Tags is a new category convention inside of Adilas. It allows you to build Tag Categories, individual tags, and attach those tags to individual items for use within the system or out in E-commerce.
Watch a video on it
(Note that there is an additional setting that needs to be activated before the tags can be utilized in E-commerce. Please refer to the written portion on “How to Make Sure Your Tags Display Out in the E-commerce”, as the video does not go over that particular setting.)
Written instructions below
In this help file we will go over:
- Naming Conventions – for Parent Attributes/Tags
- Tag Categories
- Individual Tag Elements
- How to Add a Tag to an Item
- How to Make Sure Your Tags Display Out in the E-commerce
Naming Conventions
Parent Attributes can be dynamically named according to the wishes of the corporation. For most scenarios it is used as a E-commerce tagging convention.
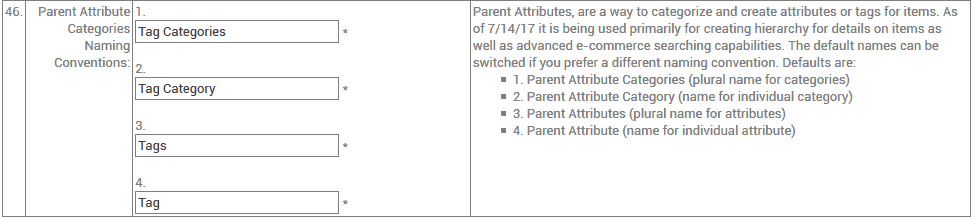
How To Get To It: Classic Links (header tab) > System Management > Manage Corp Info & Permissions > Corp-Wide Settings (button) > Parent Attribute Categories Naming Conventions (section 46 – as of 3/30/18)
Tag Categories
Tag Categories can be created to manage different types of tags. For example, you could have Tag Category named “Screen Size”. Within this Screen Size Tag Category you can create individual tags.
How to Get to It: Home (header tab) > Parts Home Page (may be named differently according to the naming conventions for items for your corporation) > More Options (button) > Add/Edit Parent Attribute Categories (link, may be named differently according to the naming conventions for your corporation)
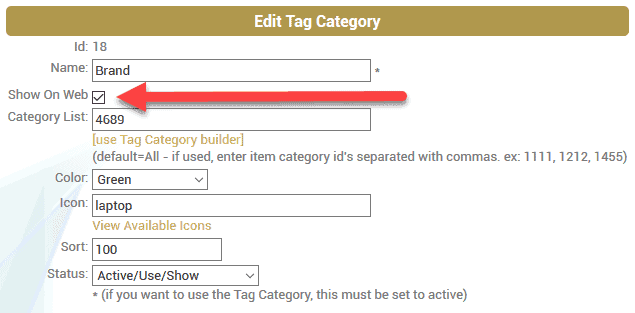
The options that are available for any given Tag Category are:
- Name – this name will be populated throughout the system as well as in the E-commerce
- Shows On The Web – yes/no
- Category List – determining which item categories can use this tag category
- Color – the ability to color coordinate tag categories
- Icon – the ability to display an icon. This will show up in the E-commerce. Over 100 icons available
- Sort – determines the sort order
- Status – active/inactive
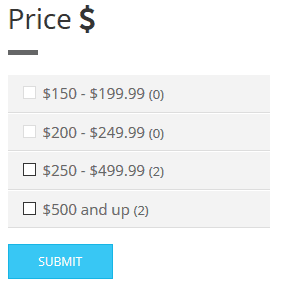
The tag category name and icon will display in the E-commerce, with the available options of individual tags that are available below it.
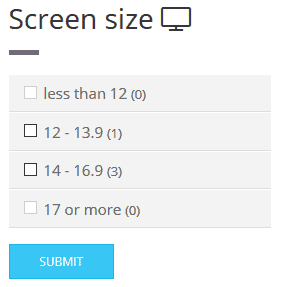
These options are determined by the individual tag elements that are created within a Tag Category.
Individual Tag Elements
Individual tag elements are what constitute the options that are available below a Tag Category. Here are a few examples of different constructs of possible tag categories with tag elements.
Tech Industry (first bullet list items are Tag Categories, sub-bullet list item are individual tag elements)
- Brand
- Dell|HP|Lenovo|Asus|Acer|Samsung|Microsoft (text section, drop-down, tag)
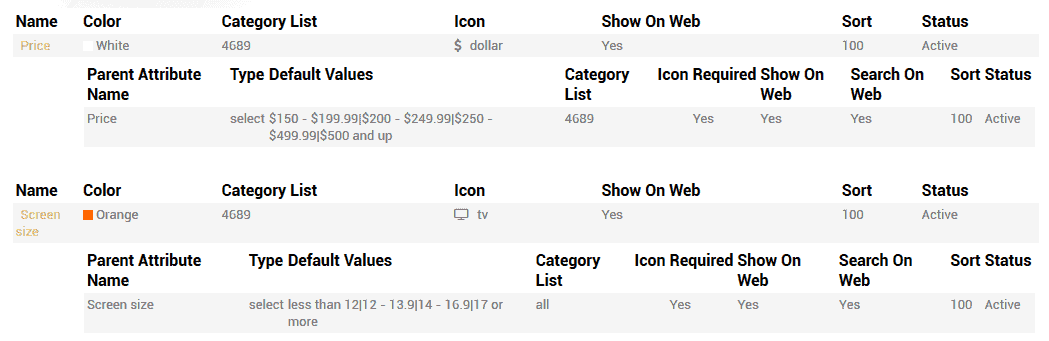
- Price
- $150 – $199.99|$200 – $249.99|$250 – $499.99|$500 and up (text section, drop-down, tag)
- Screen Size
- less than 12|12 – 13.9|14 – 16.9|17 or more (text section, drop-down, tag)
Medical Industry (first bullet list items are Tag Categories, sub-bullet list item are individual tag elements)
- Form
- Pill (numeric section, toggle, tag)
- Syrup (numeric section, toggle, tag)
- Hard Candy (numeric section, toggle, tag)
- Chewable (numeric section, toggle, tag)
- Symptoms
- Headache (numeric section, toggle, tag)
- Stomachache (numeric section, toggle, tag)
- Back Pain (numeric section, toggle, tag)
- Pain Relief (numeric section, toggle, tag)
- Trouble Sleeping (numeric section, toggle, tag)
The different fields that are available for each individual tag element are:
- Tag Name – signifies the name of the tag
- Tag Type – five different tag types are available. They are text input, text drop-down, number, number drop-down, and toggle
- Drop-Down Values or Defaults – allows for drop-down values or default values
- Required – whether or not a tag is required
- Show On Web – yes/no
- Search On Web – yes/no
- Category List – determining which item categories can use this tag
- Icon – the ability to display an icon. Over 100 icons available
- Sort – determines the sort order
- Status – active/inactive

The different tag types that are available are:
Text Tag Types
- Text Input
- Pros
- Unlimited tag values
- Flexibility
- Cons
- Hard to remember what tags you have used
- User spelling errors can occur
- Multiple tags for the same thing
- Hard to maintain consistency
- Pros
- Drop-Down
- Pros
- Preset values
- Maintainable
- Cons
- Not as flexible as a text Input
- Pros
Numeric Tag Types
- Number
- Pros
- Unlimited tag values
- Flexibility
- Cons
- Forces you to have some type of entry once the tag is created
- Pros
- Number Drop-Down
- Pros
- Preset values
- Maintainable
- Cons
- Not as flexible as a number text field
- Forces you to have some type of entry once the tag is created
- Pros
- Toggle
- Pros
- Preset values
- The ability to select multiple tags in a user-friendly way
- Maintainable
- Cons
- Not as flexible as a text field
- Pros
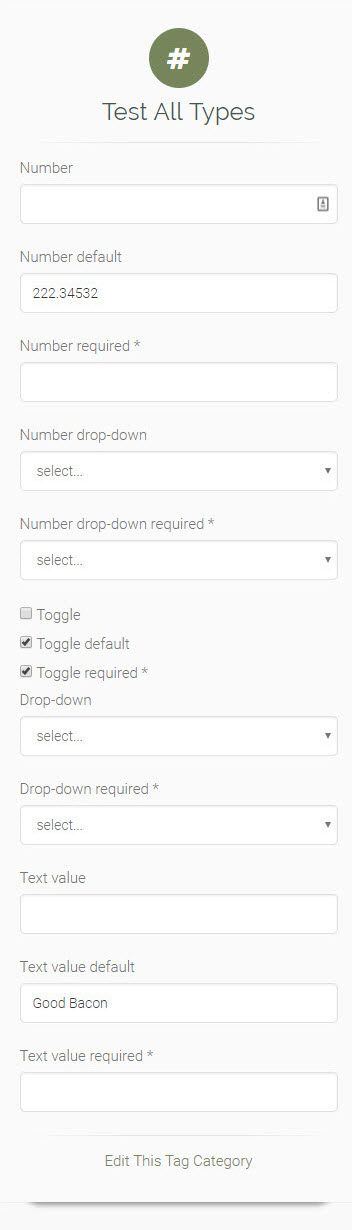
Each tag type has its pros and cons, but as a common practice the two most popular types of tags are text drop downs and toggles. Below is a visual representation of all the different types of tags as of 4/3/18.
How to Add a Tag to an Item
Once you have set up your Tag Categories and tags, you can attach any tags that are available to a particular item category to an item within that category. This is the case whether or not you use it for E-commerce.
How to Get to It:
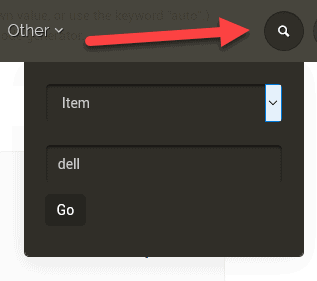
1. Quick Search (select item, name may be different depending on corporation naming convention, type in the name of the item and press submit)
2. Select Item (edit link for the item)

3. Select “Add/Edit Parent Attributes” button (may be named differently according to your corporations naming conventions)
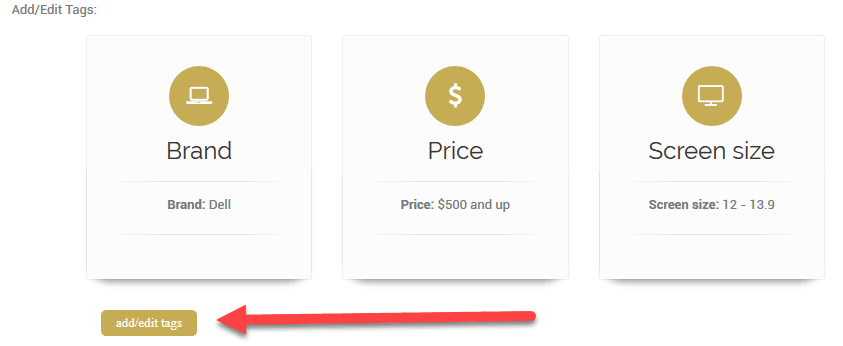
4. At this point you can go ahead and select the corresponding tag options that fit your item and click save.
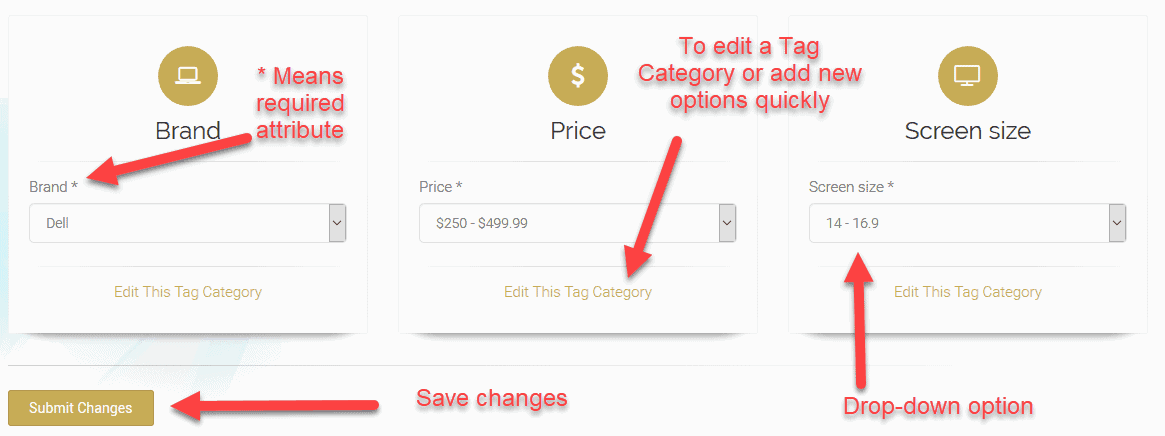
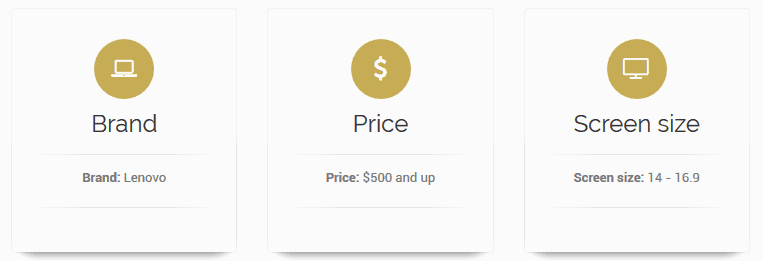
5. When you have selected your tag options and saved your changes, you will be redirected to the item edit page. You can view the tags you have selected on this page as well as on the view item page, which has customer view and full view.
How to Make Sure Your Tags Display Out in the E-commerce
If you want to make sure that your tags will show up in the E-commerce, you must select the “Show On Web” setting in both the Tag Category and the individual tag elements.

How to Get to It: Home (header tab) > Parts Home Page (may be named differently according to the naming conventions for items for your corporation) > More Options (button) > Add/Edit Parent Attribute Categories (link, may be named differently according to the naming conventions for your corporation) > Select the name of the category you wish to edit (link)
You also need to turn on the E-commerce tag setting.
How to Get to It: Other (header tab) > Other Settings > E-commerce Settings > E-commerce Options (link on the right-hand side) > Use The Tag Search
![]()
Don’t forget to save your settings.