
Please refer to the previous update ‘New Special Account Type… Vendor Credit‘ in order to turn on these settings.
Once the settings are active, you will notice links to create new credits or use existing credits in several locations in adilas: from the PO, from the Expense, and from the vendor. Here we will demonstrate how to create the vendor credit from the vendor profile.
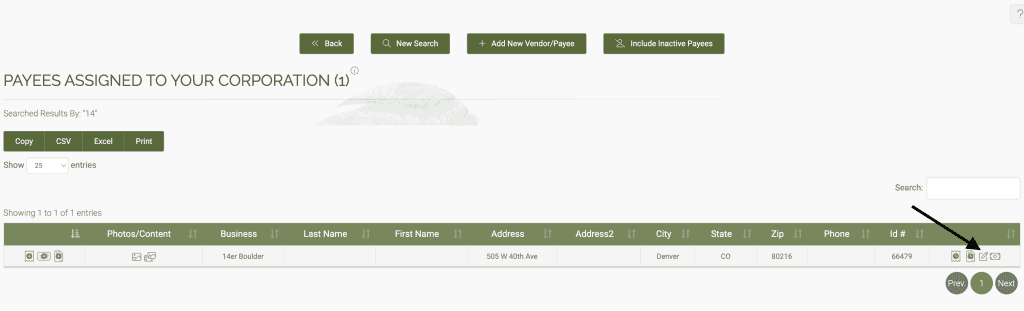
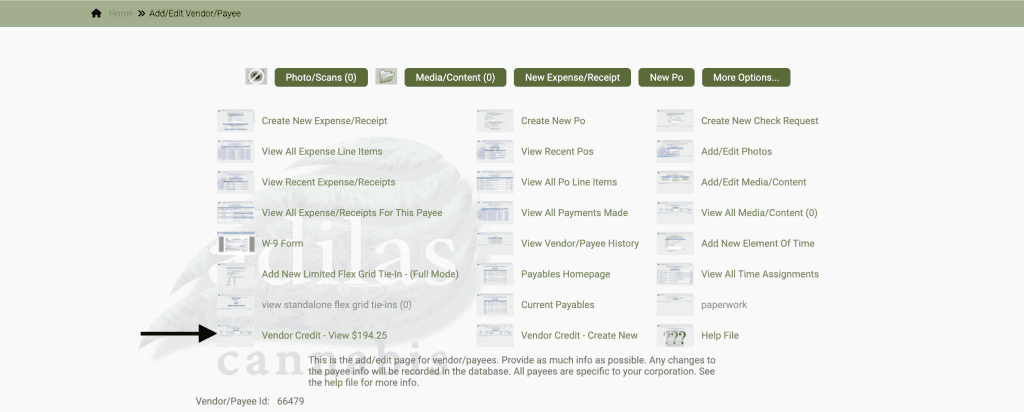
Search for the vendor and click on edit.
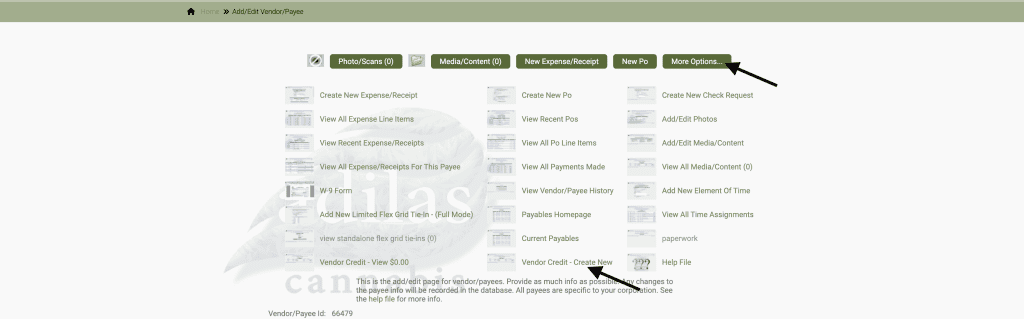
Click on more options, and click on the link for vendor credit- create new.
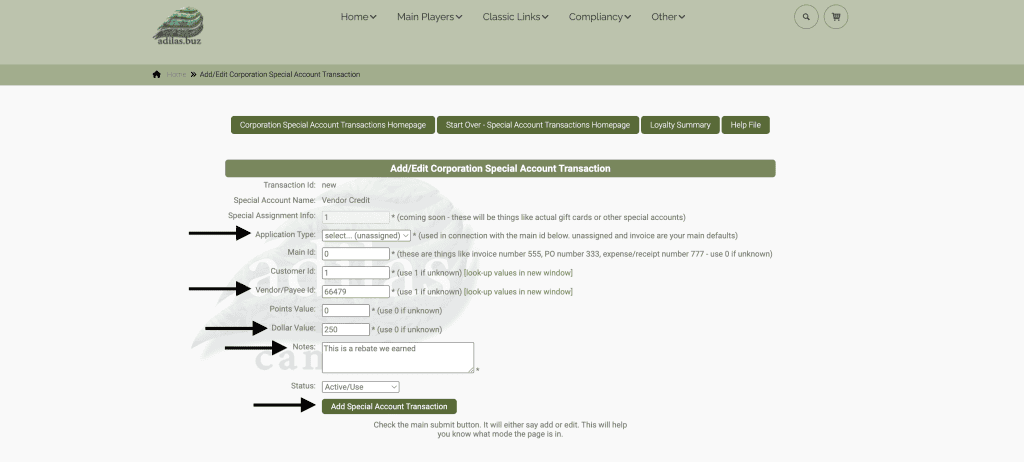
You don’t need to assign the vendor credit to an application type (leave as is). Note: if you create the vendor credit from the PO, the Applicate type will be PO; if you create the credit from an Expense Receipt, the Application type will be Expense Receipt.
The vendor/payee id will be auto-populated when you add the vendor credit from the vendor page, the PO and the E/R.
Add the dollar value and a note.
Click add special account transaction.
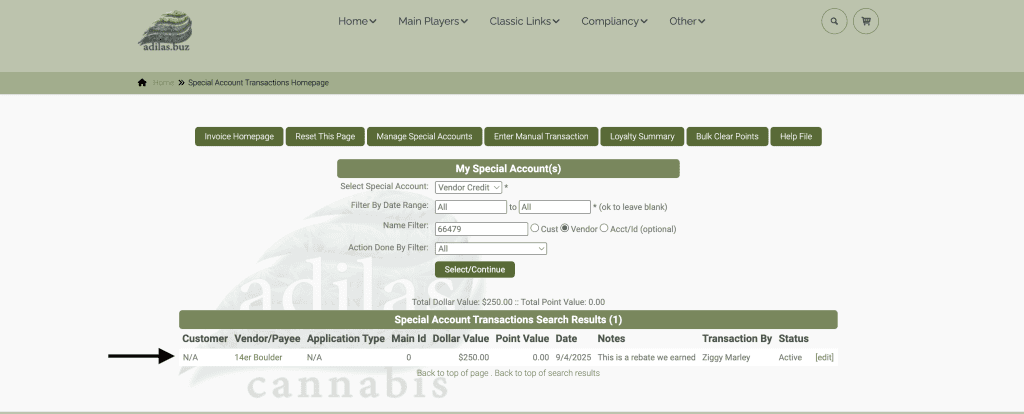
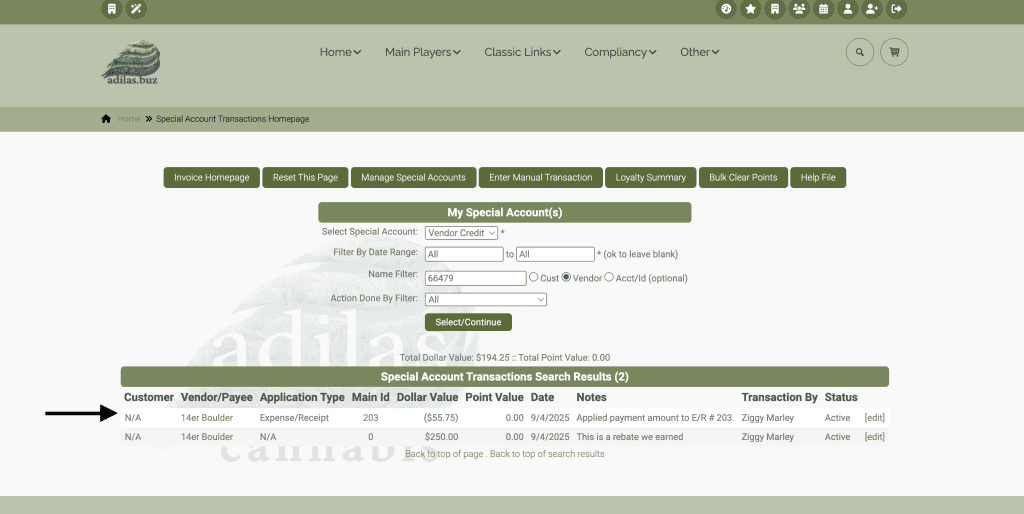
Now you can see the vendor credit here.
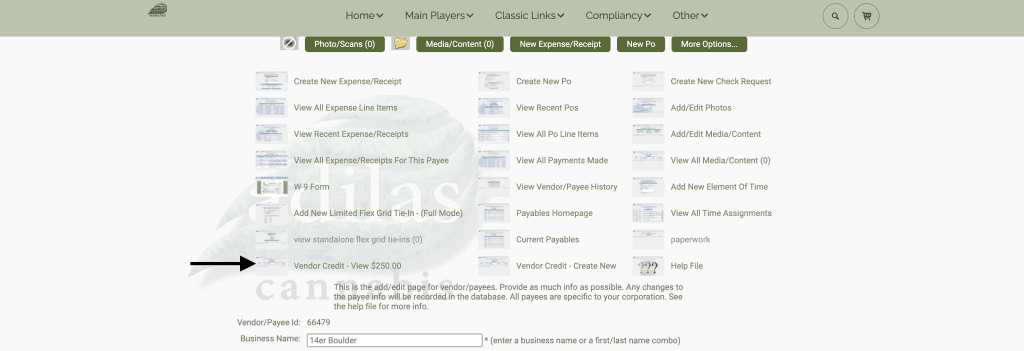
If you go back to the vendor and click on more options, you can now see the vendor credit here.
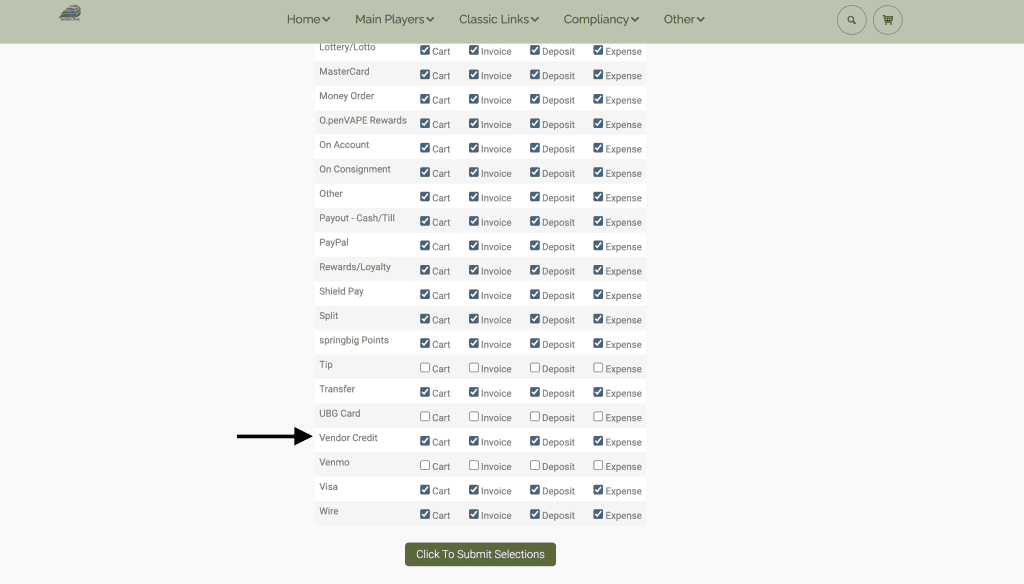
Be sure to go to money types and add the vendor credit payment type.
Now this credit can be applied to an expense.
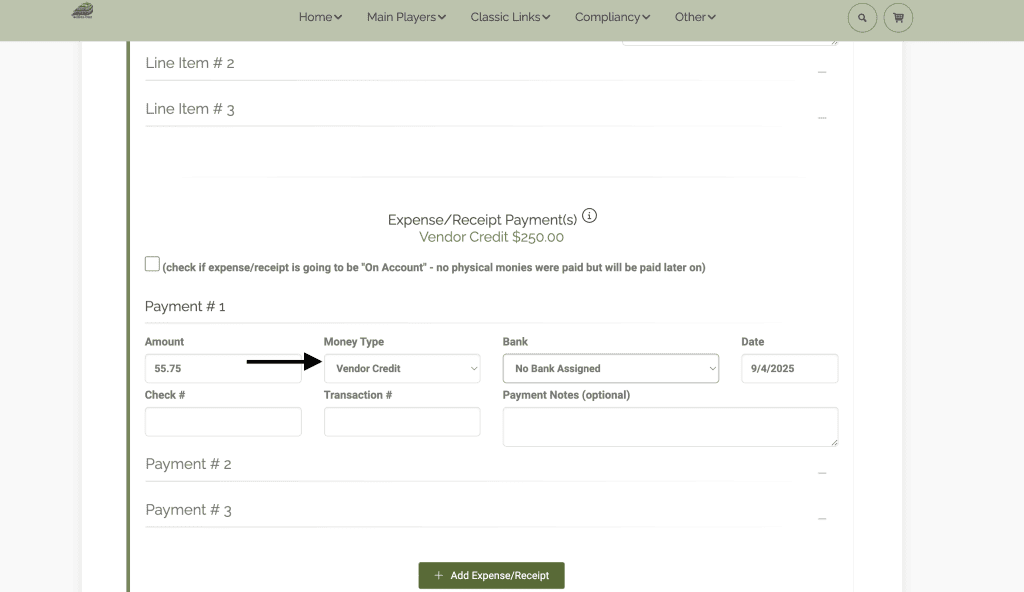
Here you can see where this credit was subtracted from the original total.
From the vendor you can also look at their credit.
Our next update will demonstrate how to automatically apply a vendor credit by using payables.
As always, please feel free to reach out to Technical Support at 720-740-3046 or email support@adilas.biz if you have any questions, concerns, or suggestions.