Please note that all new harvests will be able to access the new functions upon creation. For existing harvests, there is one additional step to follow.
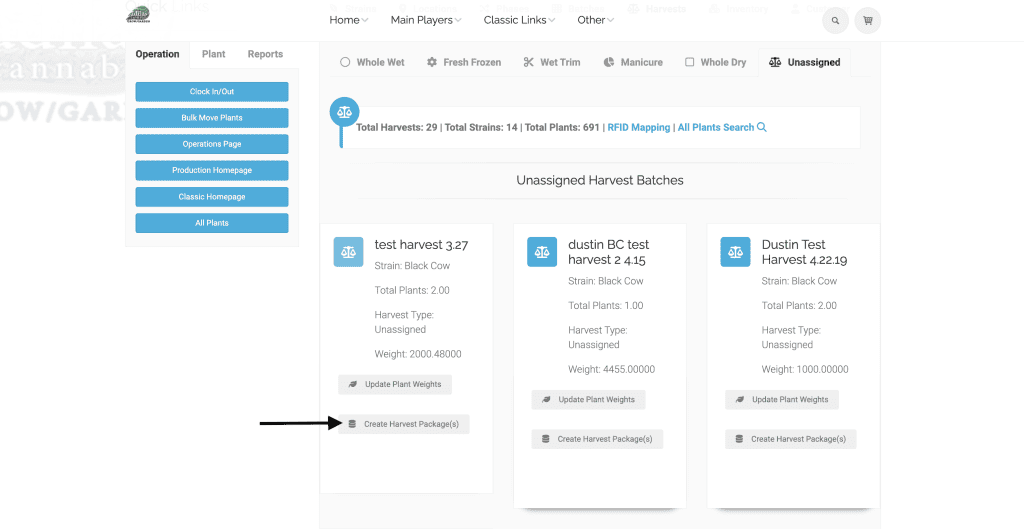
From the cultivation homepage click on Harvests tab.
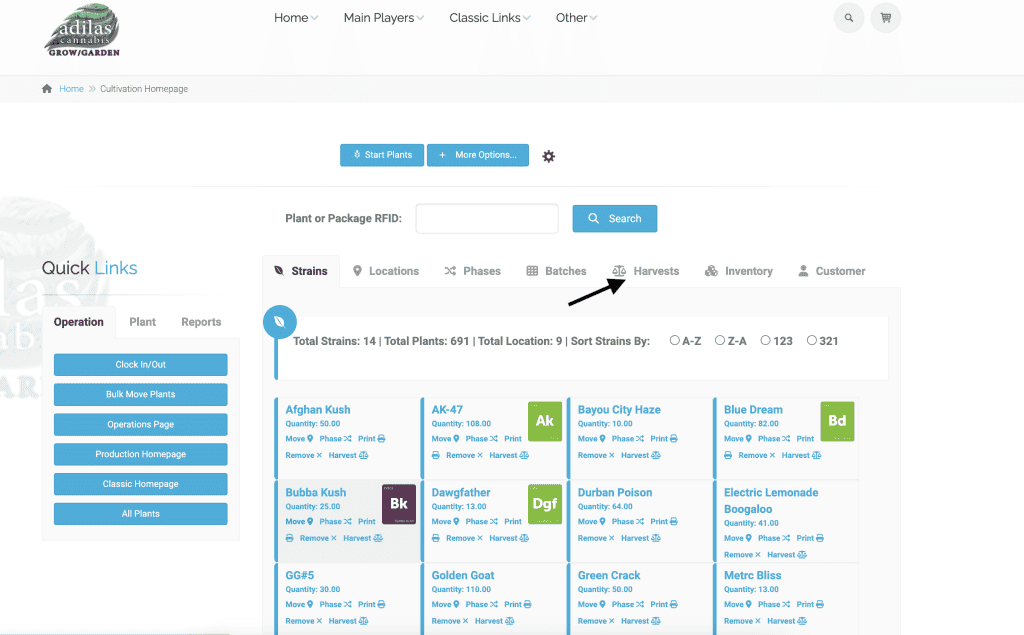
Then choose the harvest type you had assigned to the harvest you wish to package. In this scenario, the harvest was unassigned.
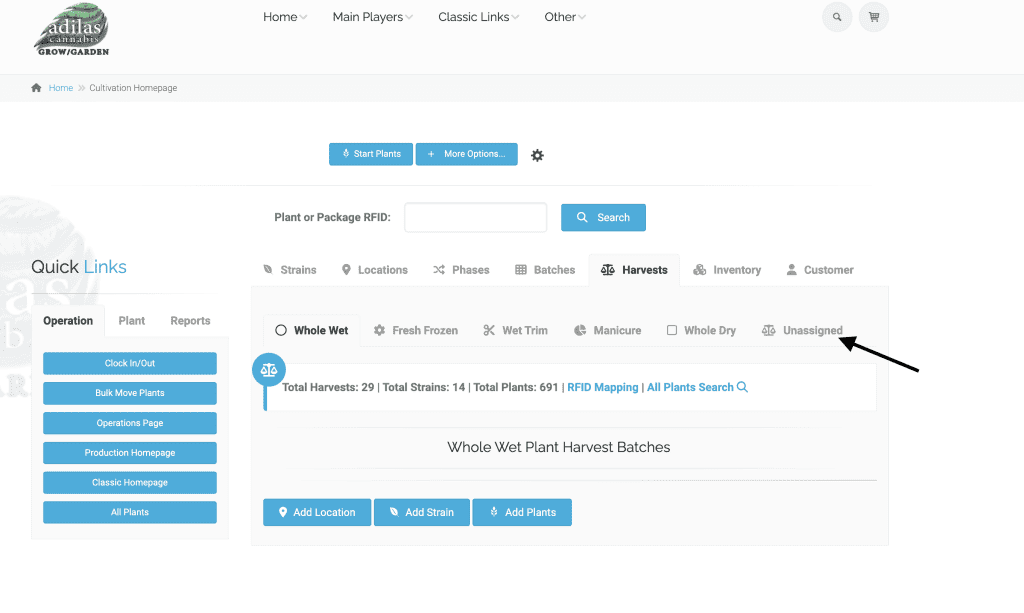
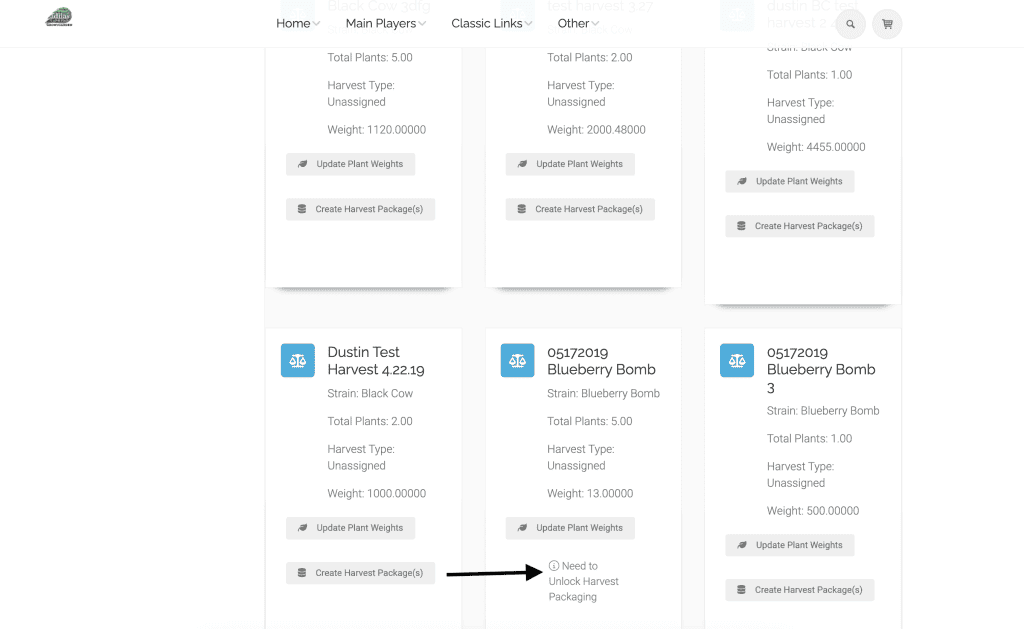
If your harvest is new, it will say ‘update plant weights’ or ‘create harvest package.’ If it is pre-existing, it will say ‘update plant weights’ and there will be a note: ‘i’- Need to unlock harvest packaging. Click on the ‘i’ for more information.
The modal will let you know you need to first click on ‘update plant weights.’
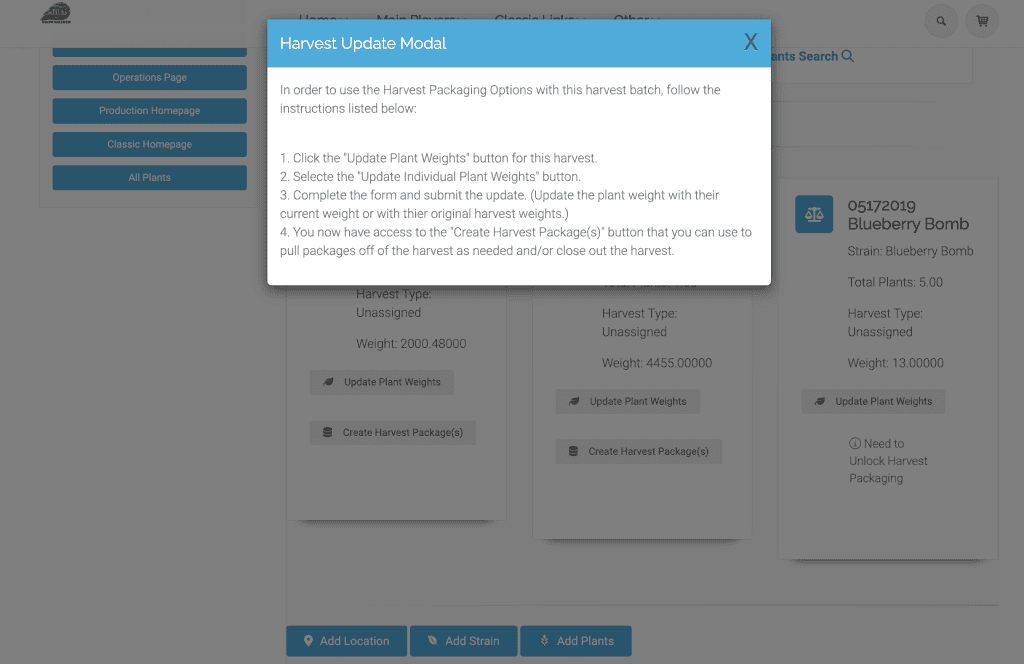
After you update plant weights (same function you have been using for harvesting), click on create harvest packages.
There is one default packaging type that will appear on the page, as well as a waste option. You will need to click on the question mark on the right side of this page to add more options.
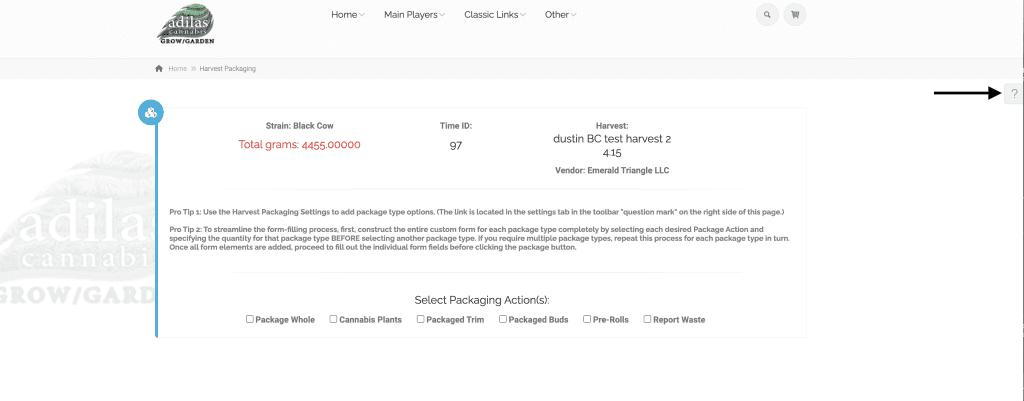
Then click on the link for settings, then harvest packaging settings.

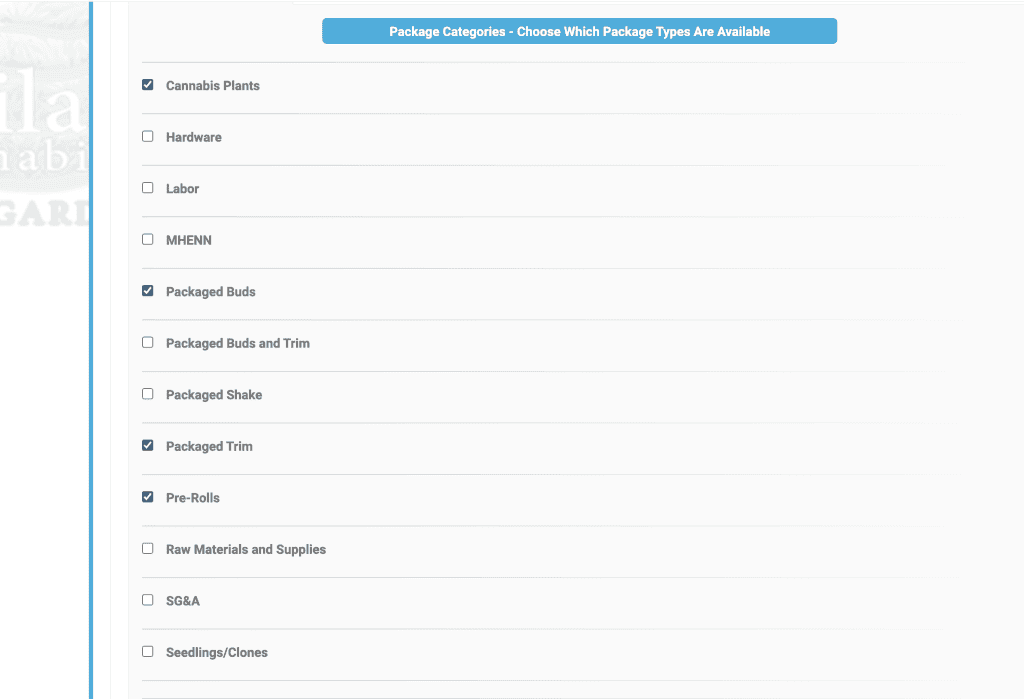
Select the boxes for the categories you will be using for packaging and click submit.
Now you will see all of the categories you added. **It is helpful to read the pro tip before starting. Also noteworthy… If METRC is turned on, an additional packaging action for Testing will auto-populate.
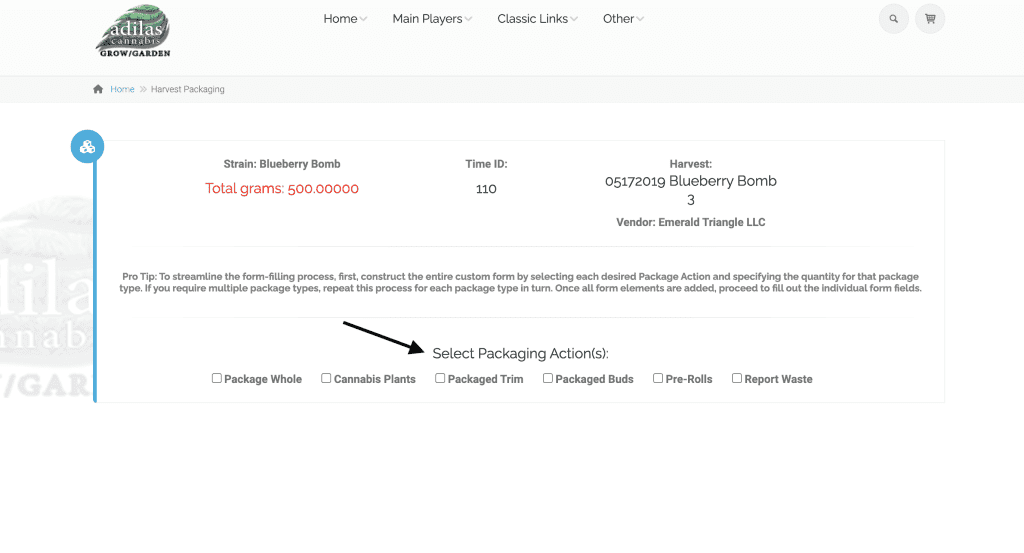
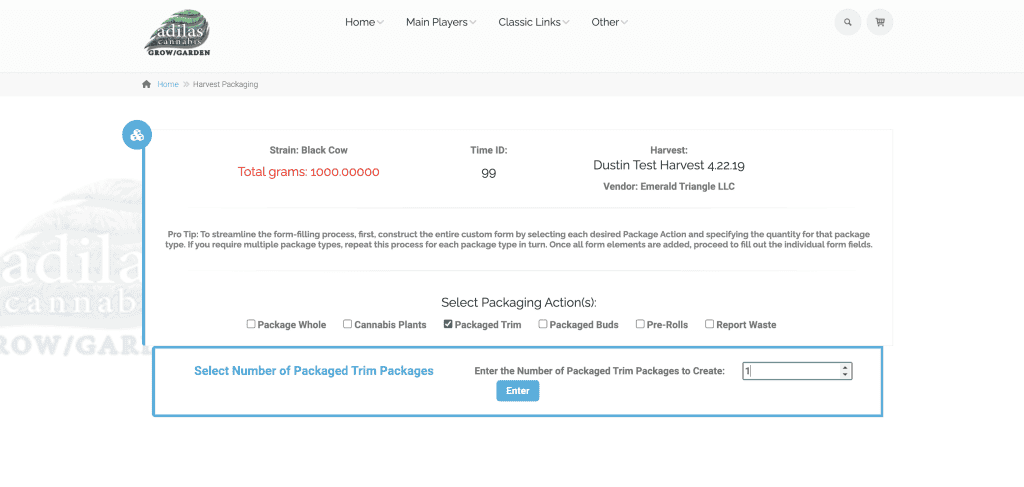
In this example we will package trim and buds. **Please note, as the pro tip explains, it is important to select a packaging action and how many packages you wish to create in that category and hit enter. Do not select another packaging action until you have finished these steps.
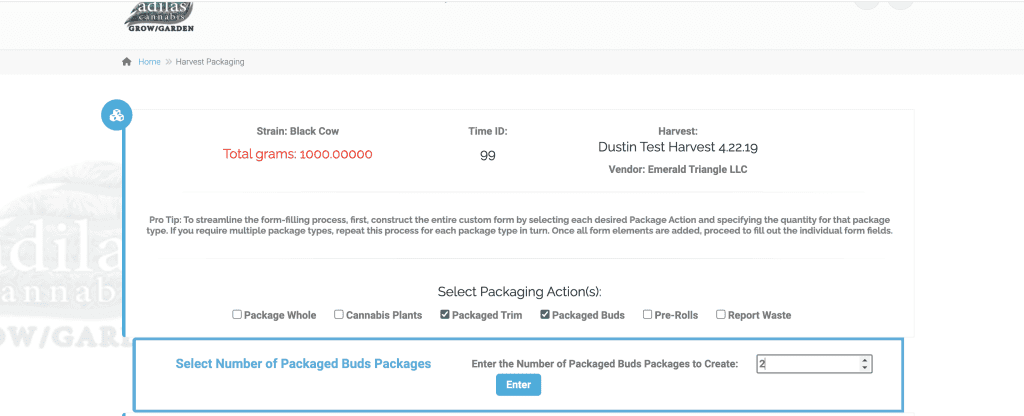
Now that we have created our trim package, we can move on and select the packaged buds packaging action.
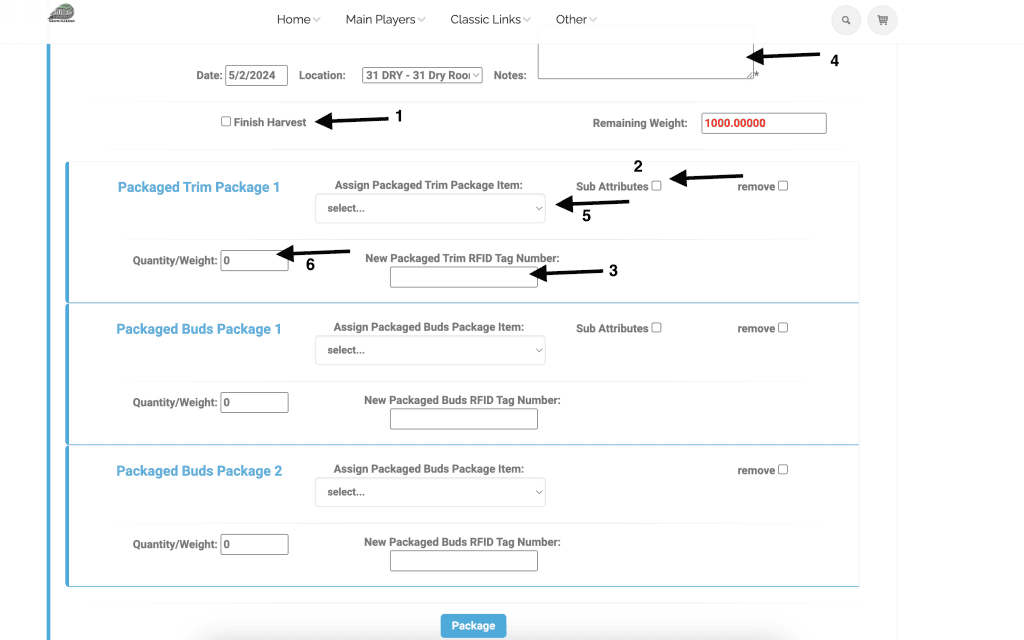
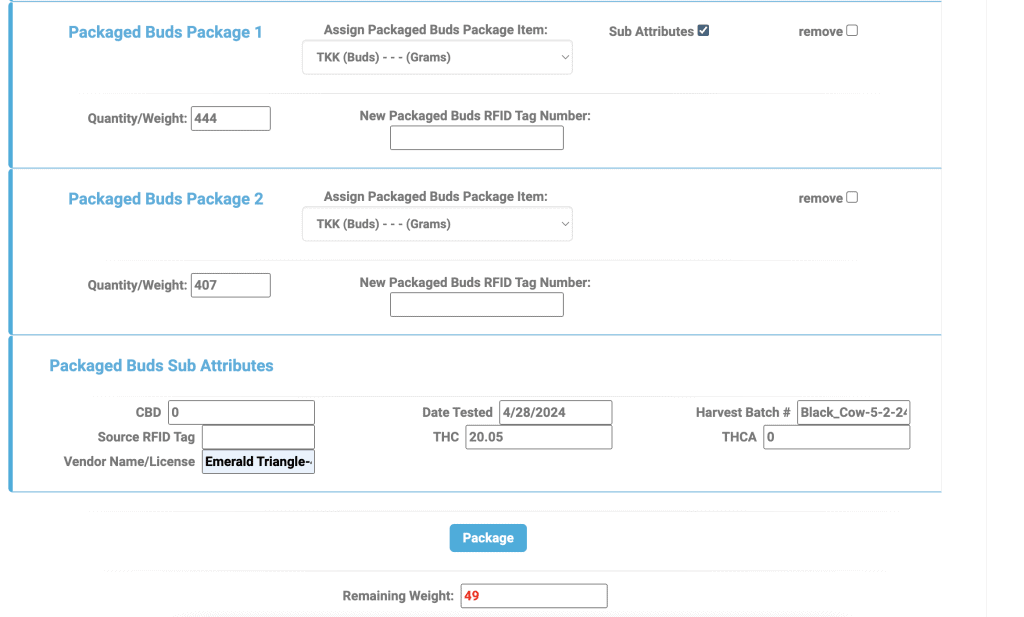
Now we have all of our fields ready to populate. There are many options on this page. 1)You can finish your harvest by checking the box, or if you aren’t ready to do so, you may leave it open. 2) You may add sub attributes at this time that will carry over onto the PO. 3) You can add an RFID tag.
4) You are required to add a note. 5) You must choose an item from the dropdown list. 6) The weight is required. **Please note: if numbers 4-6 are not populated you will receive an error and have to return to this page and recreate the data.
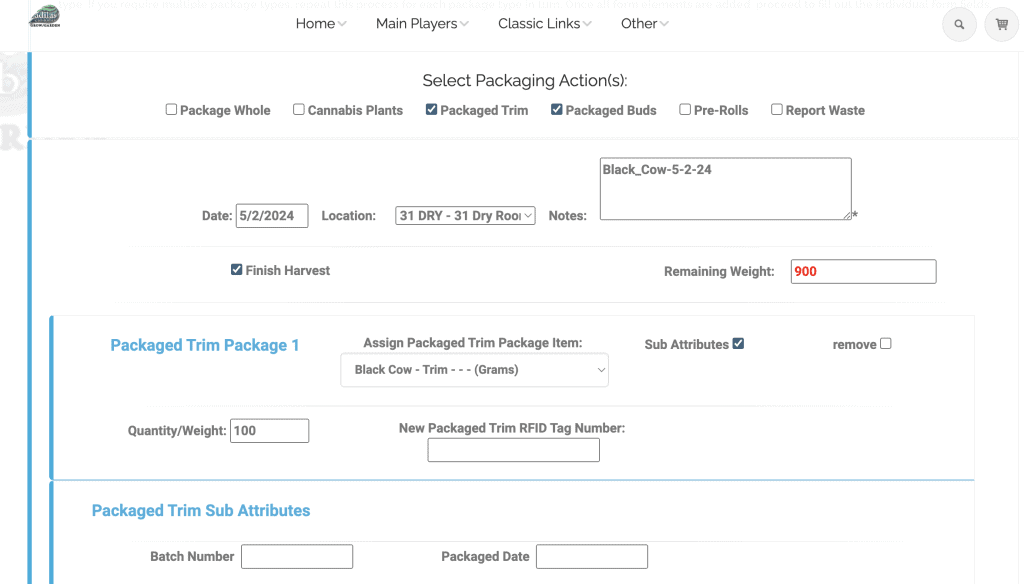
Now we can fill in the package data. Starting with the trim, in this scenario we will be finishing the harvest. We also want to populate the sub attributes. When we check that box, the sub attributes associated with the category will appear under the last package for that category. Since we only have one package for trim, we can see the sub attributes under package 1. We are not adding an RFID tag in this scenario.
Here is the data for the two packages of buds. The sub attribute fields are below package number 2. It will populate the sub attributes for both packages at once. Any weight remaining will be reported as waste.
Once you hit package, the PO will open in another window. If you have pop-ups blocked on your browser, you won’t see this and you will be directed back to the cultivation homepage. You can change your browser settings, or you can go to the PO homepage and find your PO at the top of the list.
The PO shows the two packages of buds and one package of trim, complete with sub attributes.
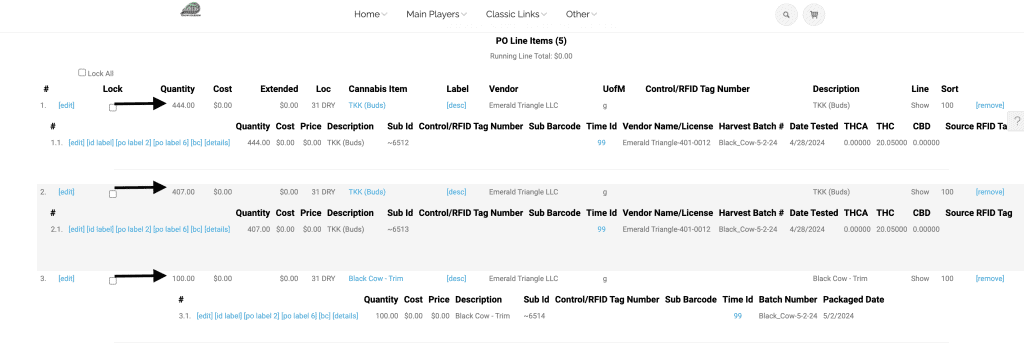
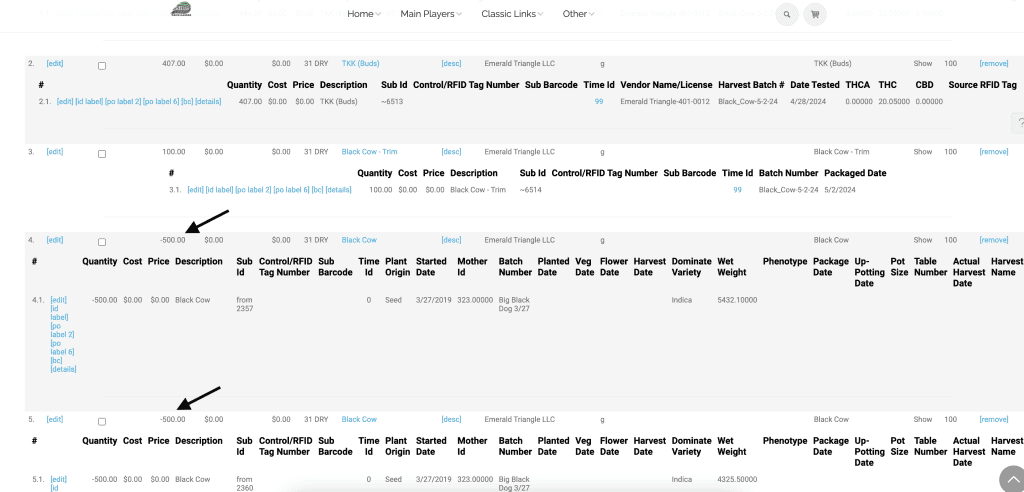
If you check the box for ‘finish harvest’ you will also see the plant PO’s with their weights as negatives on this PO. If you don’t finish the harvest, the plants will not be on the PO and will still be available for additional packaging.
As always, please feel free to reach out to Technical Support at 720-740-3046 or email support@adilas.biz if you have any questions, concerns, or suggestions.