

Have you already re-assigned your sub attribute names to better describe what is physically happening in your facility but you would like to run the new cannabis cultivation tracking functionality?
The New Cultivation Tracking requires several plant categories and sub inventory attributes to be in place in order to track each step of the cultivation process. Without them, it won’t know where you want your information to show up. Maybe you have never assigned any sub attributes or categories? Maybe you have and the functions and names of those sub attribute don’t match what is needed by Adilas’s new Cultivation Tracking? Or maybe you like the names and functionality of the sub attributes you have in place and don’t want them to change?
No Problem, we have you covered:
Our new Cultivation Settings Page can help!
Here’s how you do it:
- From the Cultivation Homepage, Click the Start Button.

- Click the gear at the top left of the Plant Batch form.
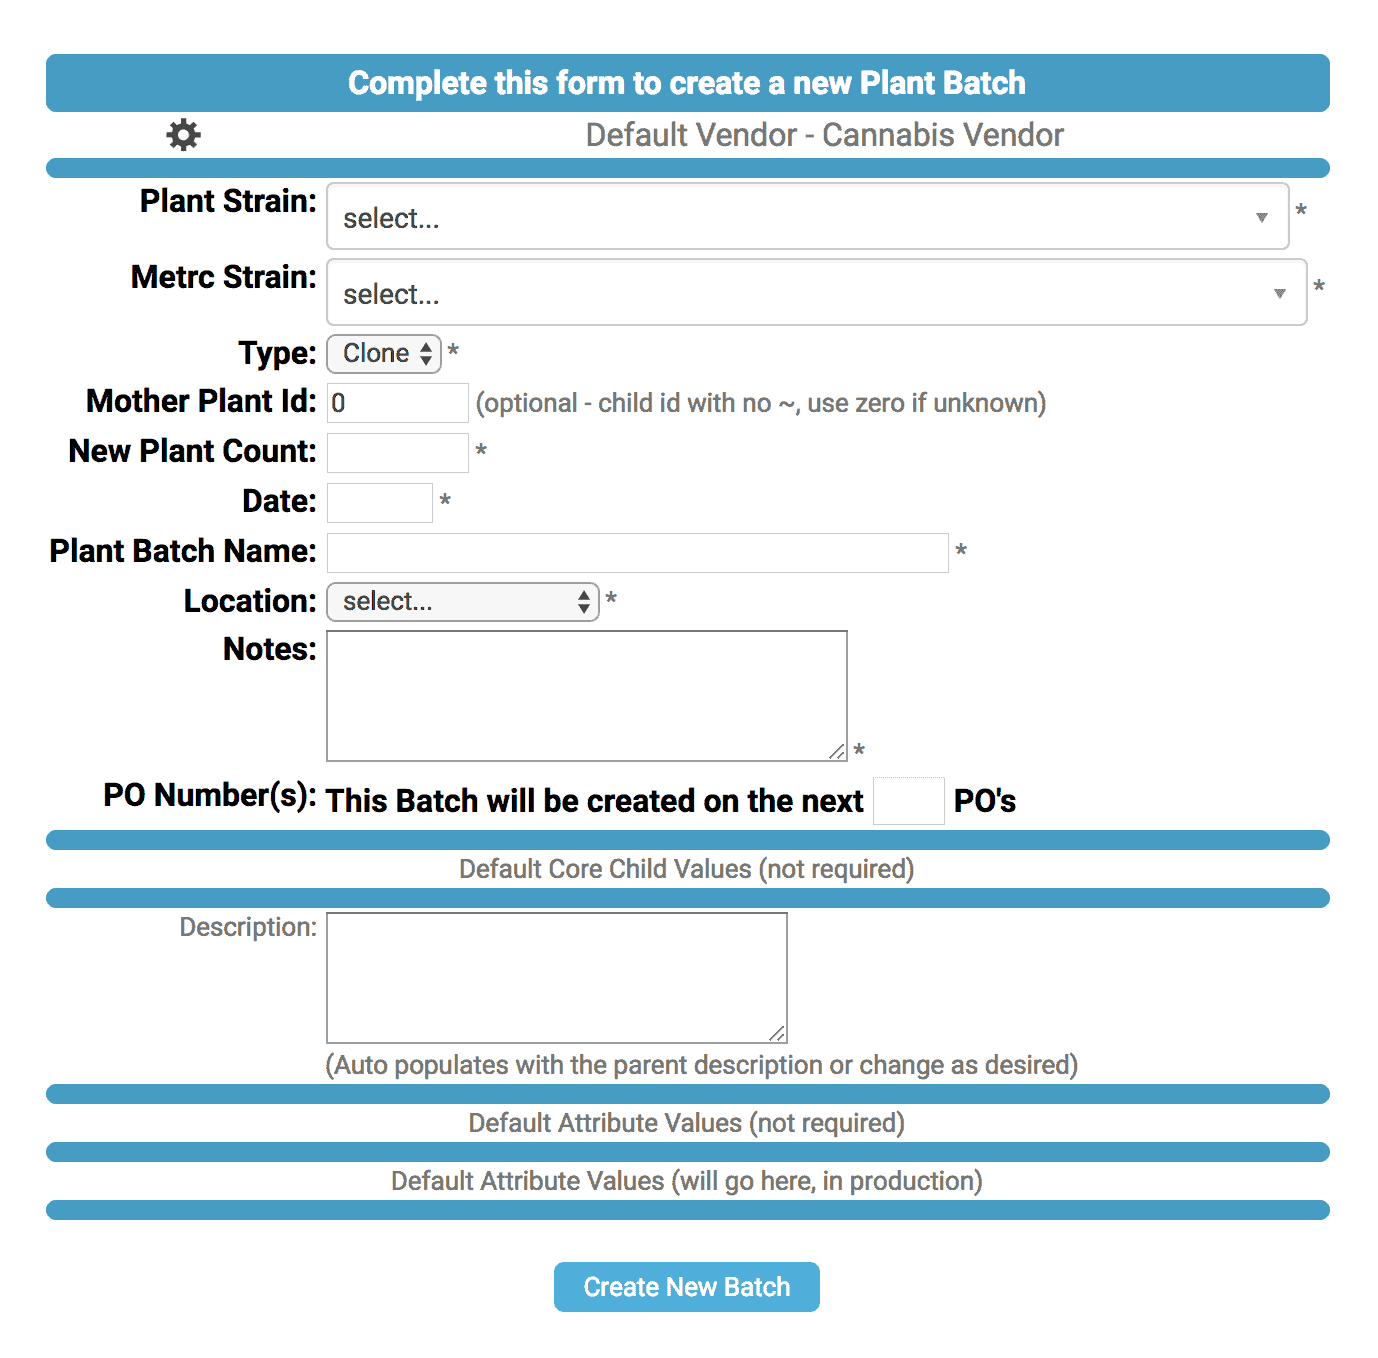
- Here is the tool that will let you MAP your attributes.
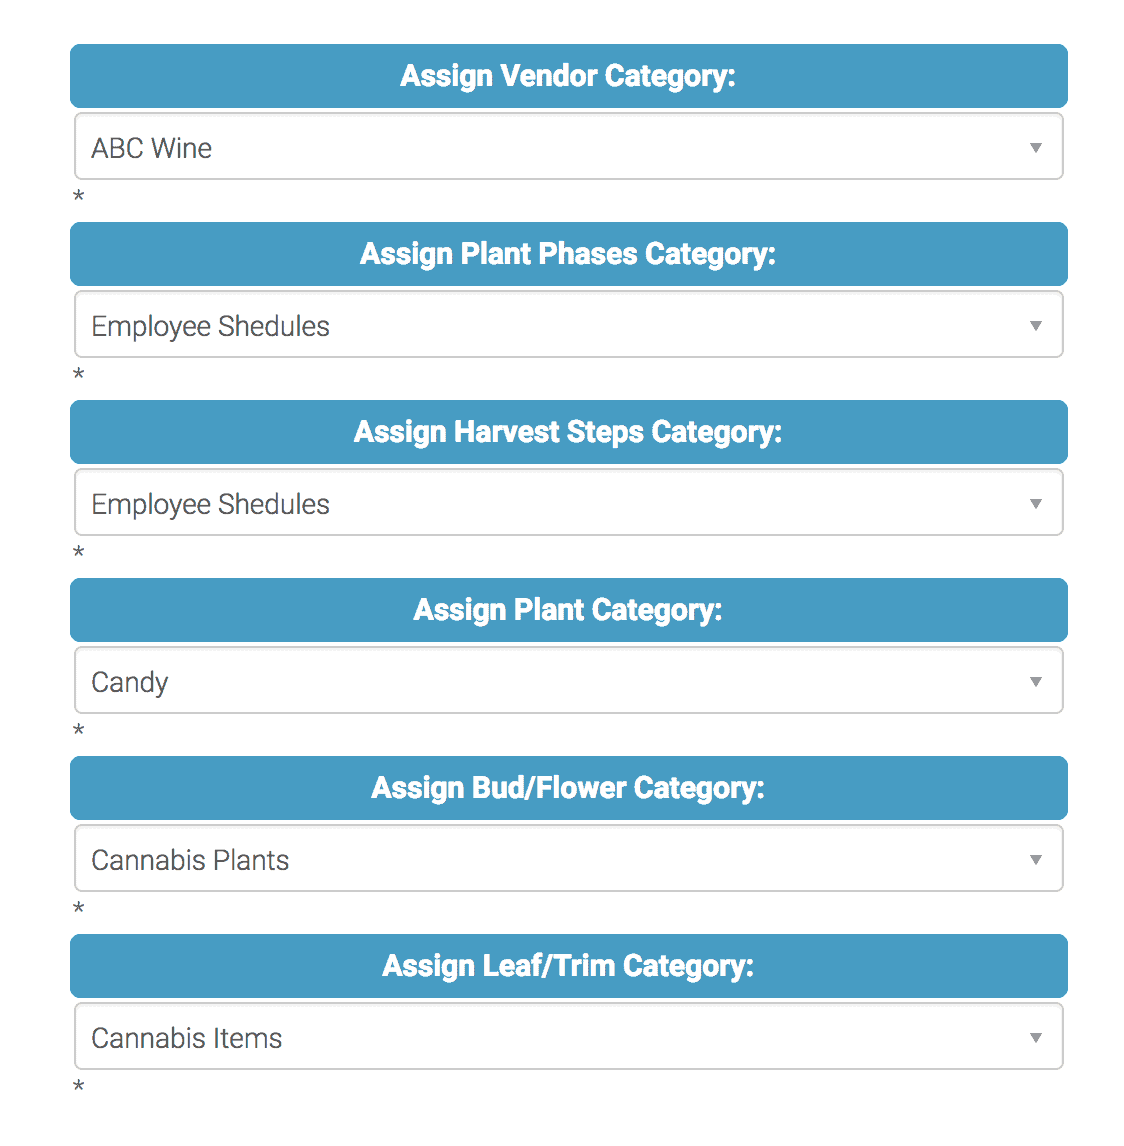
- You will need a category for Vendors, Phases, and Harvests.
- You will also need Sub Inventory Attributes for Mother Id, Plant Origin, Plant Batch Number, Wet Weight, Bud/Flower Batch Number, and Leaf/Trim Batch Number. This tool will help you get them.

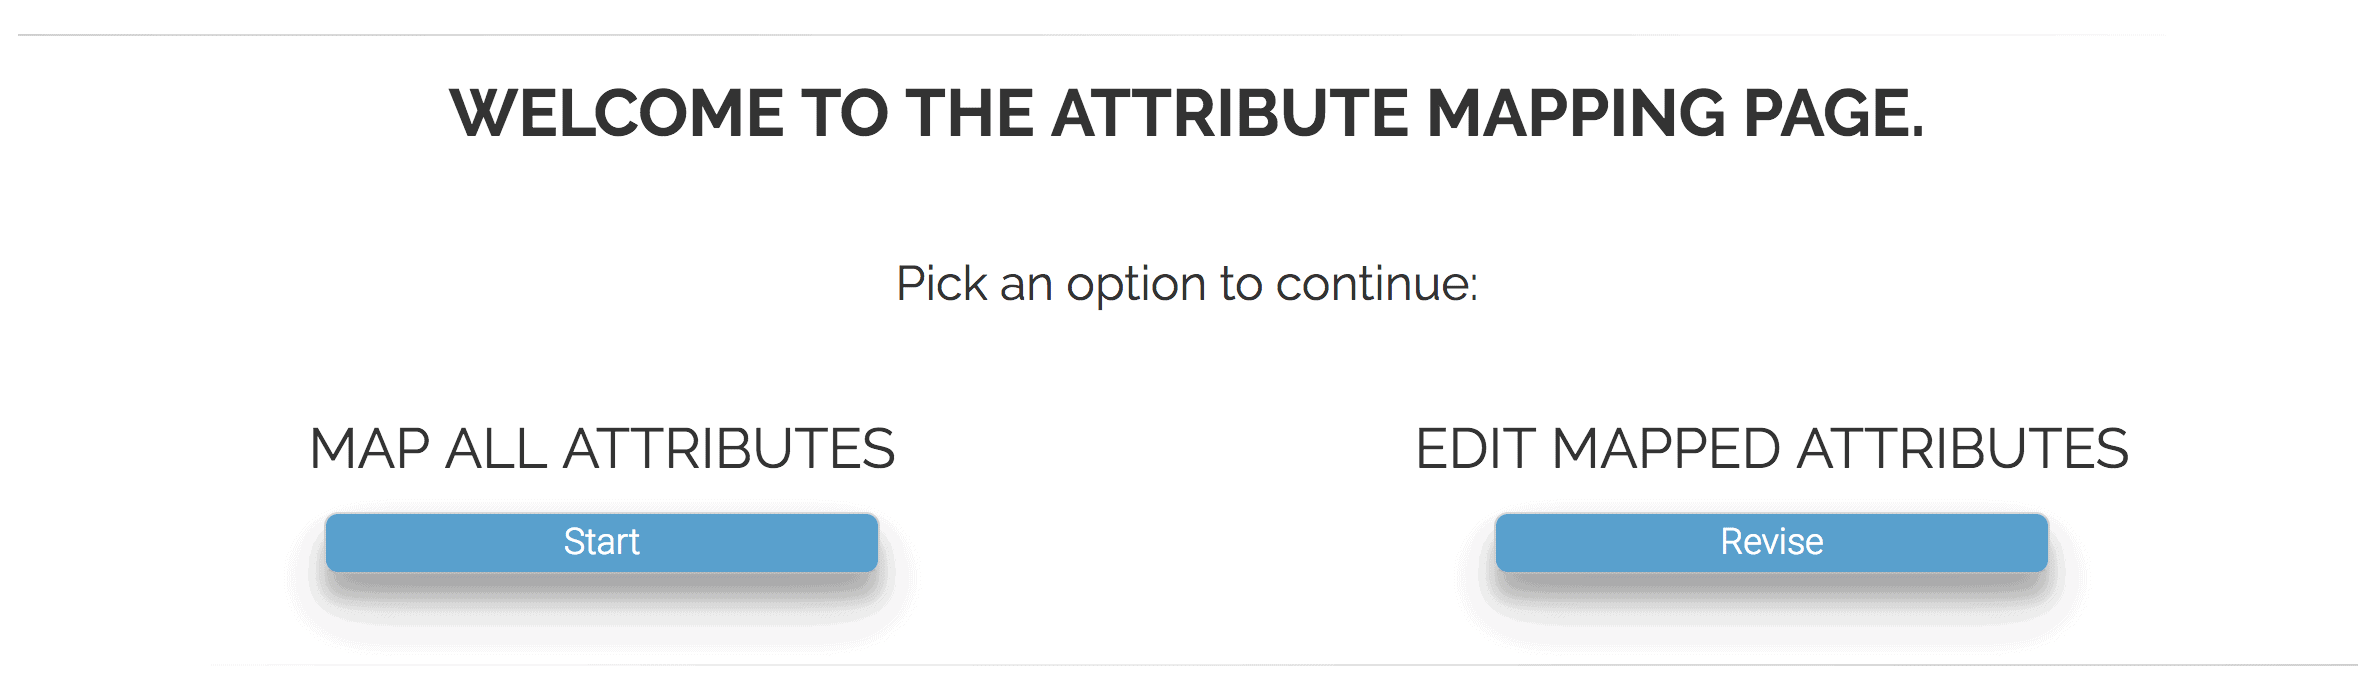
- If you have never mapped any attributes, click the “Start” Button.
- The software will now take you through each piece one by one.
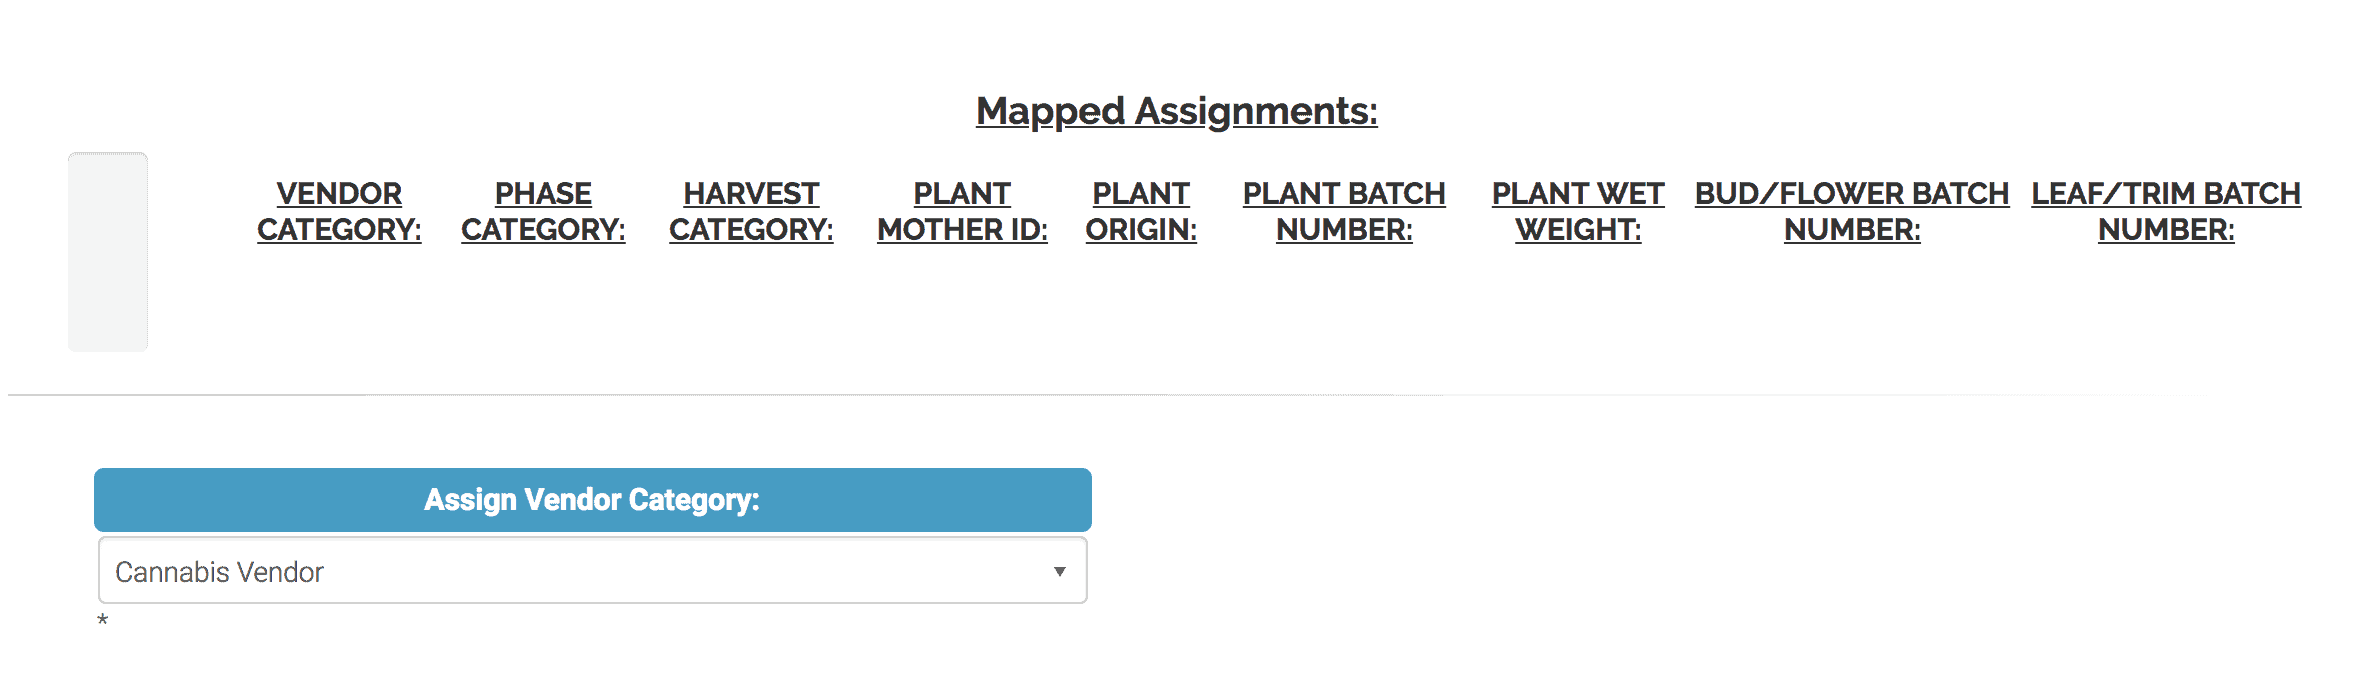
- First assign the Vendor Category you want assigned from the pulldown menu. Once you have selected one, it will show your selection in green at the top of the page.

- Next Select Phase Categories and Harvest Categories from the menus when prompted. Your selections for each of those categories will be displayed as well.

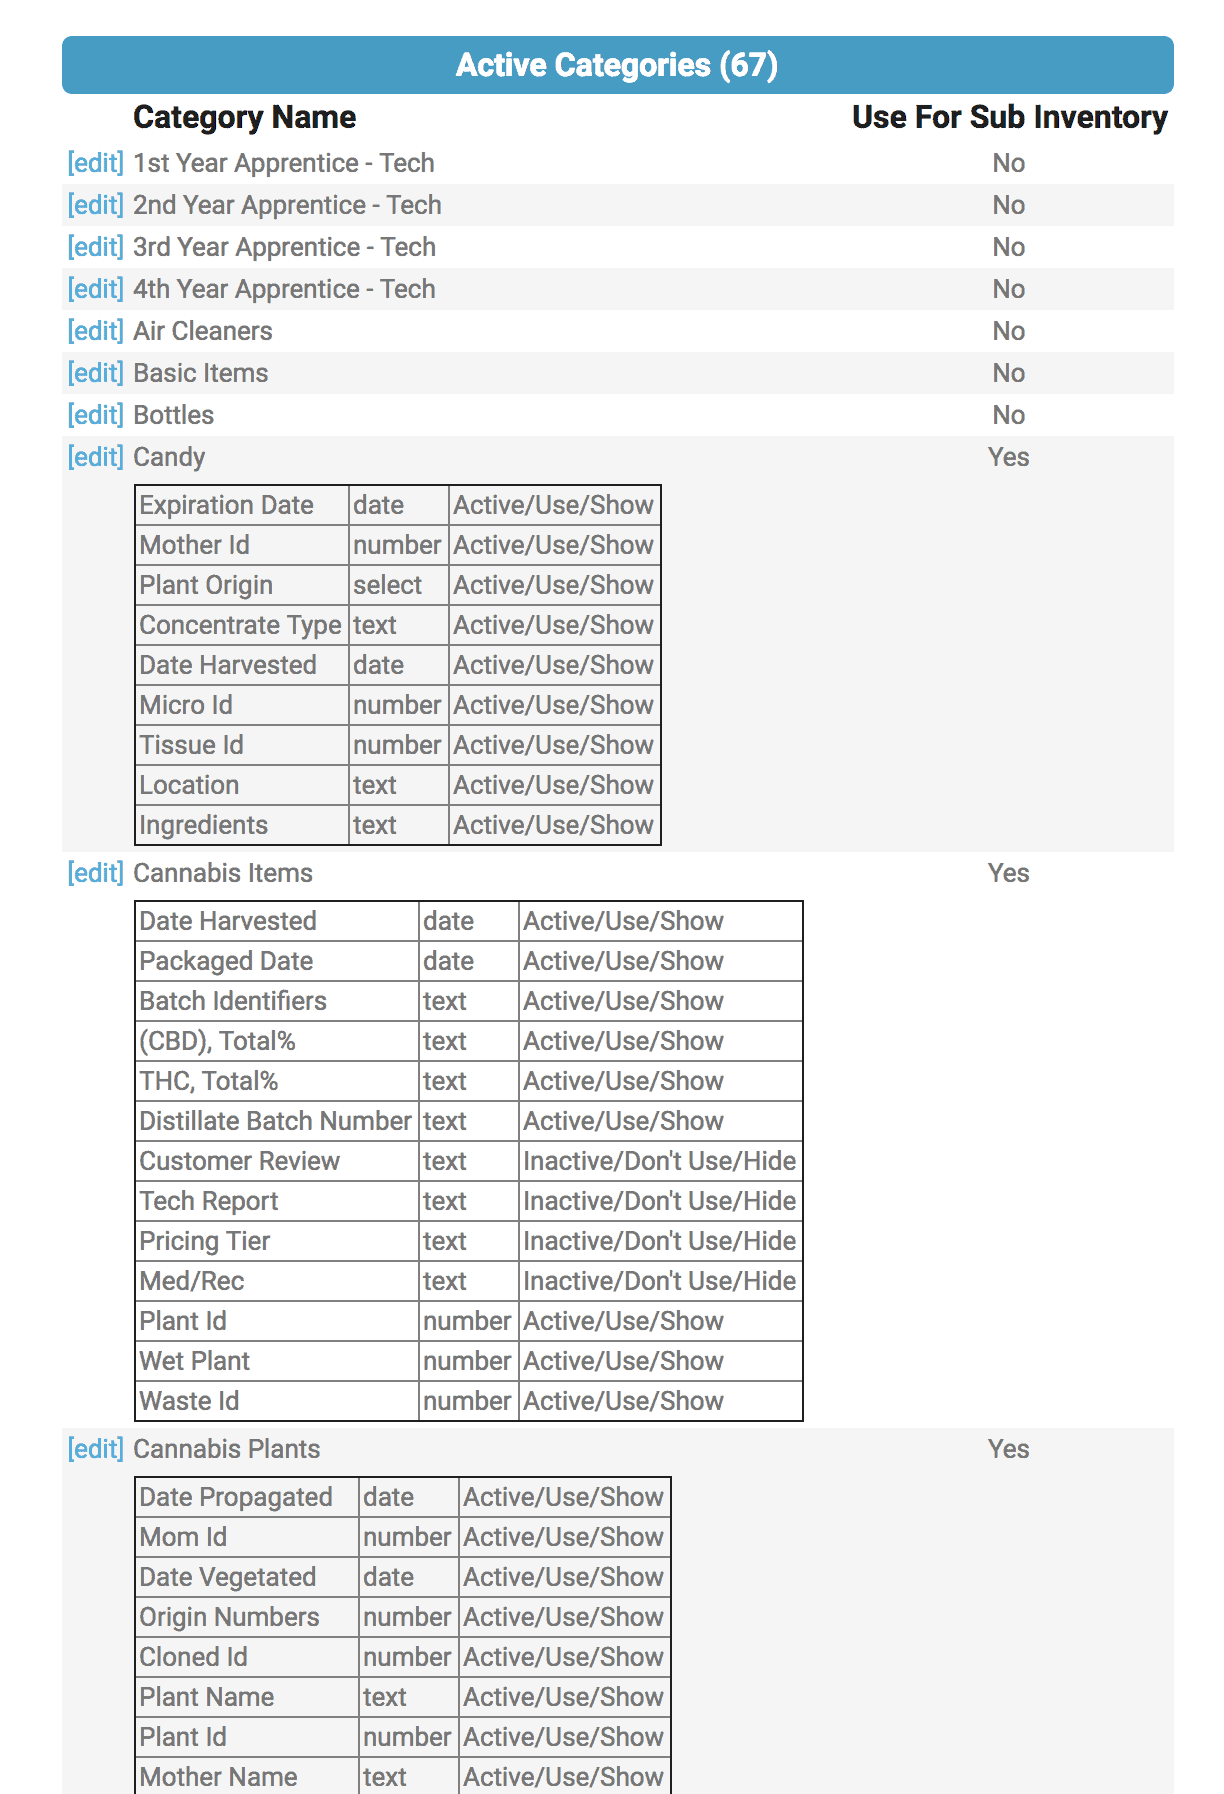
- Now pick a category from the Plant Category menu. When a category is selected, the corresponding Sub Inventory Attributes will be displayed to the right if you have created any. If you have not, a link to the “Sub Inventory Template Homepage” with be displayed. You may select a different category, or create some new attributes for the selected category by noting if it requires a Numeric or Text Based Sub-Attribute and then clicking on the link to the “Sub Inventory Template Homepage” to create a new sub inventory attribute.
- A new tab will open so you won’t lose your place. Next, select the category you would like to
assign new attributes to and click the edit button.
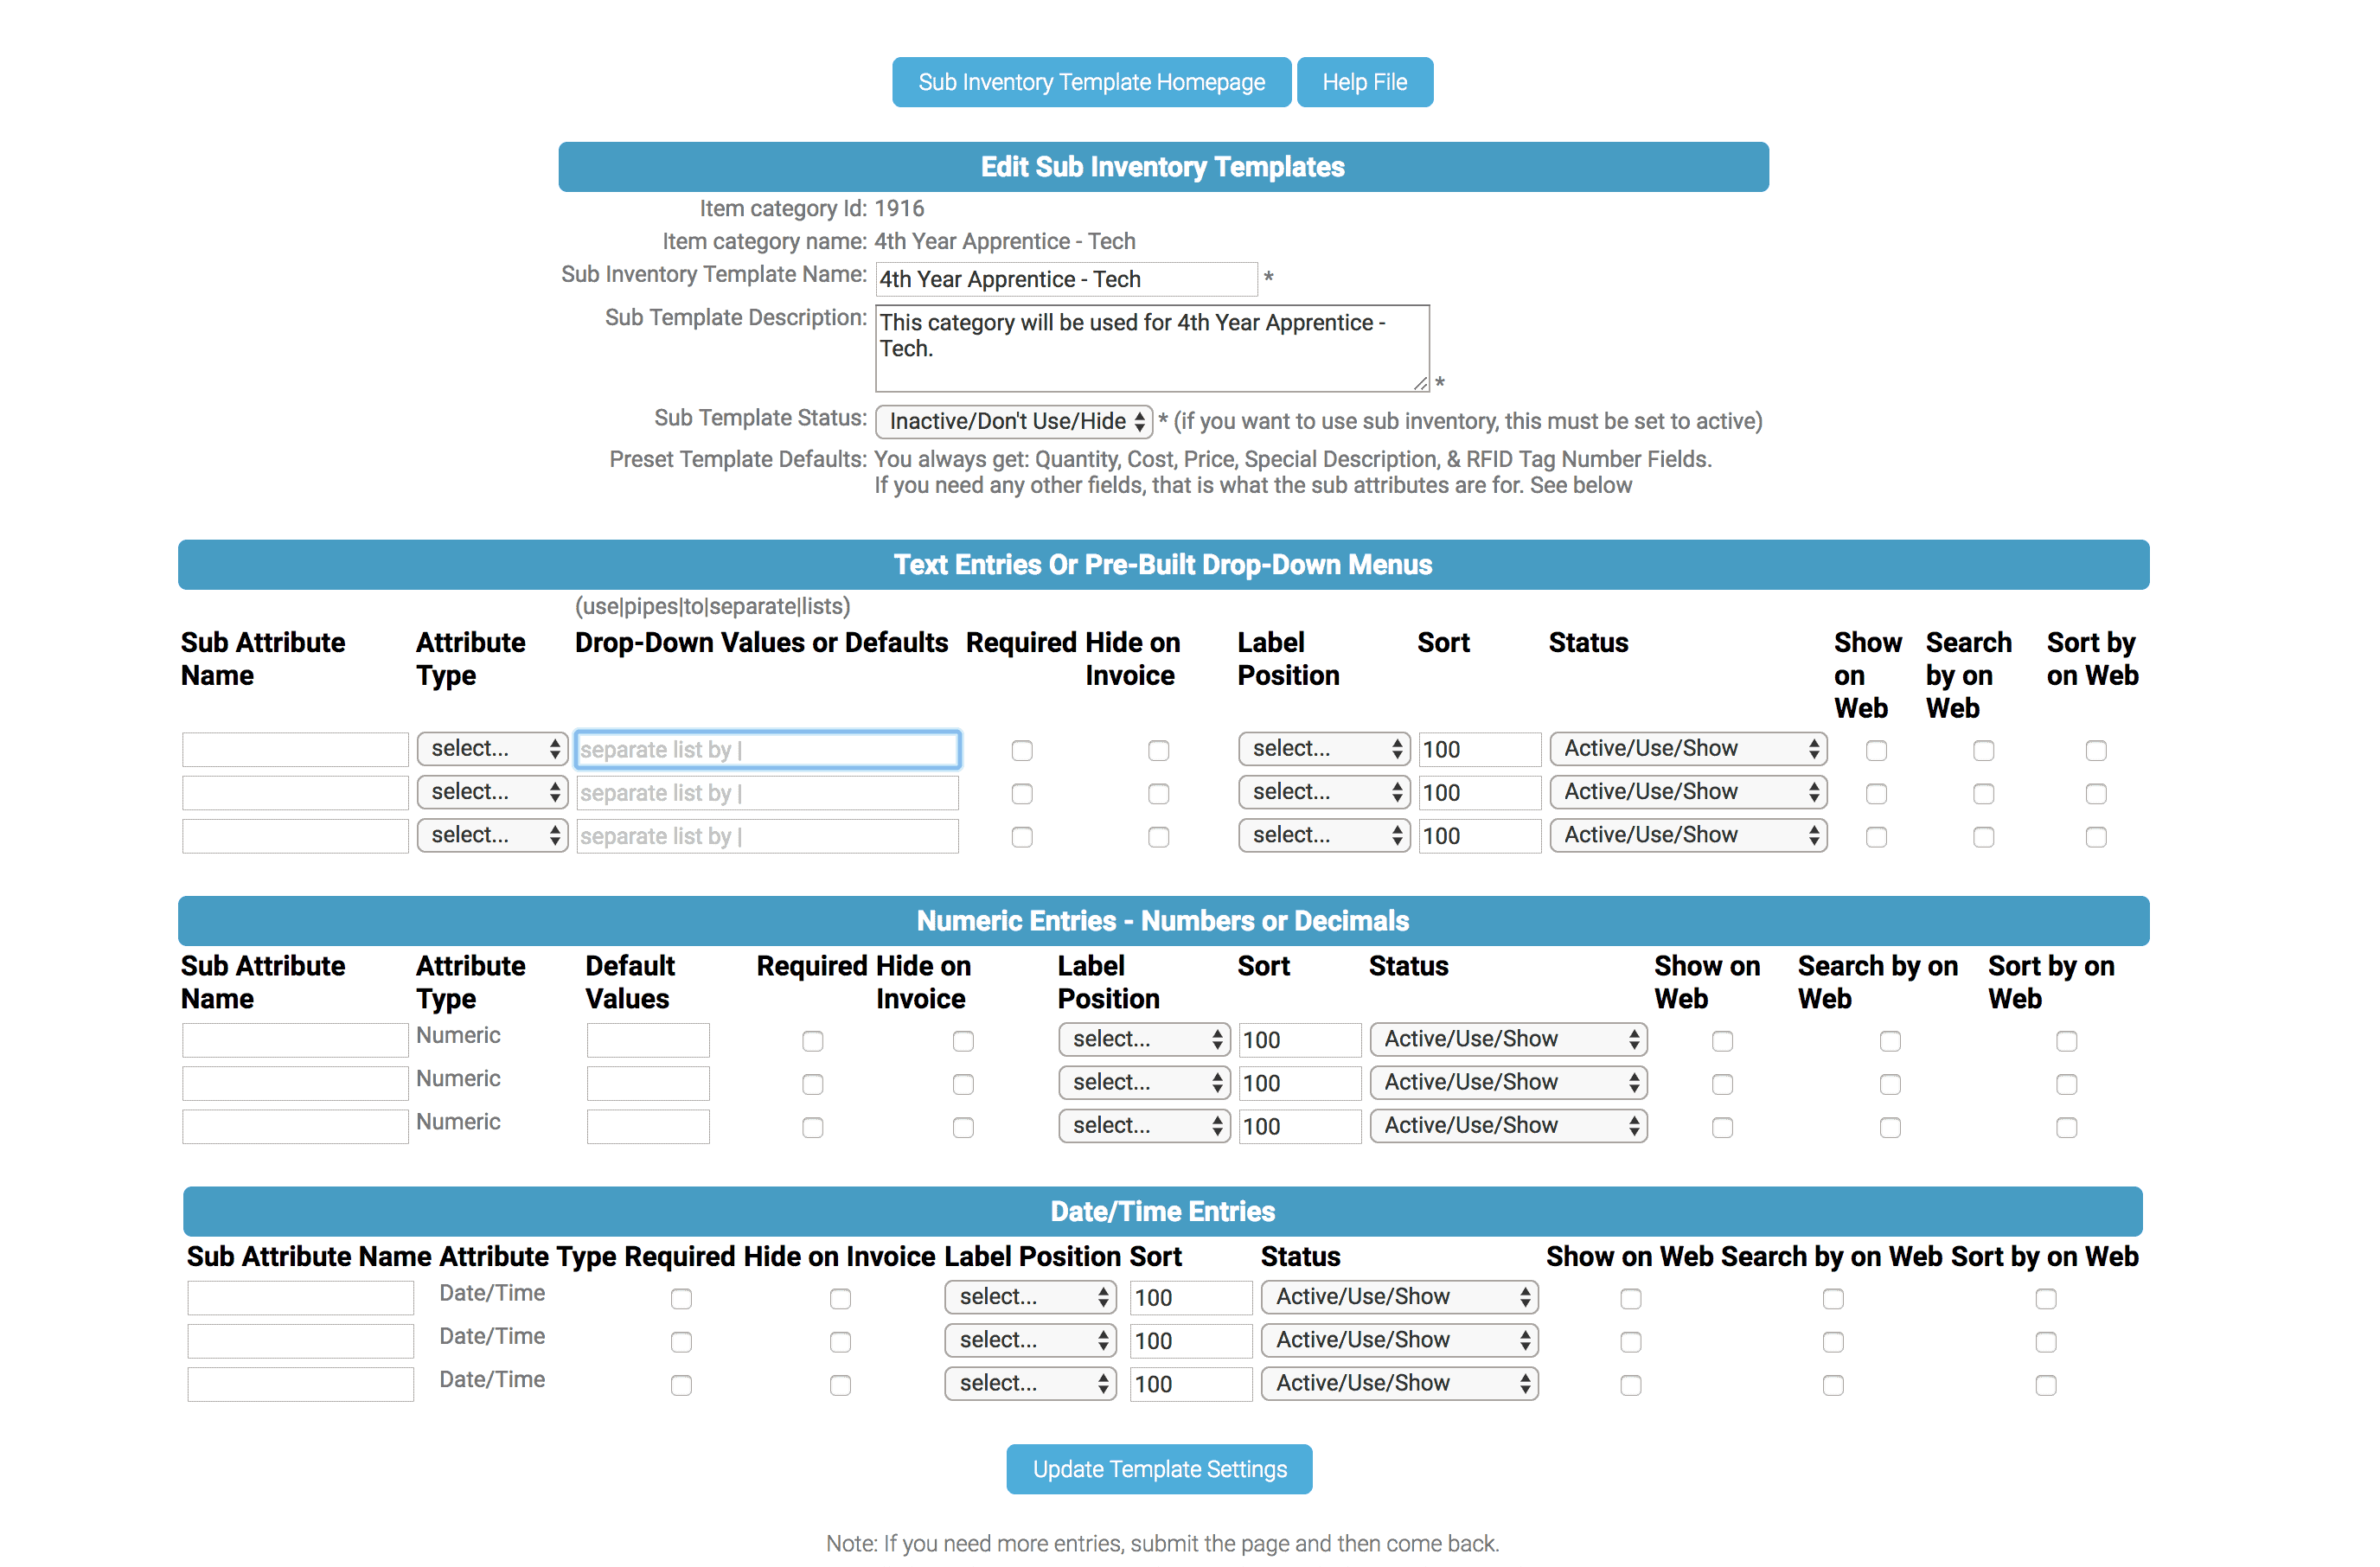
- Write in the name for your new attribute, pick the attribute type if it is a “Text” type attribute or enter a default value (usually zero) if it is a “Numeric” type, then click the “Update Template Settings” Button. NOTE: You will want at least two “Text” type attributes and two “Numeric” type attributes for the “Plant Category”
- Click the “Cannabis Defaults” Tab at the top of the screen to view the Mapping page and re-select the desired category. Now your new attributes will show up to be selected.
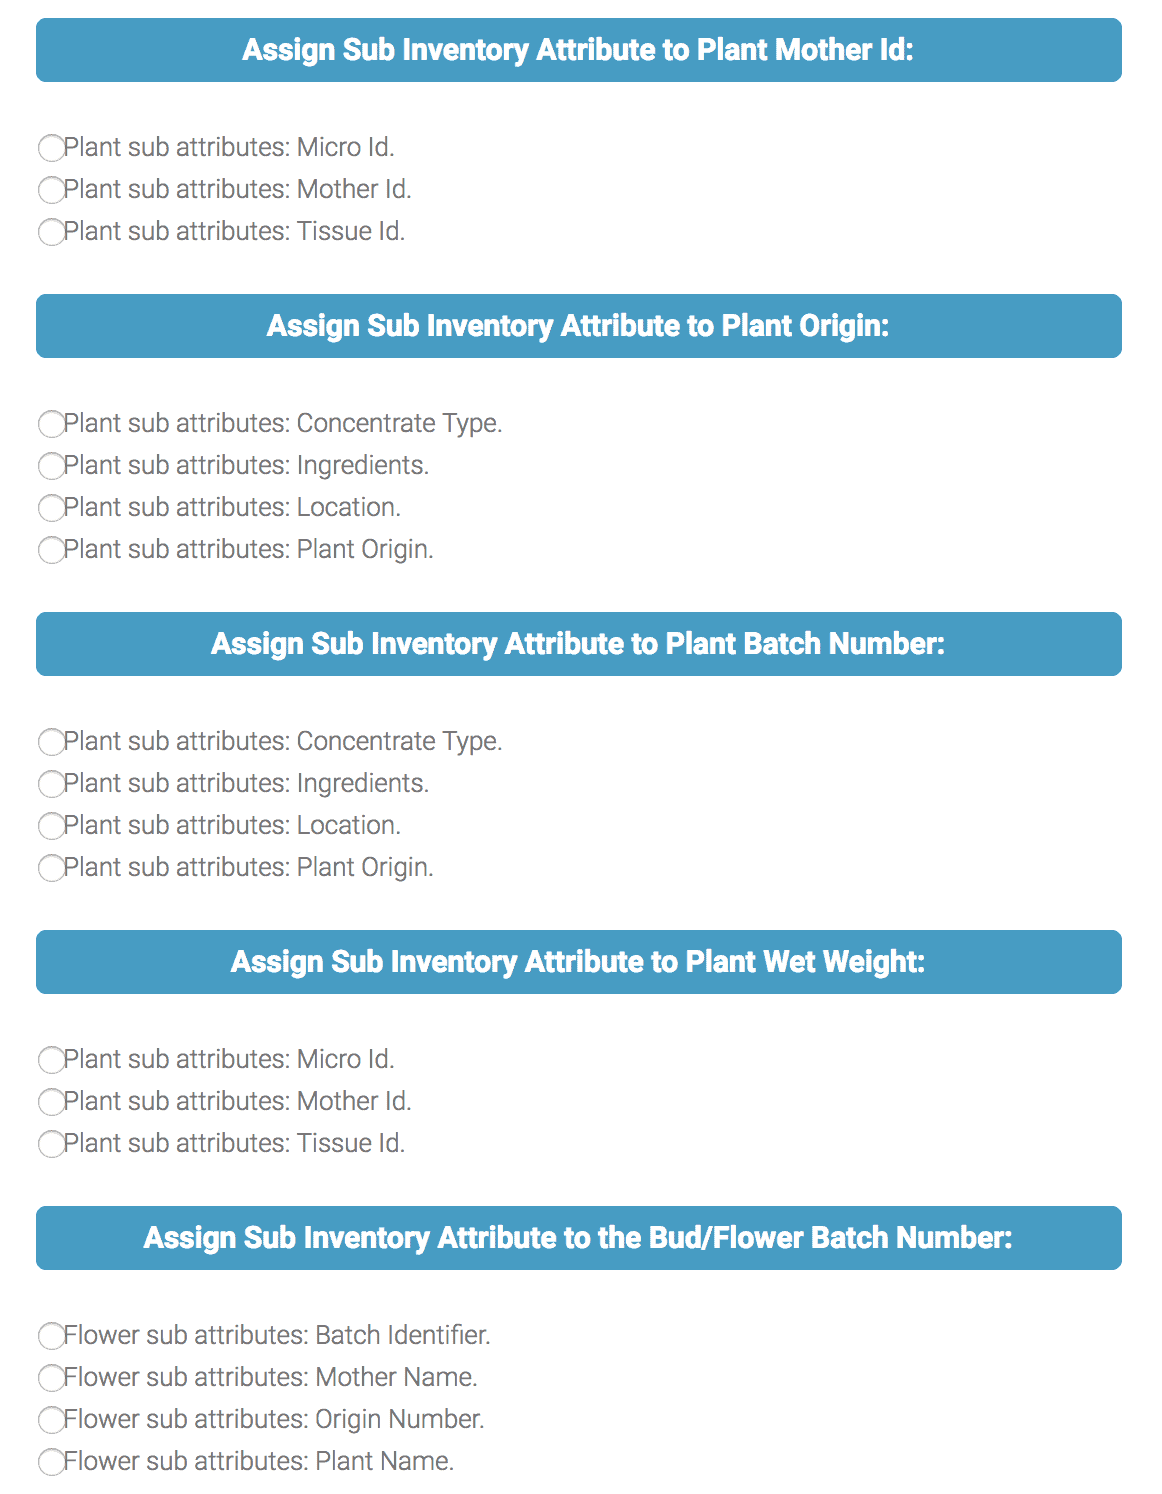
- The available sub attributes will be displayed one at a time to assign to the “Plant Mother Id”, “Plant Origin”, “Plant Batch Number” and “Plant Wet Weight”.
- Once assigned, you will be prompted to choose a Bud/Flower Category and sub attribute, and lastly a Leaf/Trim Category and sub attribute.
Finally, click the “Submit” button to map your attributes. You will then be automatically directed back to the plant batch page to start using the new cultivation functionality.
If you have previously mapped sub inventory attributes but would like to swap them out:
- From the “Cannabis Defaults page”, click the “Revise” button.
- All of your category and sub inventory attribute assignments will be displayed at the top of the page along with all of the available categories, and the sub inventory attributes will be displayed below. Select each category or sub attribute you would like to swap out and then click the “Submit button” when done.
At the end of the post there are a couple short videos that also explain how to set or edit the cultivation homepage settings.