Adilas Has Begun Beta Testing New Functionality: Bulk Actions For Plant PO’s
Are you ready to take your plant tracking and handling to the next level? Sign up for Beta Testing our new bulk print functionality and you will be able to:
- Create multiple plant PO’s and assign them with just a few clicks;
- Change the phase of any number of plants at the same time with our simple interface;
- Print plant tags for as many plants as you want at the same time, from one screen;
- Move any plants you choose to a new location within your facility all at once;
- Group and harvest plants as you see fit with the press of a button; and,
- Easily track the timing and status of plants in any phase.
Here is how it works:
- Email support@adilas.biz to let us know you would like to sign up for Bulk Plant Action Beta Testing, and we will work with you to set up the templates in your system.
- Links for “Move”, “Phase”, “Group”, “Remove”, and “Harvest” will now be available to you on your cultivation homepage. This is where these powerful new tools are accessed.

Create Many Plant POs:
- Click the “Start Plants” Button.

- Fill out the form to assign a strain, type, mother id, number of plants, batch name, location, and notes. Then, click “create new batch”.
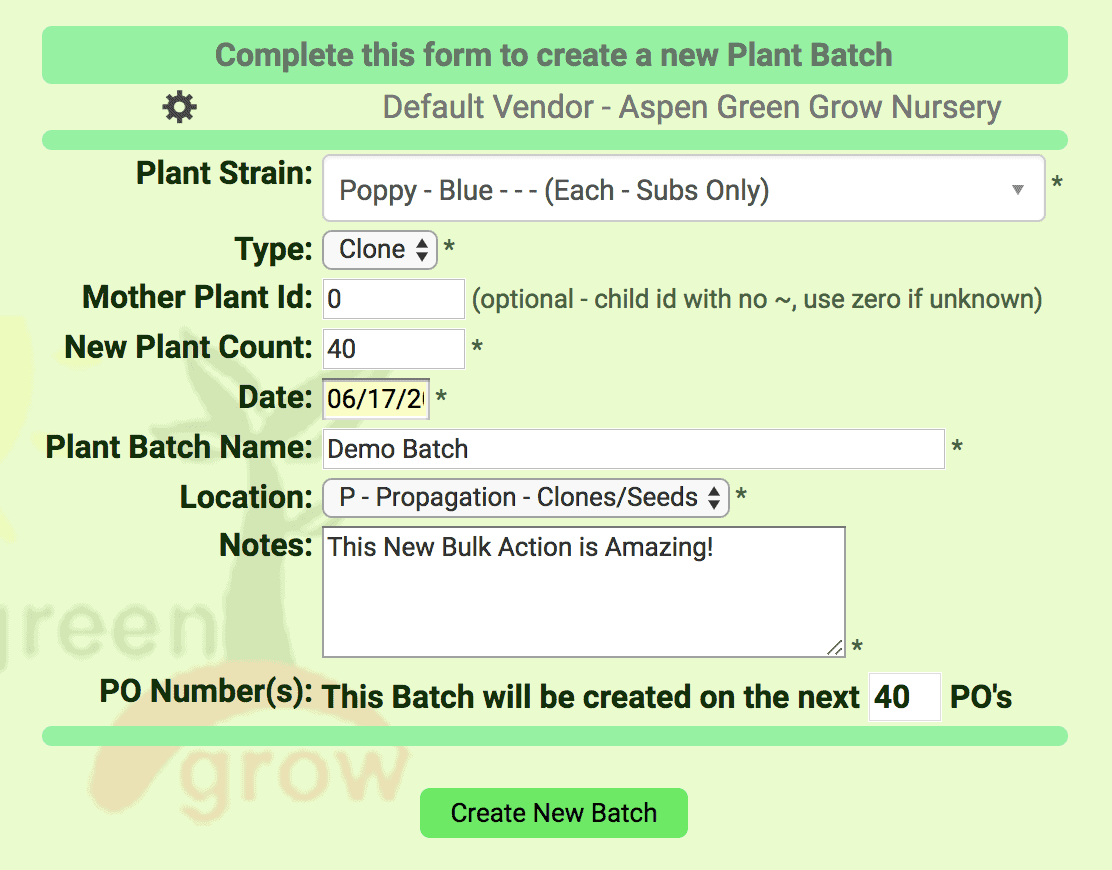
- You have just created many new plant POs.
Change phases and print plant tags:
- Click the “Phase” link on the set of plants you want changed.
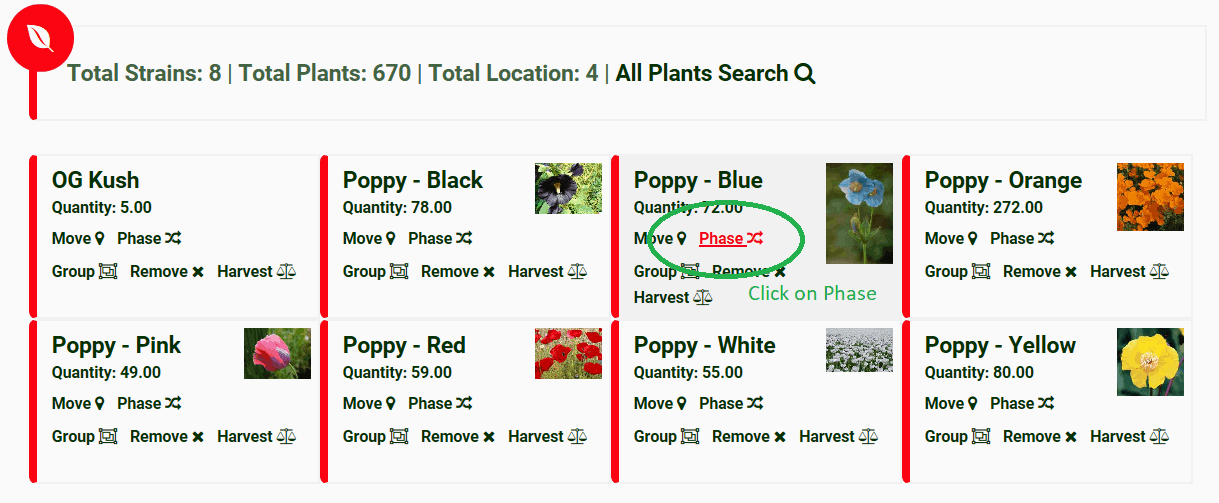
- You will be shown a table with all of the plants in that category. Click the “All’ Checkbox to act on all of the plants. Or, alternately, filter your selection through the search bar or with any of the table selectors, and click the checkbox of any of the specific plants you want to act upon.
- At the bottom of the page, select “New Phase” from the pulldown menu, pick a start date and time, add in any special notes, check the “Bulk Print Labels” checkbox if you want to print plant tags, and press the “Update Plants” button.
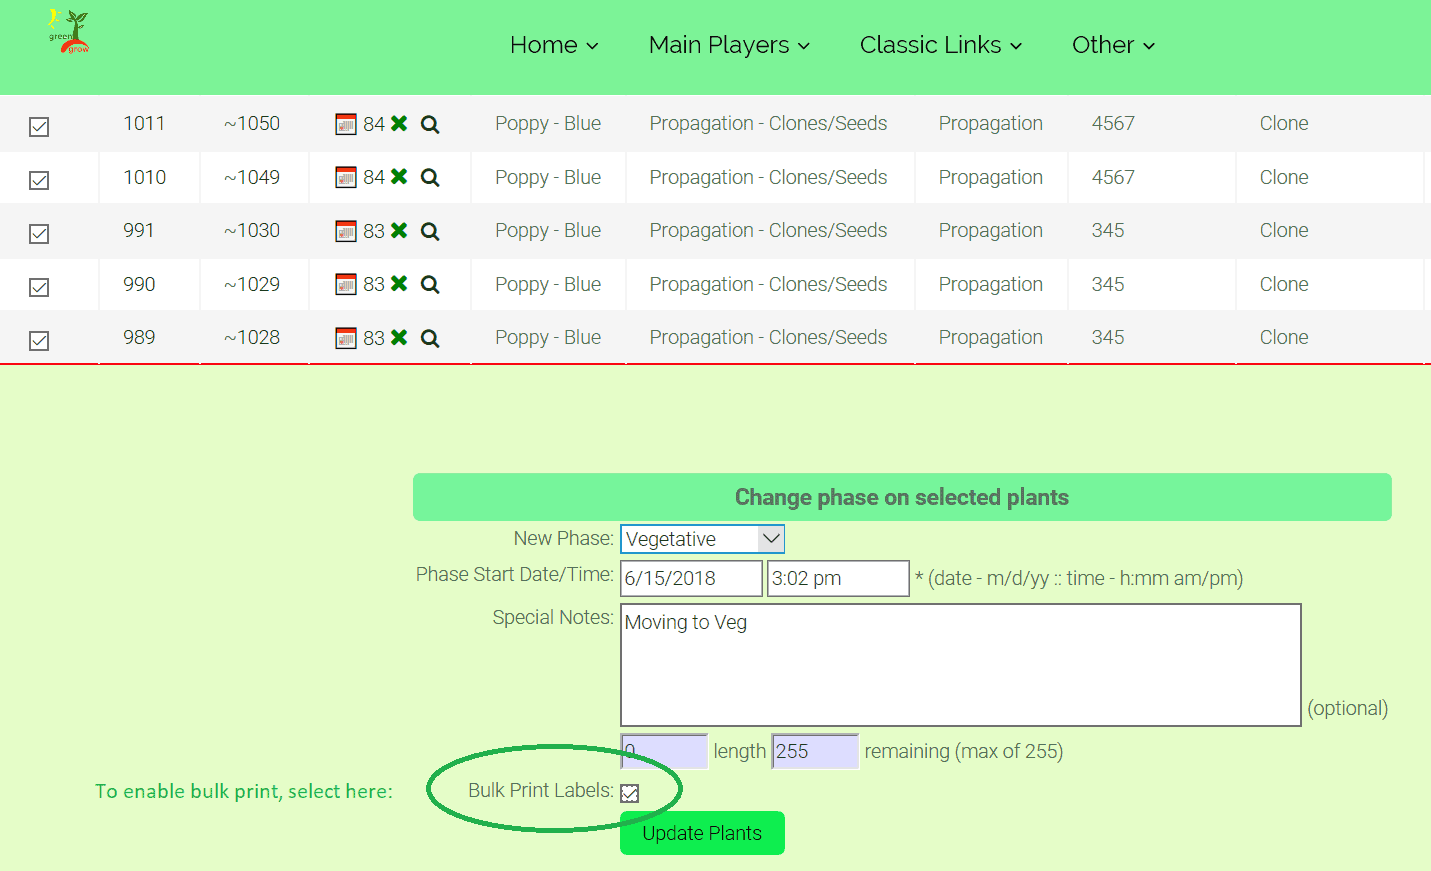
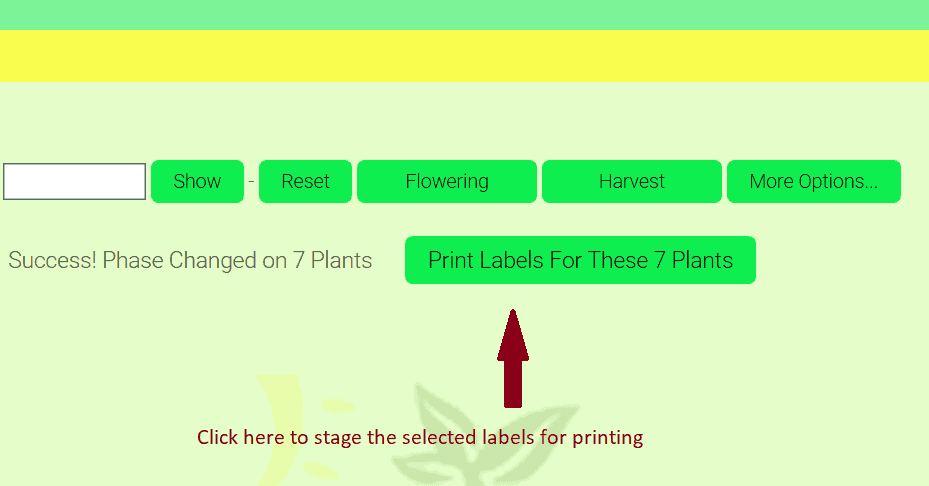
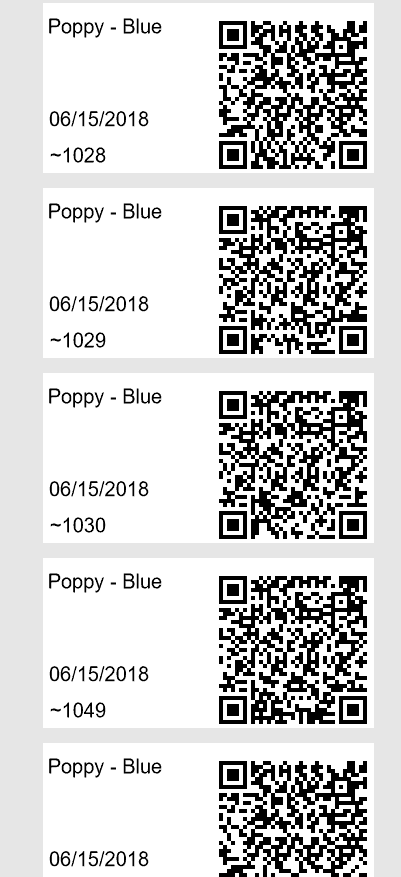
- Your plants will be moved into the new phase. Click the “Print Labels For These Plants” button to open a print page and generate your plant tags. (Note: depending on how many plants you have selected, it may take a few minutes to generate all of the plant tags.)
Move Plants from one location to another within a facility:
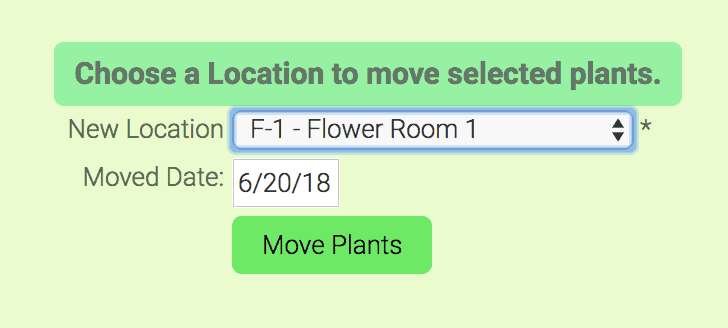
- Click the “Move” link on the group of plants that you want to move from.
- Click the “All” Checkbox if you want to move every plant in the group or click the checkbox of any individual plants that you would like to move.
- Select the location you would like to move the plants to from the pulldown menu at the bottom of the page.
- Enter a date for the move and press the “Move Plants” button.
- Adilas will display a list of the plants that you have moved.
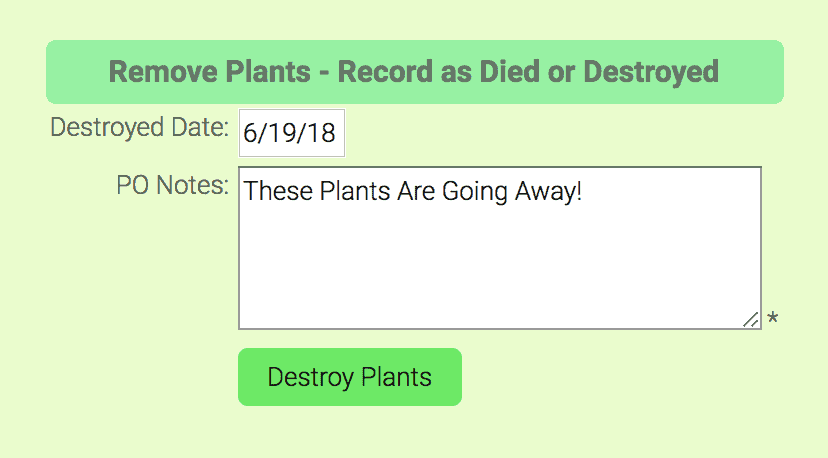
Remove and Destroy Plants:
- Click the “Remove” link on the set of plants you want to adjust.
- Click the “All” button to act on the entire batch or select any of the individual plants you want to act on.
- Select a “Destroyed Date”, add in any notes you like, and click the “Destroy Plants” Button.
- A list of the plants that have been removed will be displayed.
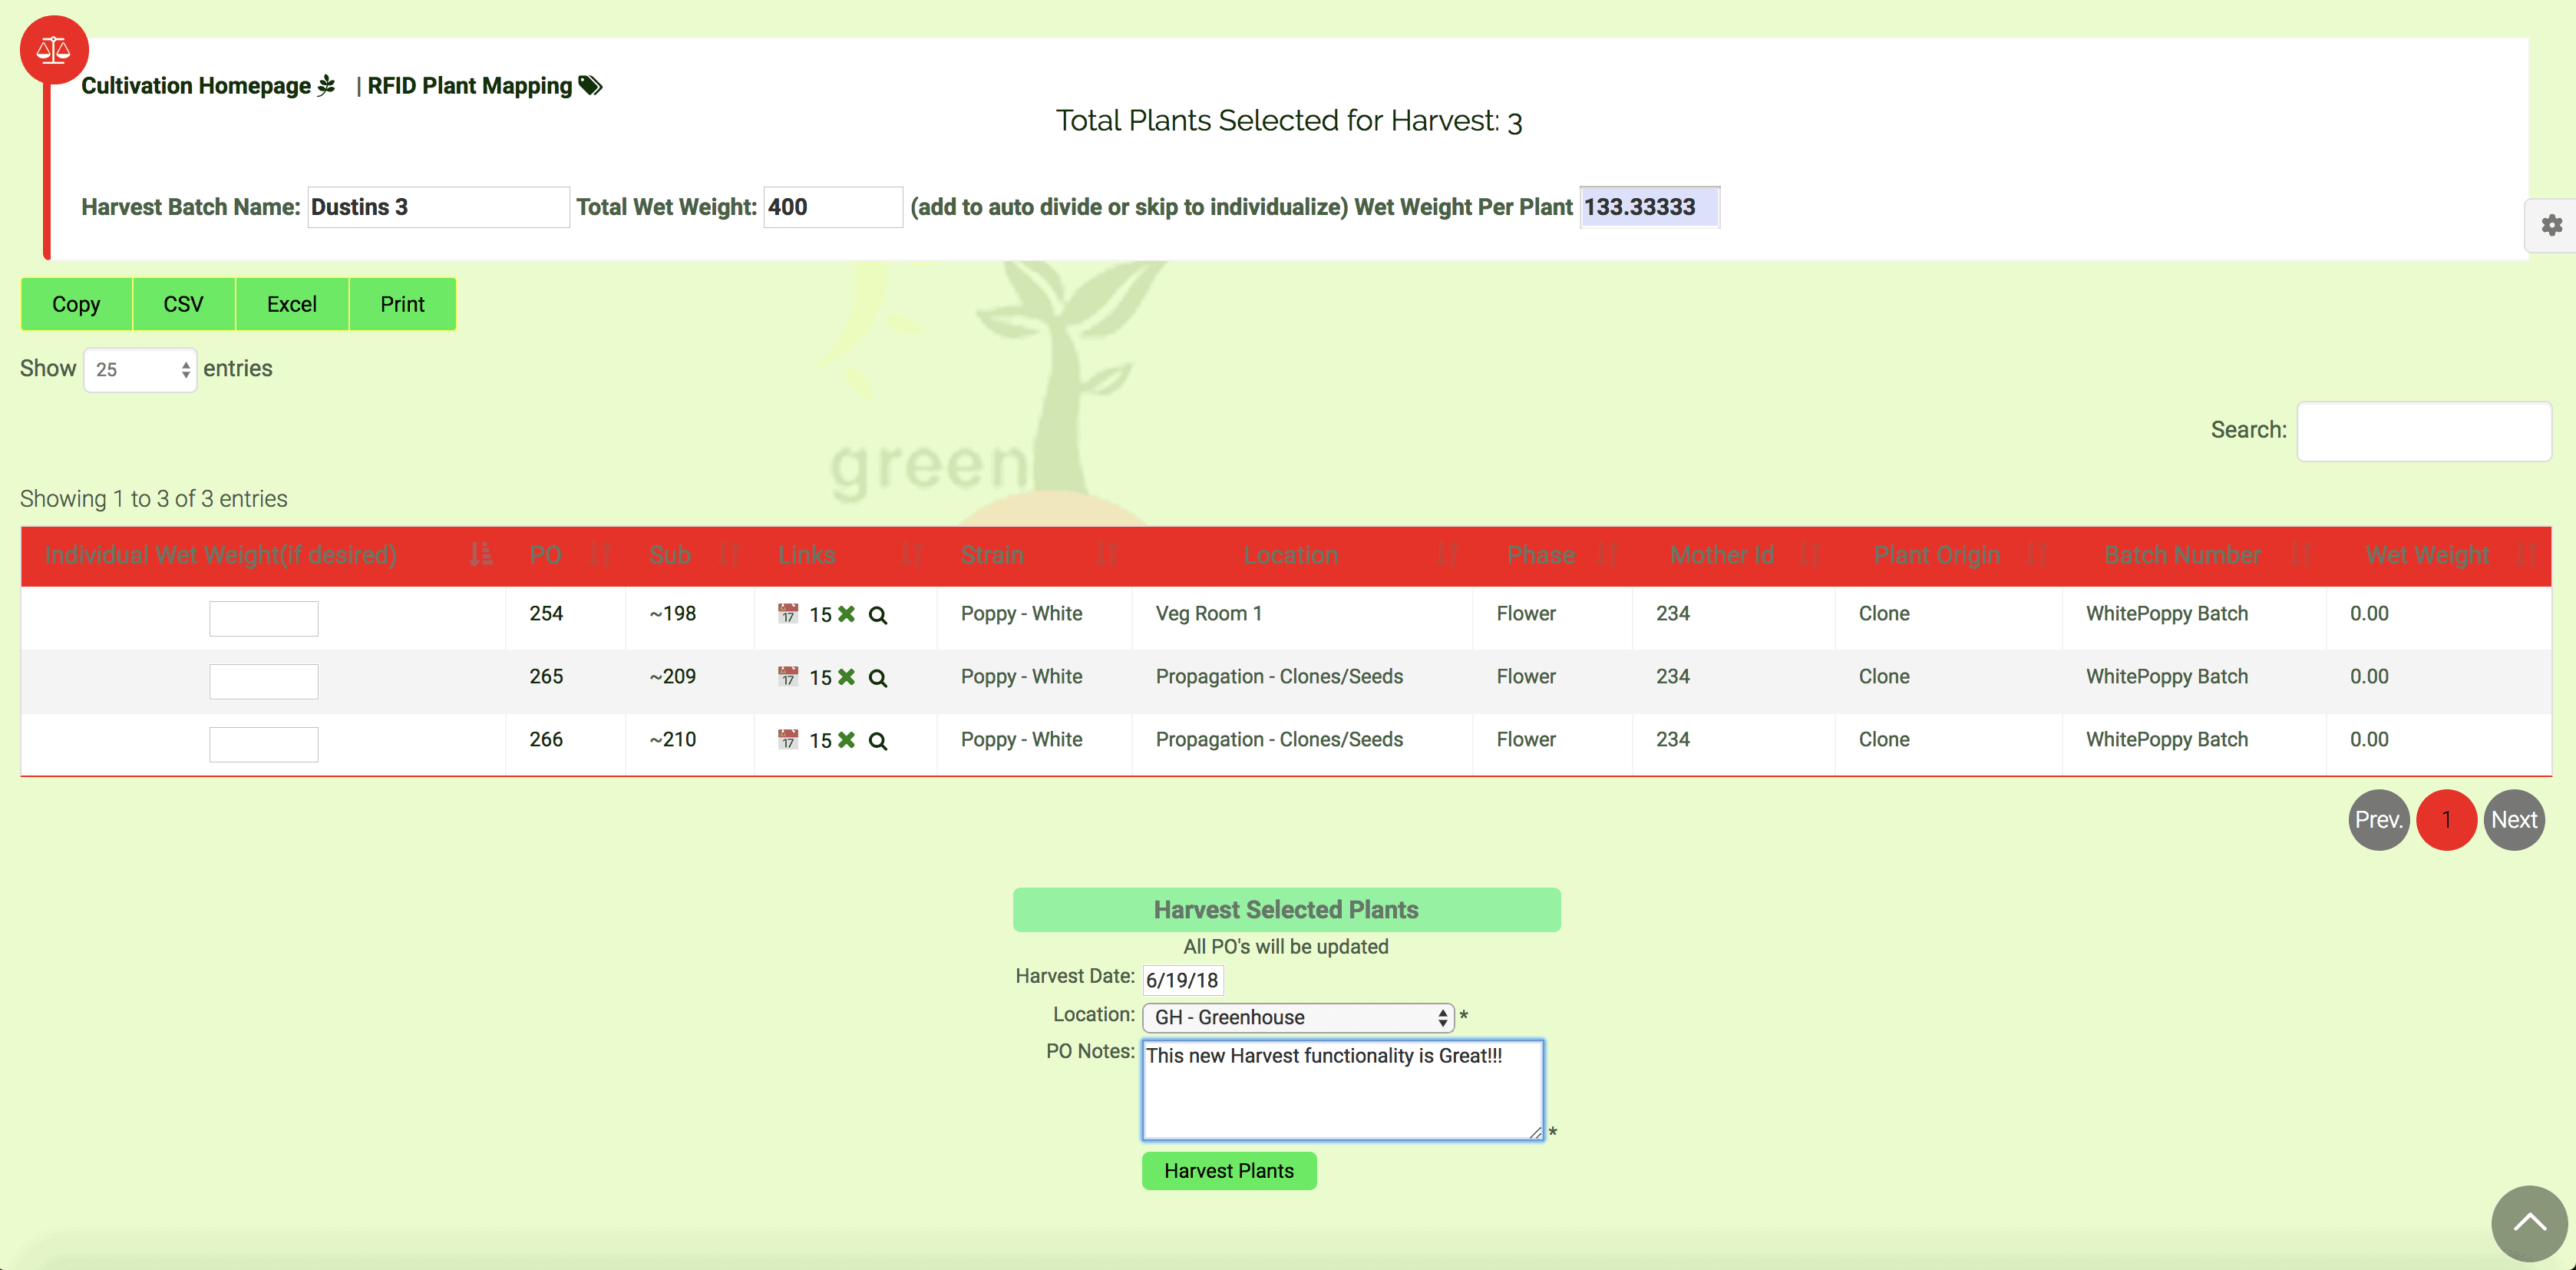
Harvest Plants:
- Click the “Harvest” link on the set of plants you want to harvest from.
- Click the “All” button to act on the entire batch, or select any of the individual plants you want to act on.
- Click the “Click Here For The Next Step” button at the bottom of the page.
- Assign a “Harvest Batch Name” in the corresponding field.
- Add in a “Total Wet Weight” in the corresponding field or give each plant its own weight in the “Individual Wet Weight” fields.
- Assign a Harvest Date, pick a location from the dropdown menu, add in some PO Notes, and click the “Harvest Plants” button.
- Your plants are now Harvested and the status is set to “In Progress”. This ties the action to an element of time that will now track how long the plants are in each state.
- Once the plants have physically been harvested you may change the “Action Status”, and the system will note how long the process took.