
Please refer to the news and update “New Mini Display for Shopping Cart Activity Now Available” if you are interesting in using an external monitor. Once you have that set up, you can take advantage of these new settings.
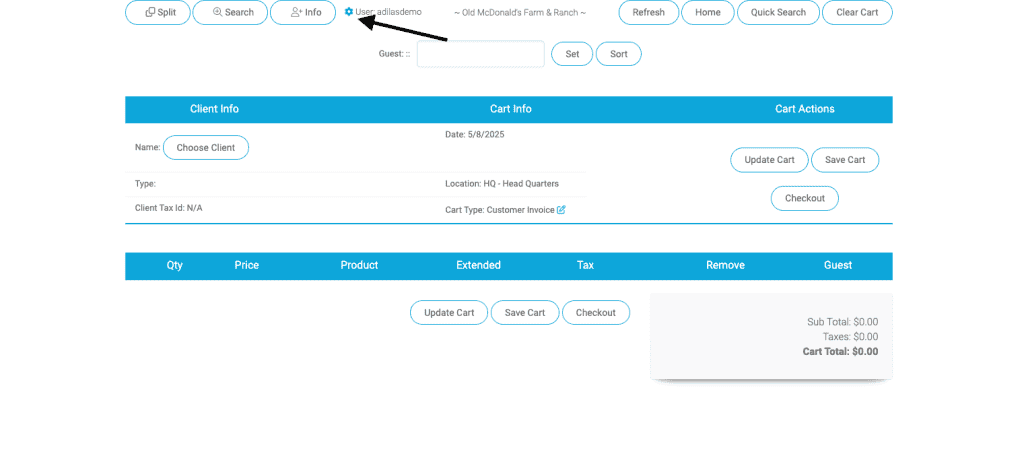
From the mini scan shopping cart, access the settings gear.
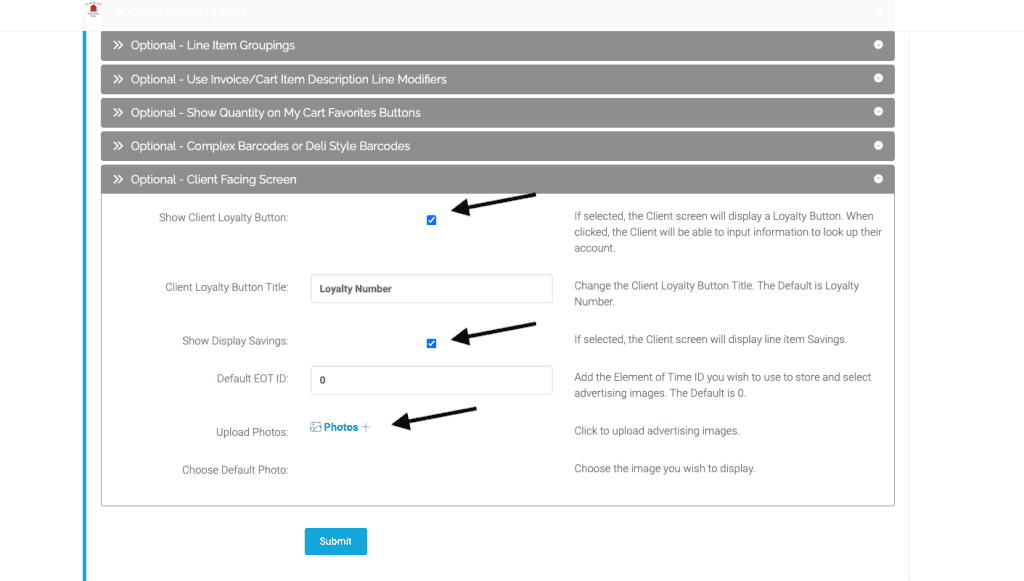
Click on the link for client facing screen. You may add images to the display that can be changed as you wish, such as seasonal images that are welcoming to your customers. First create an EOT to store your images. If you need help doing this, please reach out to customer support at 720-740-3046.
Add the EOT number in the field and click submit.
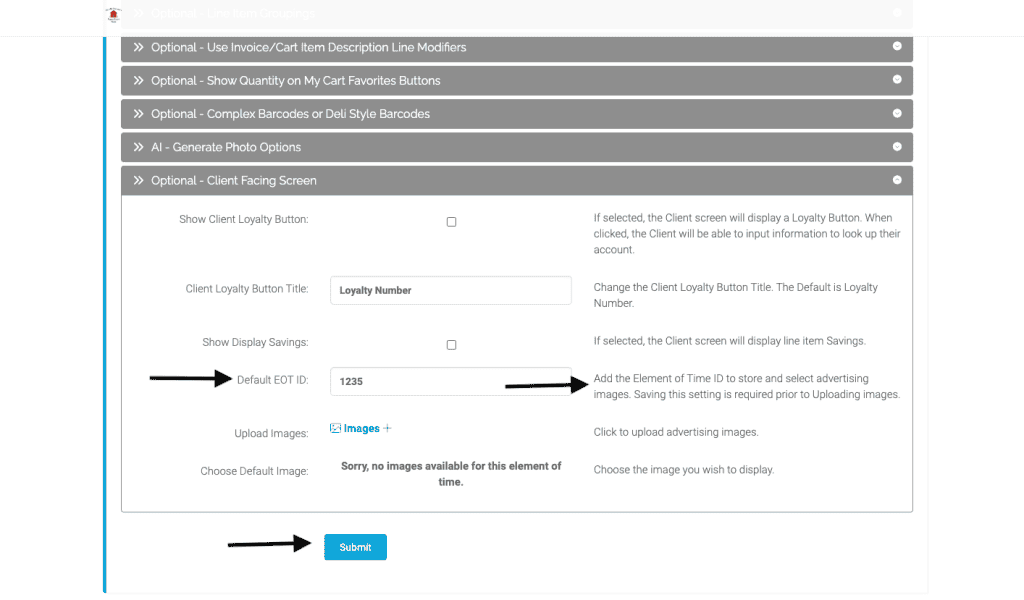
Now return to the settings to upload an image. Click on images+. Choose file from your desktop.
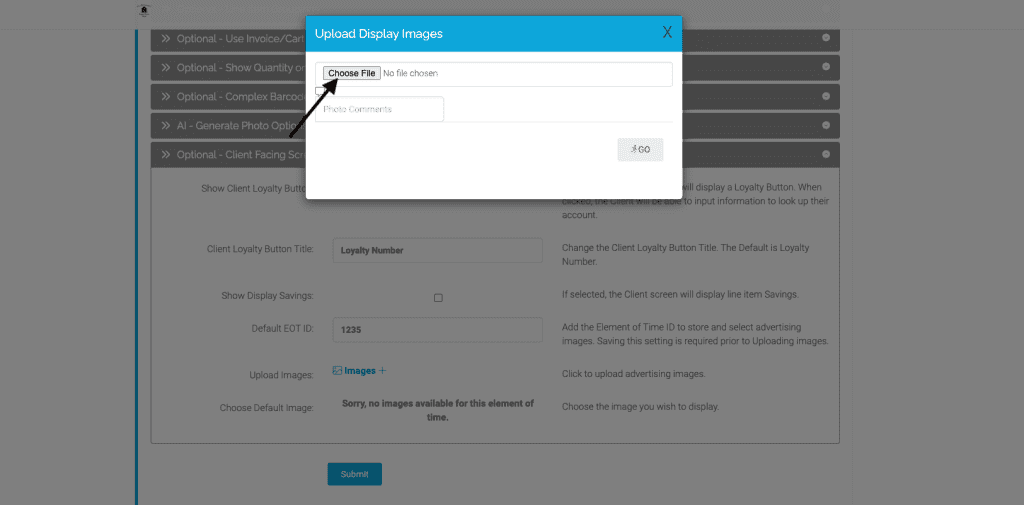
The image will be stored on the EOT you created. It can hold up to 100 images.
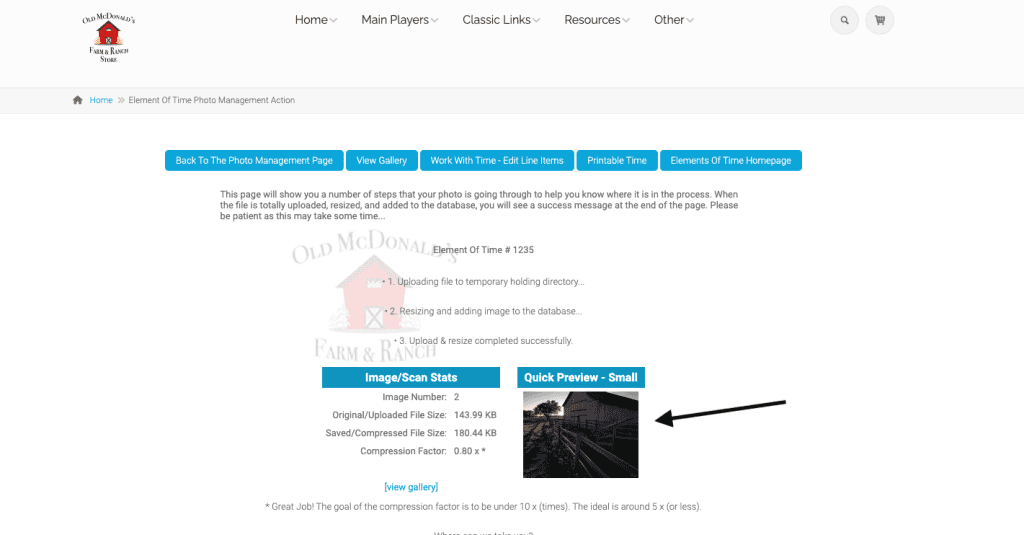
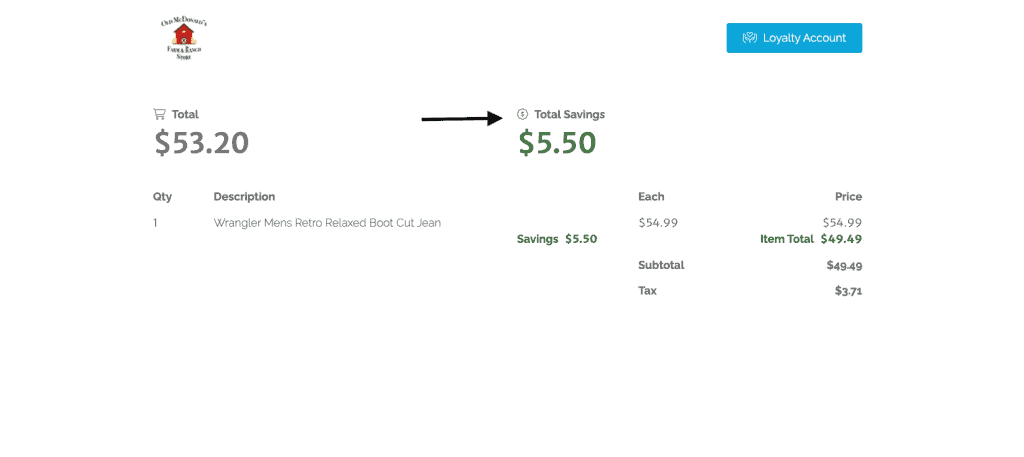
Now when you go to your external monitor you will see your default image.

Once you start a shopping cart, you will see the items as they are added.
You can set the setting to view discounts in the cart by checking the box for “Show Display Savings” on the settings page.
As you can see, an item was added to the cart, and the savings are displayed.
Please note: If you select the box for “Show Client Loyalty Button” it will appear on the external display and you can rename it, but it is not yet able to look up client loyalty points (future development required).
As always, please feel free to reach out to Technical Support at 720-740-3046 or email support@adilas.biz if you have any questions, concerns, or suggestions.