First we will cover unwanted plants and then move on to destroying actual plants that have died.
Let’s say you just created a new batch of 50 plants and entered the wrong start date. Fear not! While you can never completely delete data in adilas (which is why we rank so high in POS compliance and transparency), you can easily remove those plants and start a new batch with the correct data.
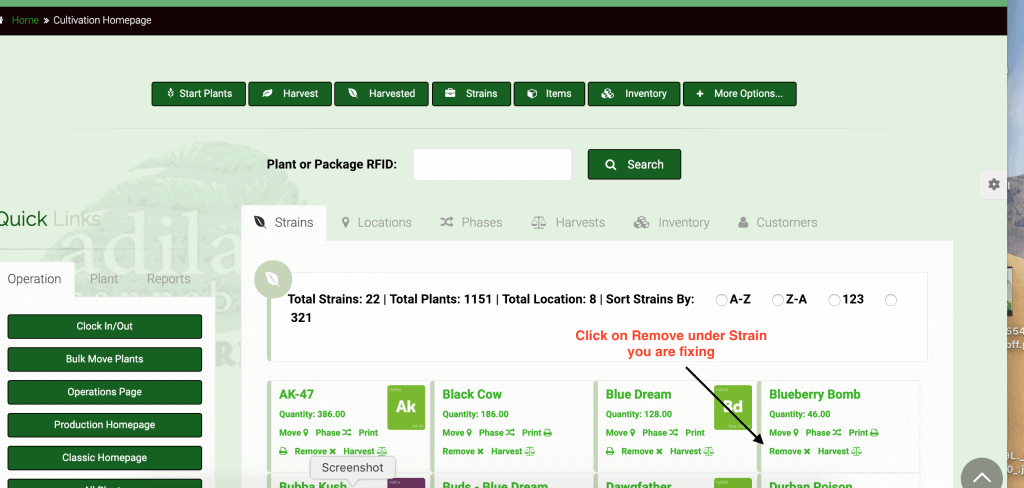
Simply go to the Cultivation Homepage and click on the word “Remove” under the strain that you are fixing.

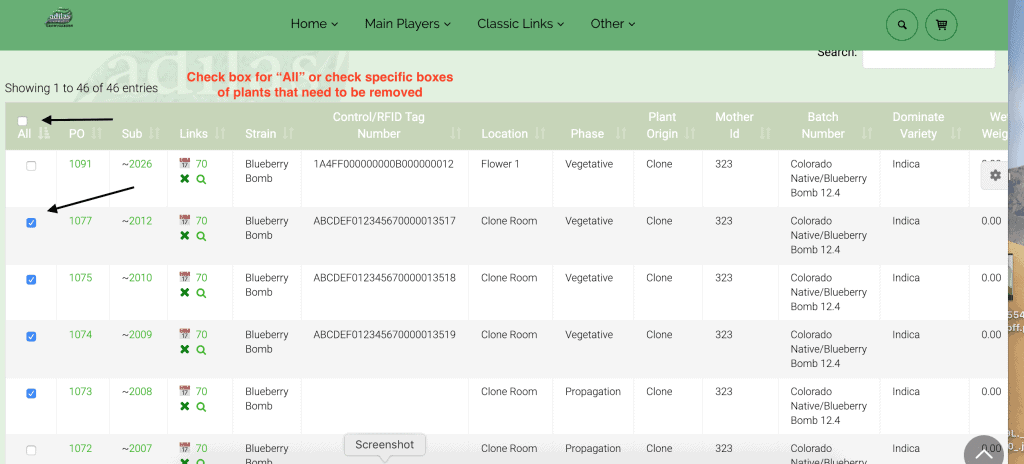
This will take you to a page where you can access all of your plants of that strain. Use the Search field at the top right to limit the list if needed, or if you want to see all plants you can use the number drop down list on the top left to increase the entries shown.
Check the box for all or select the plants that need to be removed. Remember, these are plants that were entered incorrectly, NOT plants that died. While the protocol is mostly the same, there is one big difference in data entry that we will discuss at the end.

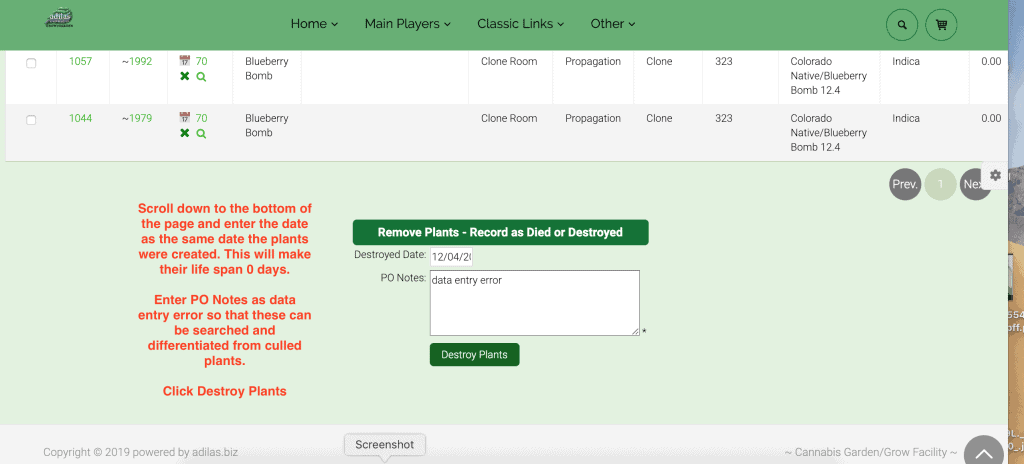
After you have selected all plants needing to be removed, scroll down to the bottom of the screen. Add the same date as the date the plants were started and be sure to add to the notes “Data entry error” to let you know that these plants were errors and not live and destroyed.
**You may add other notes in the PO Notes field based on your company’s operating procedures.

Now you can start over and create a new batch of 50 plants with the correct date.
How to Destroy Dead Plants
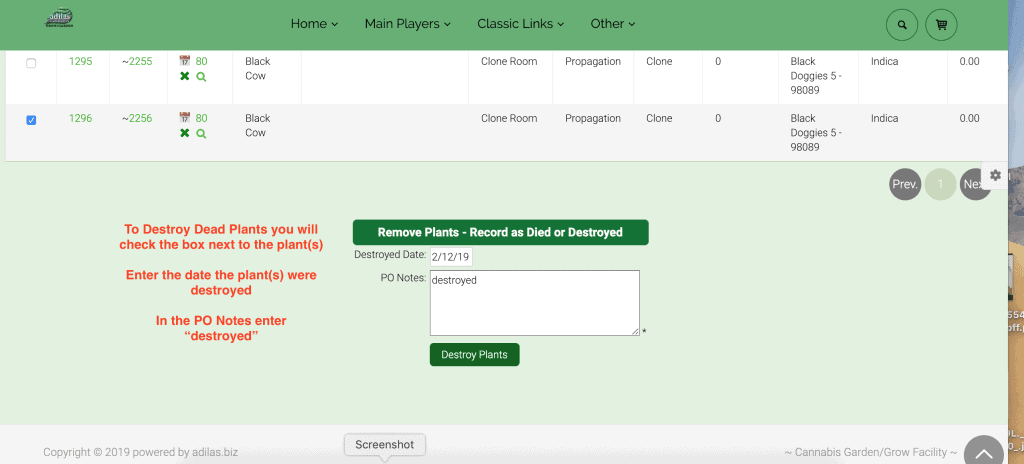
If you need to cull dead plants, you will follow all of the same steps as above. The only difference will be at the end, where you will enter the date as the date they were destroyed. You will also enter “destroyed” in the PO Notes.
**You may add other notes in the PO Notes field based on your company’s operating procedures.

As always, please feel free to reach out to your consultant, technical support at 719-966-7102, or email support@adilas.biz if you have any questions, concerns, or suggestions.


