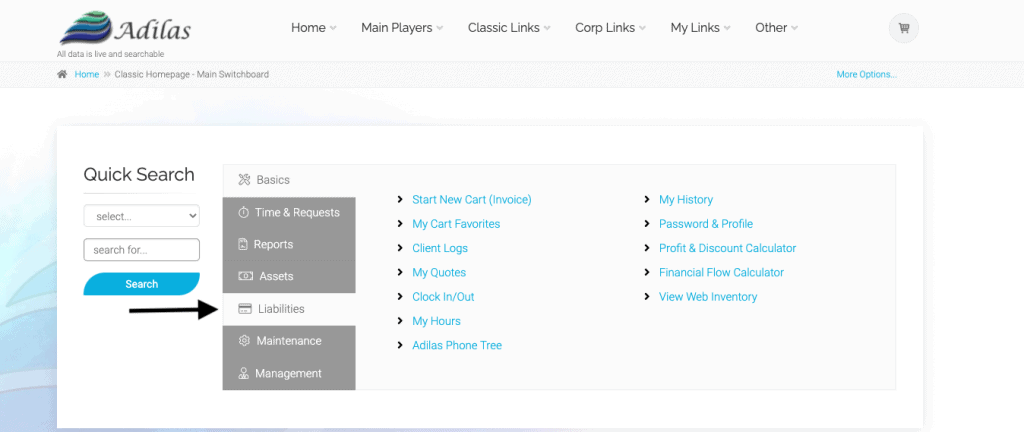
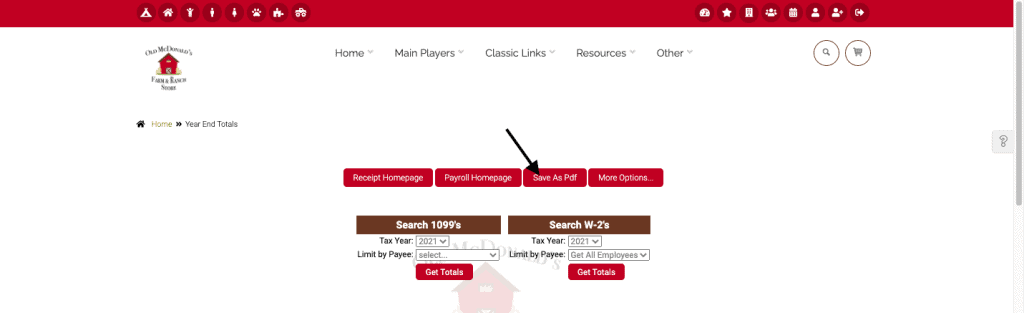
We hope our clients find the new year-end totals page more helpful when viewing their W-2 and 1099 reports. To access the page from the classic homepage, click on the Liabilities tab.
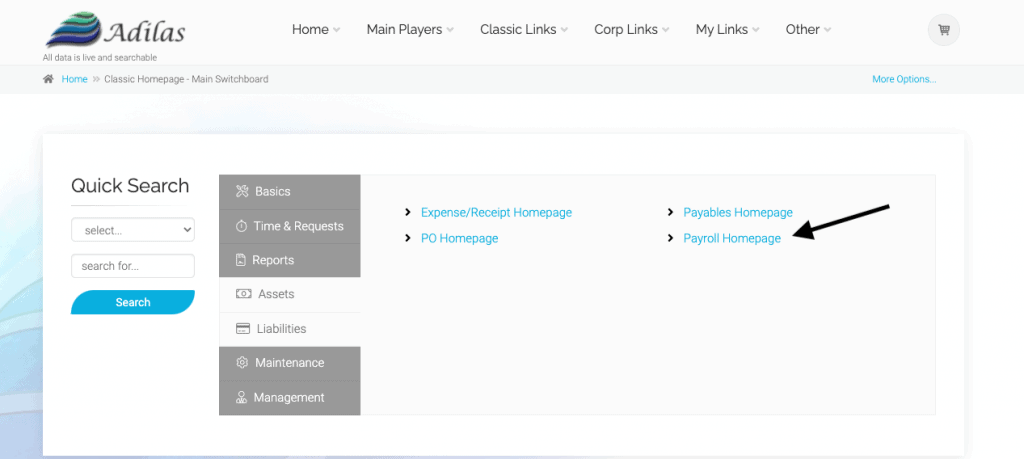
Then click on Payroll Homepage.
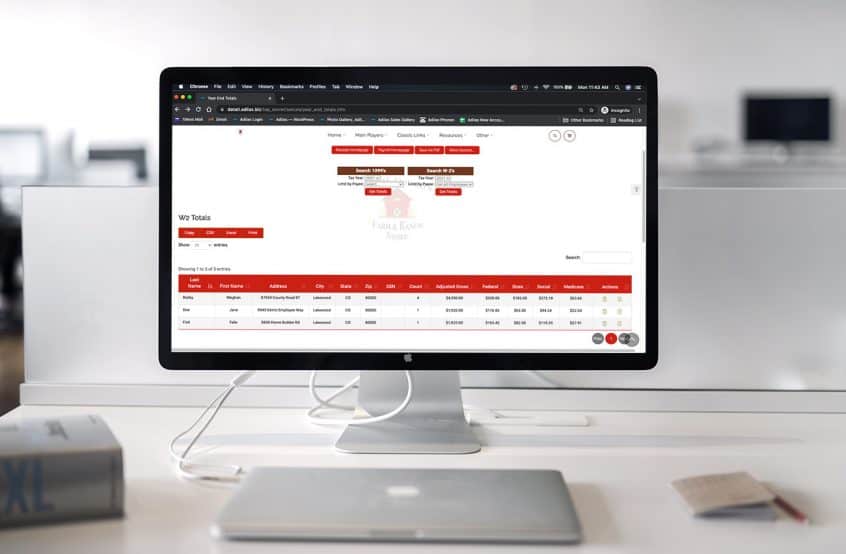
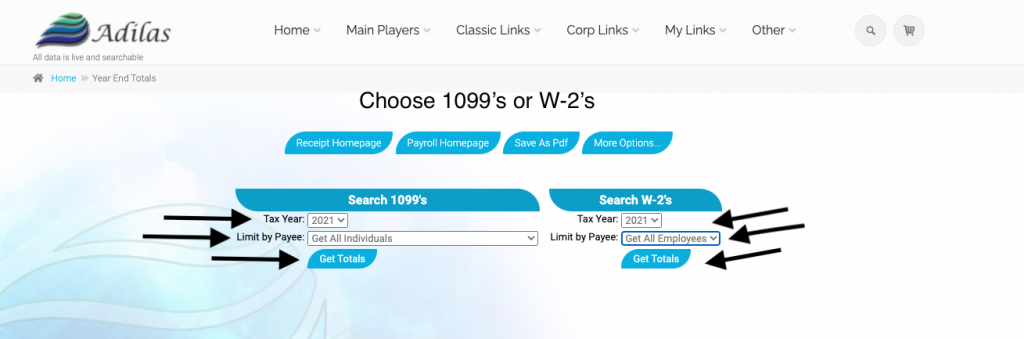
From here you will see a link at the top called “Year End Totals.” Click on this button.

The list on the left titled “Search 1099’s” will help you view the data for all payees that need a 1099 form. (Note: If you do not see a payee in the list, you may need to go to the Vendor Homepage and search for the Payee, then select “edit” and confirm that the box for “Flag for 1099” is checked.)
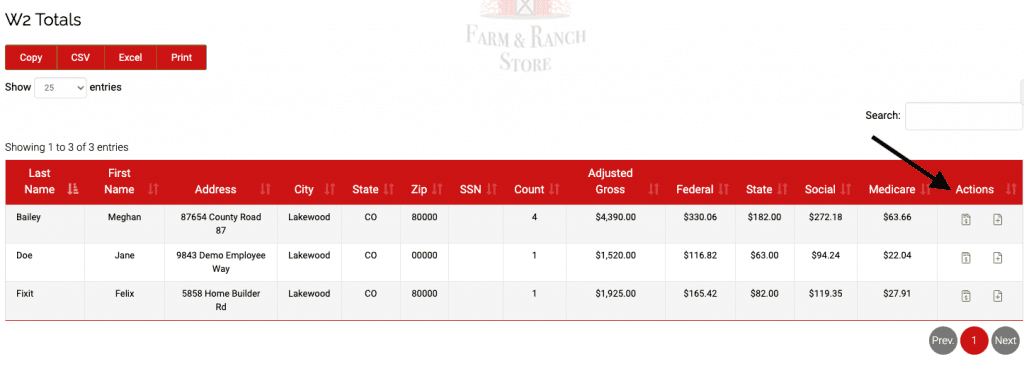
On the right side, “Search W-2’s”, you can generate a list of all employees who will receive a W-2.
You can now export this list easily to CSV or Excel. You can also sort the list with the arrows at the top of each column. The “Search” field on the right is helpful when you want to isolate one piece of information, such as one payee in particular. Start by typing their name in the search field and all other information that is not the same will be hidden.
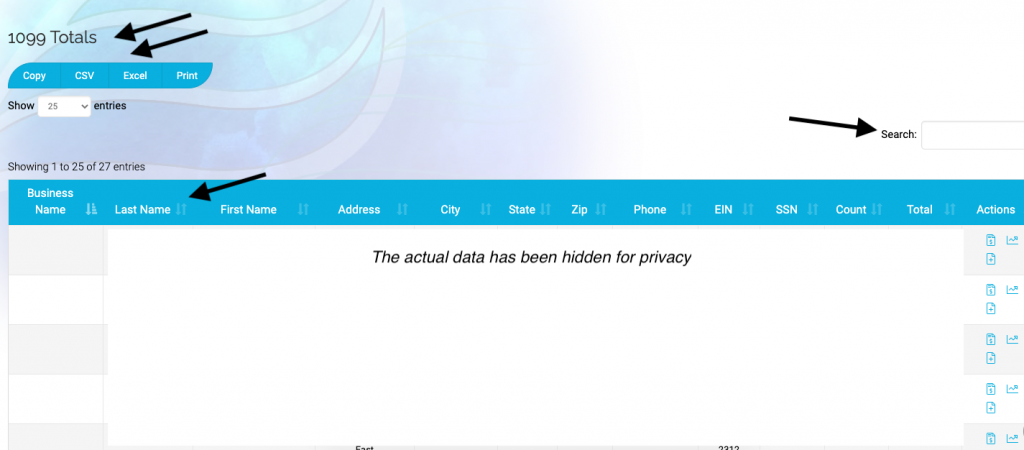
When using the 1099 table, there are three icons under the far right column titled “Actions” (see above screenshot).
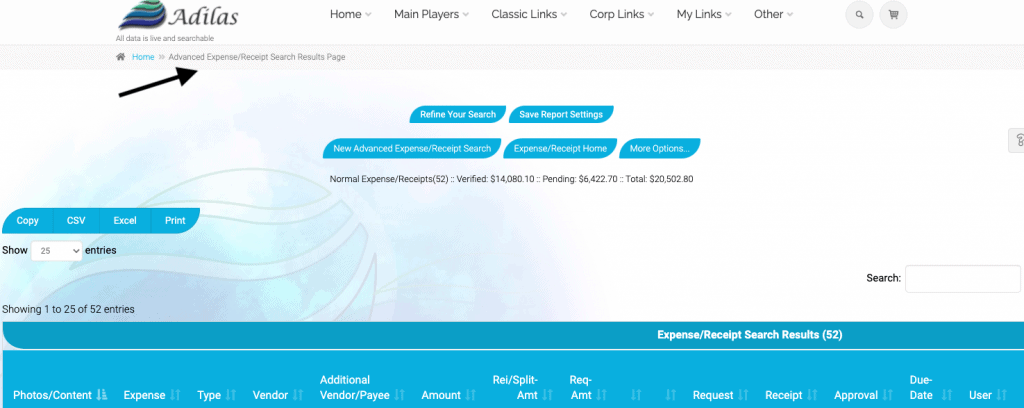
The first icon that looks like a piece of paper with a dollar sign on it, will allow you to ‘View Results’ for that payee. It takes you to the Advanced Expense Receipt search where you will see all expenses associated with that payee.
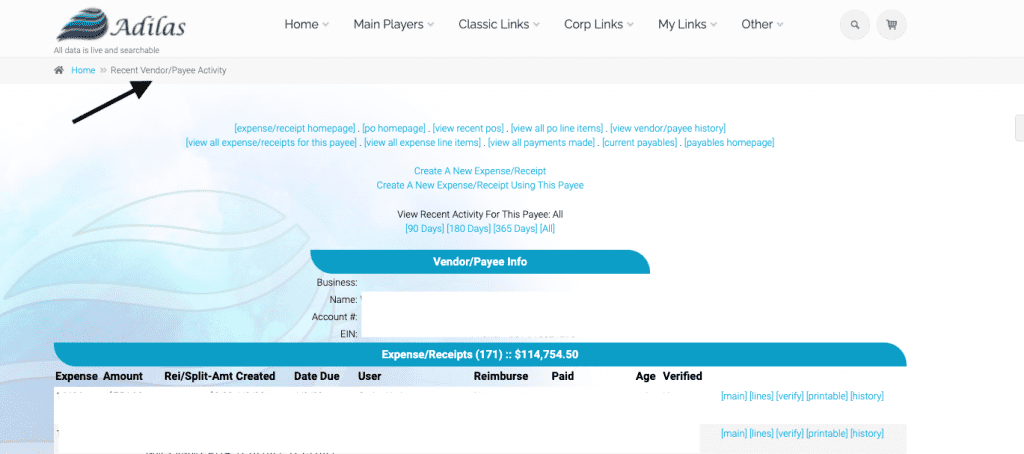
The second icon that looks like a graph is “View Activity”. This takes you to the Recent Vendor/Payee Activity page, which is a different view of the expense receipts that you had created/paid to the payee.
Finally, the third icon, a paper with a plus symbol, is to “Create 1099”. This will take you to the page where you can populate the 1099 form for the Payee.
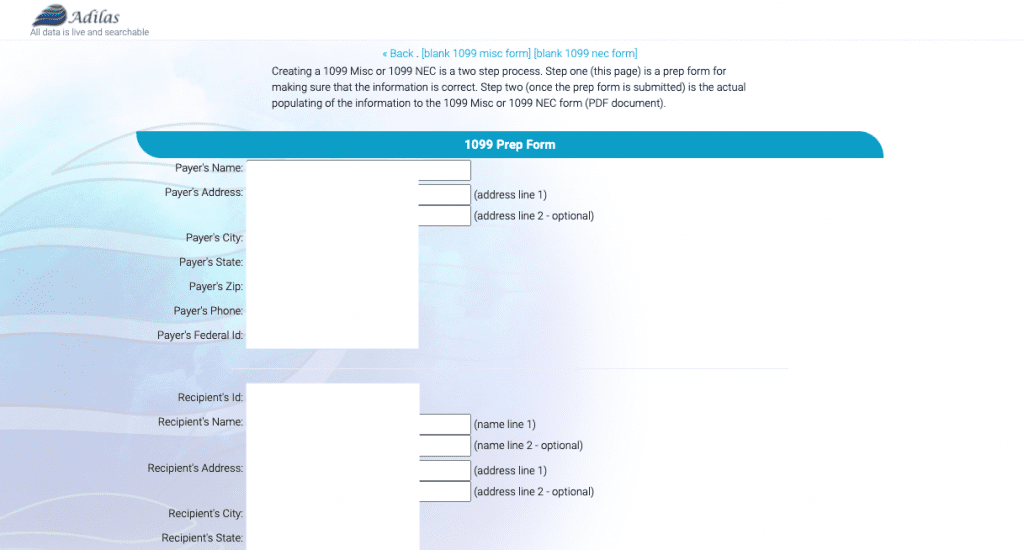
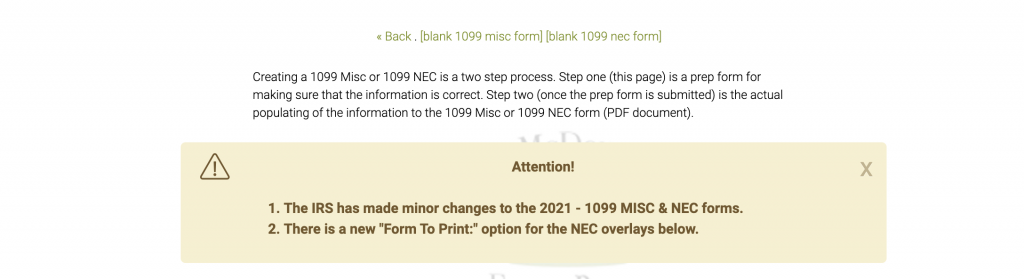
PLEASE NOTE: The IRS has made changes to the 1099 MISC & NEC forms for 2021 and you may see this message displayed when creating the form.
When using the W-2 table, there are two “Action” icons.
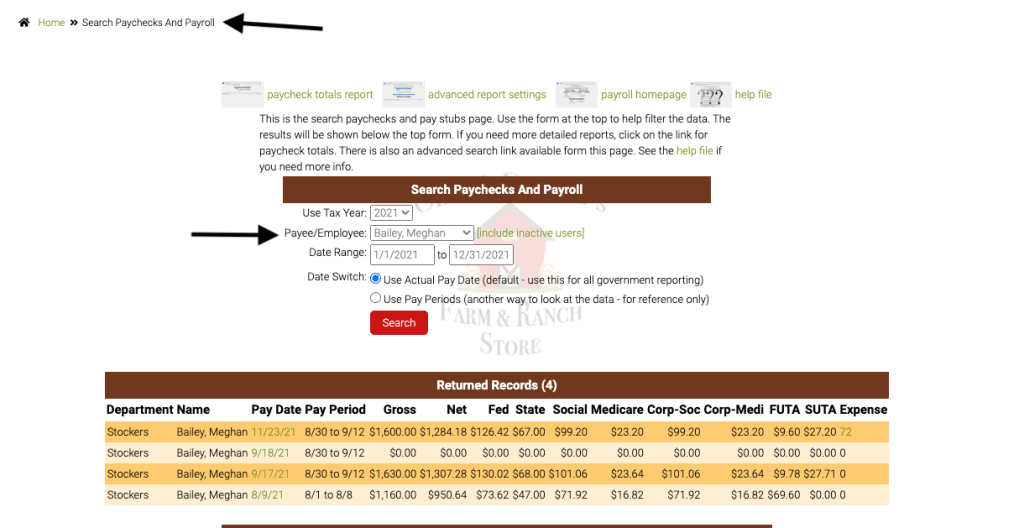
The first icon for “View Results” (the paper with the dollar symbol) takes you to the Search Paychecks and Payroll page, so you can confirm all the pay dates are in adilas, with the proper withholding and expense receipts that have been created.
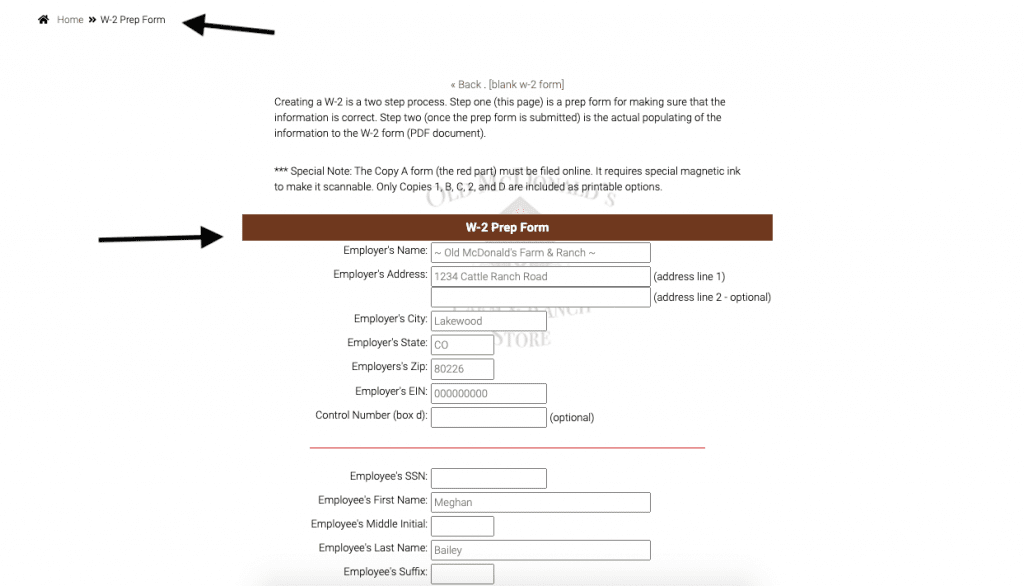
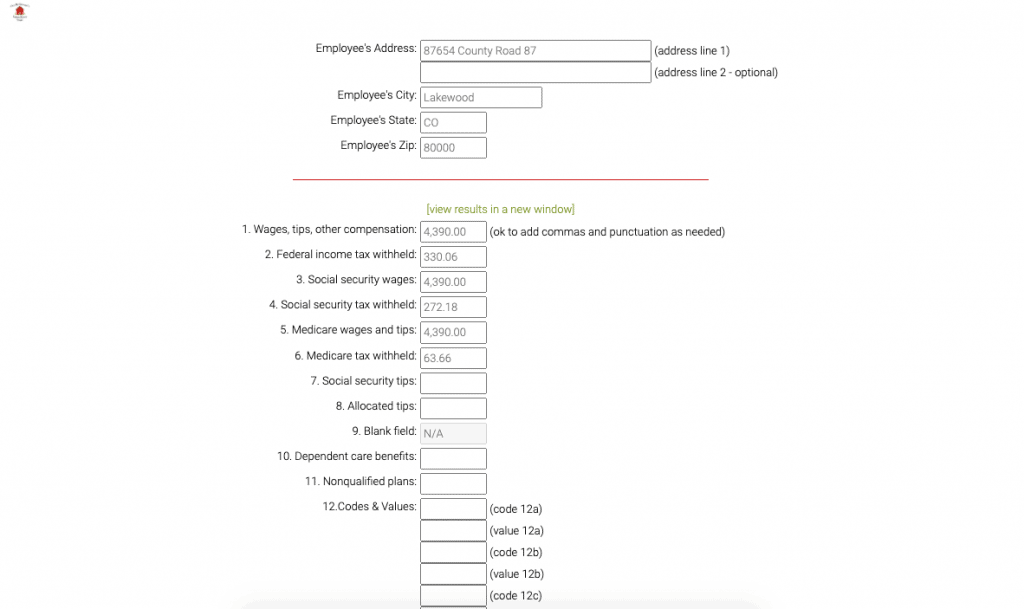
The second icon for “Create W-2” (paper with the plus symbol) takes you to the W-2 prep page.
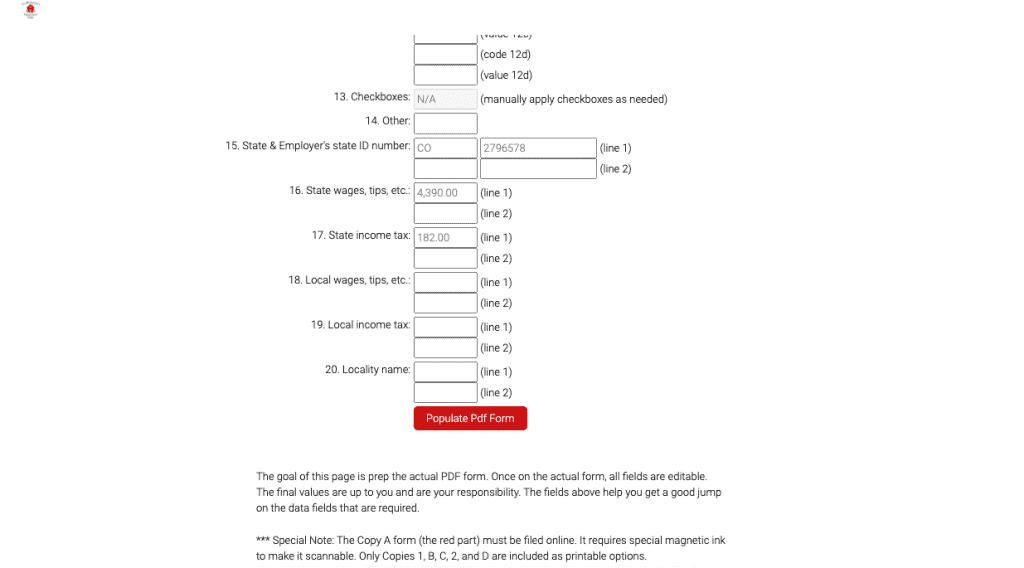
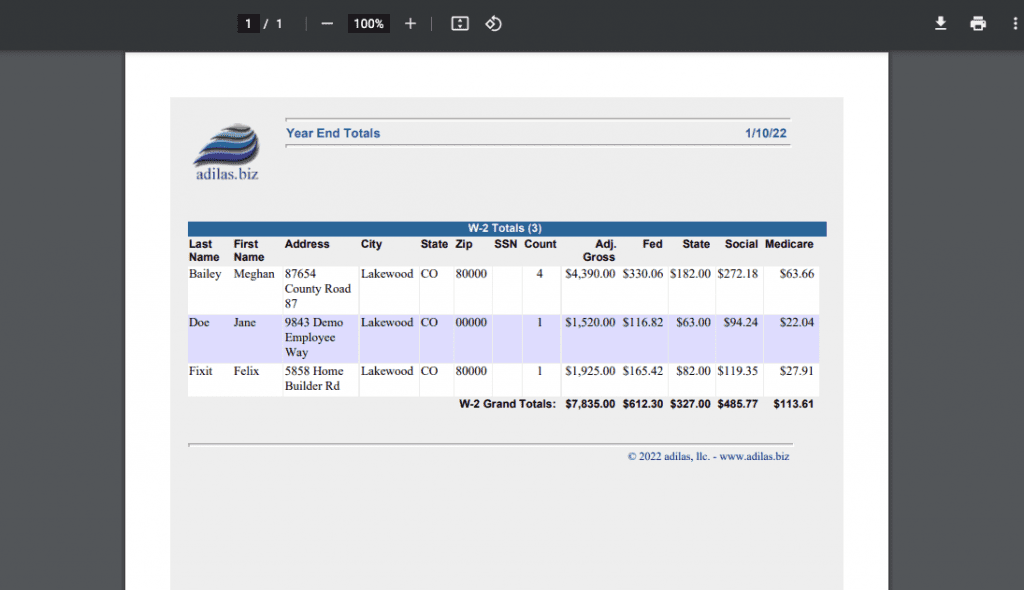
Another new feature on the Year End Totals page is the ‘Save as PDF’ feature, which can be found as a button at the top of the page. This allows you the ability to save these year-end totals for 1099s and W-2’s as a PDF once the data has been pulled.
You must first choose either the 1099 or W-2 and ‘get totals’, and then you can click on the ‘Save as PDF’ link and it will create one from the data below.
As always, please feel free to reach out to your consultant, technical support at 720-740-3076, or email support@adilas.biz if you have any questions, concerns, or suggestions.
Order Next Year Tax Forms (W2, 1099 MISC/NEC & 1096 etc.) This needs to be done as early in the year as possible as they can get back-ordered quickly.
1. Go to the IRS website: https://www.irs.gov
2. Click the Forms & Instructions link in the top navbar.
3. In the left menu click “Order Forms and Pubs”.
4. Click on “Online Ordering for Information Returns and Employer Returns”.
5. Locate the “Tax Year 202? Quantity” column.
6. Order the applicable forms for your corporation
IE: Form W-2, Instructions W2, Form W3, Instructions W3, Form 1096, Instructions 1096, Form 1099 MISC, Form 1099 NEC, Instructions 1099-MISC & NEC.